Discover the world of fermentation with these 4 easy projects: honey garlic, daikon kimchi, milk kefir, and sauerkraut. Learn how to ferment these foods at home and enjoy the health benefits and delicious flavors they offer.
Table of Contents
Embarking on your fermentation journey can feel daunting, but it’s easier than you think! This guide provides simple, step-by-step instructions for four beginner-friendly ferments: honey garlic, daikon kimchi, milk kefir, and sauerkraut. These projects offer a delicious introduction to the fascinating world of fermentation and its incredible health benefits.
Fermented Honey Garlic: A Flavor Explosion
- Combine peeled garlic cloves and raw honey in a jar.
- Turn the jar daily for the first few days to coat the garlic.
- Watch for bubbles, a sign of fermentation.
- After a few weeks, strain the honey and enjoy! Try it in salad dressings, stir-fries, or sauces. Unlock Flavor: A Beginner’s Guide to Fermenting Garlic offers more in-depth techniques.
This simple project yields an intensely flavorful infused honey that elevates any dish. The natural bacteria in raw honey helps kickstart the fermentation process.
Daikon Kimchi: A Simpler Take on a Classic
- Chop daikon radish into bite-sized pieces.
- Blend pear, green onion, ginger, garlic, gochugaru, and salt into a paste.
- Combine the radish and paste, packing them into a jar.
- Allow the mixture to ferment for several days in a cool, dark place, ensuring the radish is submerged beneath the brine.
- Enjoy your kimchi as a vibrant condiment. For other fermented vegetable options, check out 3 Easy Ways to Ferment Vegetables at Home.
Daikon kimchi offers a less intensive introduction to kimchi making than traditional napa cabbage kimchi, while still delivering the signature spicy, fermented flavor. Remember to keep everything submerged for successful lacto-fermentation. A Beginner’s Guide to Fermenting Vegetables at Home provides a great overview of vegetable fermentation.
Milk Kefir: A Probiotic Powerhouse
- Strain your kefir grains from their storage milk. Awaken Your Kefir Grains guides you through this initial step if your grains are new.
- Combine the grains with fresh milk (not ultra-pasteurized) in a jar.
- Let the mixture ferment at room temperature for 24 hours.
- Strain the grains and allow the kefir to ferment for another day or two for a thicker, tangier result.
- Sweeten to taste and enjoy! It’s fantastic in smoothies. Looking for inspiration? 5 Delicious Kefir Smoothie Recipes are a great place to start. Explore more about kefir in The Ultimate Guide to Making Delicious Milk Kefir. You might also be interested in Milk Kefir vs. Water Kefir or even Brew Your Own Bubbly: A Beginner’s Guide to Water Kefir.
Milk kefir is a simple way to introduce beneficial probiotics into your diet. The two-stage fermentation process creates a tangy, slightly effervescent drink packed with gut-friendly bacteria.
Sauerkraut: A Fermented Staple
- Slice cabbage and combine it with shredded carrots and grated ginger.
- Add salt (2.5% of the vegetable weight) and massage to release water.
- Pack the mixture into a jar, ensuring all vegetables are submerged under the brine.
- Ferment in a cool, dark place for 2-3 weeks (or longer for a more intense flavor). Sauerkraut for Beginners offers a detailed guide.
- Explore more on fermenting vegetables by visiting 5 Mistakes to Avoid When Fermenting Vegetables and Unlock Gut Health: A Beginner’s Guide to Fermenting Carrots.
Sauerkraut, a fermented cabbage dish, is a classic for a reason. It’s incredibly versatile and packed with beneficial probiotics. The salt helps draw out the cabbage’s juices, creating the brine necessary for fermentation. Don’t forget to check out Kombucha 1st & 2nd Fermentation: A Complete Guide, and Brew Your Own Booch: A Beginner-15 Guide to Homemade Kombucha for other fascinating fermentation adventures.
With these four easy projects, you can confidently begin your fermentation journey. Enjoy the delicious and healthy rewards of fermented foods! Remember, fermentation is a process; don’t be afraid to experiment and enjoy the journey.
Fermentation: A Simple Step-by-Step Guide
- What you’ll learn: The basics of lacto-fermentation, a safe and easy method for preserving and enhancing the flavor of vegetables.
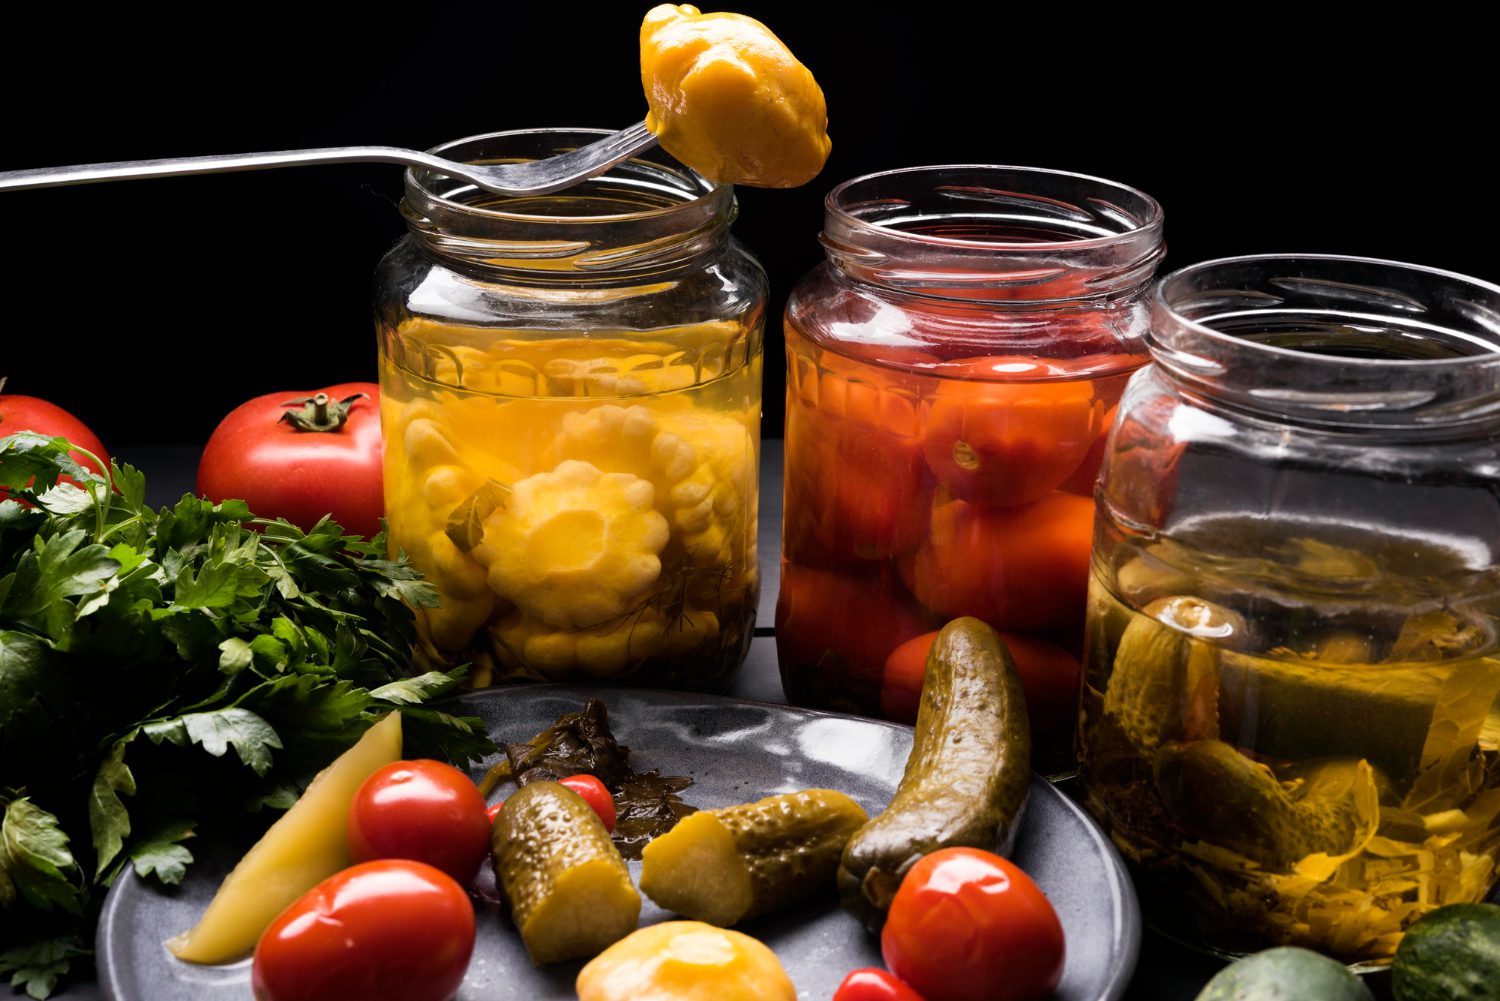
- Project: Fermented Pickles (Cucumber or other vegetables)
- Step 1: Choose Your Vegetables: Select fresh, firm vegetables. Cucumbers are a classic choice, but you can also ferment carrots, cabbage, green beans, and more. Organic is recommended as pesticides can interfere with fermentation.
- Step 2: Prepare Your Vegetables: Wash your vegetables thoroughly. For cucumbers, you can leave them whole, slice them into spears, or cut them into rounds. For other vegetables, chop them into bite-sized pieces or shred them.
- Step 3: Create Your Brine: The brine is crucial for successful fermentation. A general rule is to use a 2% brine. This means 2 grams of salt for every 100 grams of water. Use non-iodized salt, like kosher salt or sea salt. Iodized salt can inhibit fermentation. Measure your water and salt accurately using a kitchen scale for the best results. Dissolve the salt completely in the water.
- Step 4: Pack Your Jar: Pack the prepared vegetables tightly into a clean glass jar, leaving about an inch of headspace at the top. Add any desired flavorings (garlic, dill, spices). Ensure the vegetables are completely submerged in the brine. You can use a fermentation weight to keep them below the surface, preventing mold growth. (A small, clean zip-top bag filled with water works well.)
- Step 5: Seal and Ferment: Seal the jar with a lid that allows gases to escape, like an airlock lid or a loosely tightened regular lid. Place the jar in a cool, dark place (ideally around 65-75°F/18-24°C). Fermentation time varies depending on the vegetable and the temperature, but it typically takes anywhere from a few days to a few weeks. Taste test periodically. The longer you ferment, the tangier the flavor becomes.
- Step 6: Monitor and Burp (if needed): If using a regular lid, “burp” the jar daily by slightly loosening the lid to release built-up gas. This prevents pressure buildup and potential explosions. If using an airlock, this isn’t necessary. Watch for bubbles – this is a sign of healthy fermentation.
- Step 7: Refrigerate: Once the vegetables reach your desired level of sourness, transfer the jar to the refrigerator. This slows down the fermentation process and helps preserve the pickles. Your fermented vegetables are now ready to enjoy!
Common Questions About Fermentation
Q: What is fermentation?
Fermentation is a natural process where microorganisms like bacteria and yeast convert sugars into other substances, like acids or alcohol. This naturally preserves food and can create unique flavors.
Q: Is fermented food good for you?
Many fermented foods are naturally rich in probiotics, which are beneficial bacteria for your gut. These can aid digestion and boost your immune system.
Q: What are some examples of fermented foods I can easily find?
Yogurt, sauerkraut, kimchi, and pickles are all common examples of naturally fermented foods. You can find these in most grocery stores.
Q: How does fermentation naturally preserve food?
During fermentation, naturally produced acids or alcohol create an environment that prevents the growth of harmful bacteria that spoil food. This allows the food to last longer.
Q: Is all fermentation good?
While most fermentation is beneficial, some types of fermentation, like the kind that produces toxins, are not good. It’s important to ensure the fermentation process has happened naturally and correctly for safe consumption.