
I still remember my first attempt at fermenting at home. It was a jar of what I hoped would become crunchy, tangy sauerkraut. I had a cabbage, some salt, and a healthy dose of anxiety. Was I creating a superfood or a science experiment gone wrong? Every bubble and hiss from the jar felt like a mystery. That initial mix of fear and fascination is something I see in almost every student in my fermentation workshops.
Table of Contents
The good news? My sauerkraut was a resounding success, and yours can be too. The world of home fermentation is not some exclusive club for scientists and chefs; it’s an ancient, natural process that is surprisingly safe, incredibly rewarding, and accessible to everyone.
This guide is designed to be your trusted companion, demystifying the process and putting safety first. We’ll walk you through the science, the essential tools, and your first few foolproof ferments. By the end, you’ll have the confidence and knowledge to turn your kitchen into a thriving hub of delicious, probiotic-rich creations. As fermentation revivalist Sandor Katz puts it, “Fermentation is ultimately a very hopeful practice… it’s an investment in the future.”
Why Fermentation is Actually Safer Than You Think
Let’s address the biggest hurdle for anyone new to fermenting at home: the fear of getting it wrong and making someone sick. It’s a valid concern, but one that is largely unfounded when you follow basic principles. In fact, lacto-fermentation—the process we’ll focus on for vegetables—is a time-honored food preservation method that creates an environment where harmful pathogens simply cannot survive.
Historically, before refrigeration, fermentation was a primary method for preserving harvests and ensuring food security through long winters. Cultures around the globe have been safely fermenting foods for thousands of years. The process inherently protects the food. According to the USDA, properly fermented vegetables are safer than raw vegetables, as the acids produced during fermentation destroy spoilage-causing and pathogenic microorganisms.

The magic lies in a battle of microbes. On one side, you have potentially harmful pathogens like Clostridium botulinum or E. coli. On the other, you have an army of beneficial Lactic Acid Bacteria (LAB). When you create the right conditions, the good guys win, every single time. They produce lactic acid, which lowers the pH of the environment, making it inhospitably acidic for the bad guys.
The Science Behind Safe Fermentation
Understanding a little bit of the science behind the process will empower you and replace fear with confidence. Safe fermentation at home isn’t about luck; it’s about creating the ideal conditions for beneficial bacteria to thrive.
Three key factors work together to ensure a safe ferment:
Salt: Your First Line of Defense
When you add salt to vegetables, it serves two purposes. First, it draws water out of the vegetables through osmosis, creating a brine. Second, and more importantly, it inhibits the growth of undesirable bacteria while giving the salt-tolerant Lactic Acid Bacteria a competitive head start.
Anaerobic Environment: Keeping Oxygen Out
LAB thrive in an environment without oxygen (anaerobic). By keeping your vegetables submerged under the brine, you prevent oxygen-loving molds and yeasts from growing on the surface.
Acidification: The Ultimate Safety Net
This is the most critical safety checkpoint. As the LAB consume the natural sugars in the vegetables, they produce lactic acid. This steadily drops the pH of the brine. According to food safety research, a pH of 4.6 or below is considered the safety zone where pathogenic bacteria like C. botulinum cannot grow or produce toxins. Most successful vegetable ferments will naturally finish with a pH between 3.4 and 4.0, well within the safe range.
Essential Equipment for Safe Home Fermentation
You don’t need a laboratory of expensive gadgets to start fermenting at home. In my experience, you can get started with equipment you likely already have. However, a few key items are non-negotiable for safety and success.
Must-Have Tools
Glass Mason Jars
Glass is the gold standard for fermentation vessels. It’s non-reactive, so it won’t leach chemicals or flavors into your ferment. It’s also transparent, allowing you to watch the fascinating process unfold. Wide-mouth mason jars are particularly useful for making it easy to pack vegetables in and keep them submerged.
Fermentation Weights
This is the most common area where beginners make mistakes. Vegetables must stay below the surface of the brine to maintain an anaerobic environment. Floating bits are an invitation for mold. You can buy glass fermentation weights specifically designed for this, or use a smaller, brine-filled jar or even a clean, boiled rock. Submersion is key.

Non-Iodized Salt
Use non-iodized salt. Iodine can inhibit the beneficial bacteria you’re trying to cultivate. Sea salt, kosher salt, or pickling salt are all excellent choices for home fermentation.
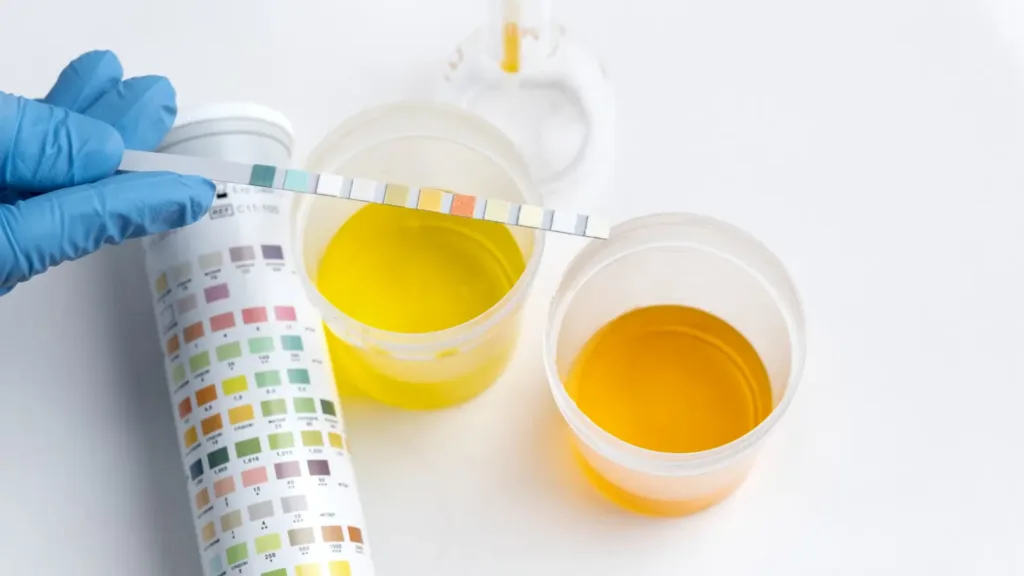
pH Test Strips
While not strictly necessary for simple ferments like sauerkraut (which reliably becomes acidic), having pH strips is the single best way to build confidence. They are inexpensive and give you definitive proof that your ferment has reached the safe acidic level (below pH 4.6). For a beginner, this visual confirmation is priceless.
Nice-to-Have Upgrades
As you get more comfortable with fermenting at home, you might consider these tools to make the process more convenient and consistent.
Airlock Lids
These special lids fit onto mason jars and feature a one-way valve. They allow carbon dioxide—a byproduct of fermentation—to escape while preventing oxygen and contaminants from getting in. This eliminates the need to “burp” your jars daily to release pressure.
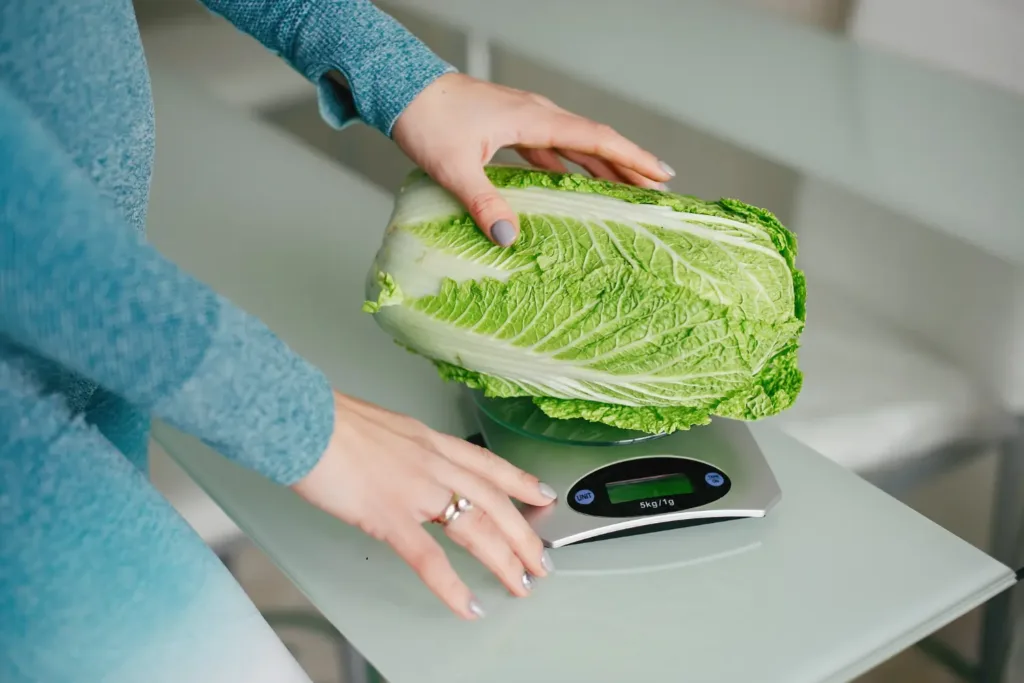
Kitchen Scale
Precision is a fermenter’s friend. Using a scale to measure your vegetables and salt by weight (aiming for a 2-3% salt concentration) is far more accurate than using measuring spoons. This ensures your salt brine is at the perfect strength for safety and flavor.
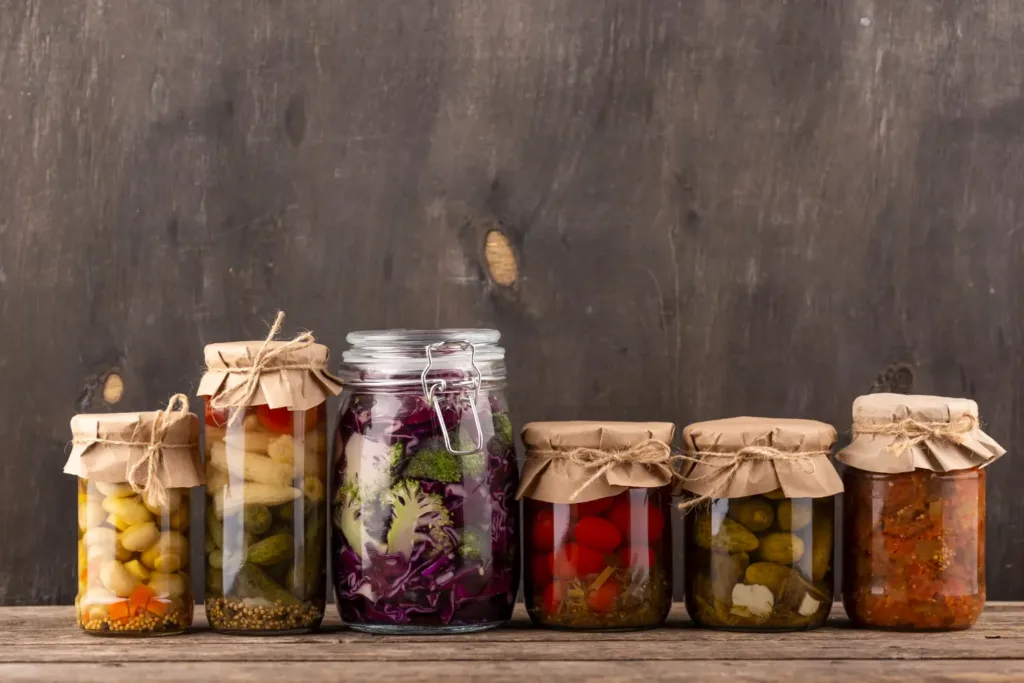
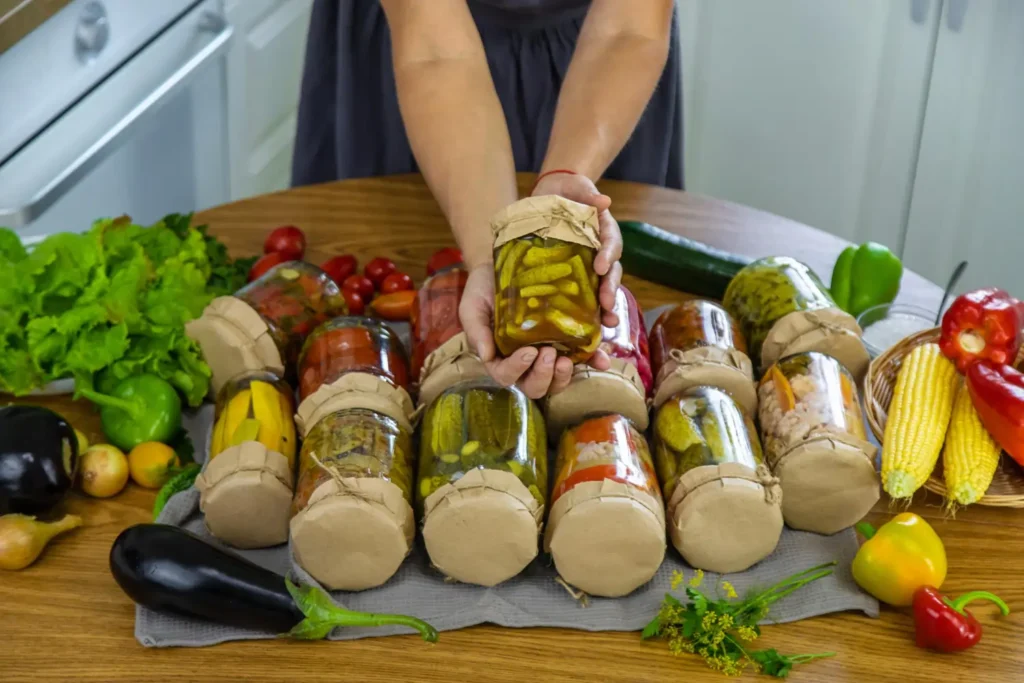
The 5 Safest Ferments for Complete Beginners
Start with a win! These five ferments are renowned for being incredibly reliable, teaching you the fundamental principles of fermentation at home with a very high chance of success.
1. Sauerkraut: Your First Success
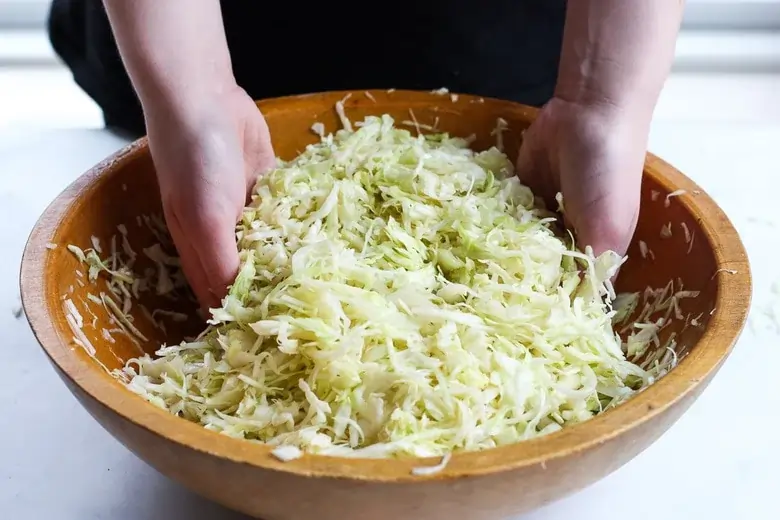
This is the classic entry point for a reason. With just two ingredients—cabbage and salt—it’s the perfect project to learn the core principles of brining, submerging, and monitoring. The process of massaging the salt into the cabbage and seeing the brine magically appear is a foundational experience for every new fermenter.
2. Fermented Carrot Sticks: Build Your Confidence
If sauerkraut seems daunting, carrot sticks are even simpler. You simply pack carrot sticks into a jar, cover them with a 2-3% salt brine, and weigh them down. They ferment relatively quickly (5-7 days) and give you a tangy, crunchy, probiotic-rich snack. This teaches you the basics of brine fermentation.
3. Garlic Honey: Nearly Foolproof
This one feels like alchemy. You place peeled garlic cloves in a jar and cover them with raw honey. That’s it. The low water activity of the honey and the antimicrobial properties of both ingredients make this an incredibly safe ferment. Over a few weeks, the honey will thin out and become infused with a sweet, mellow garlic flavor, perfect for dressings or drizzling on pizza.
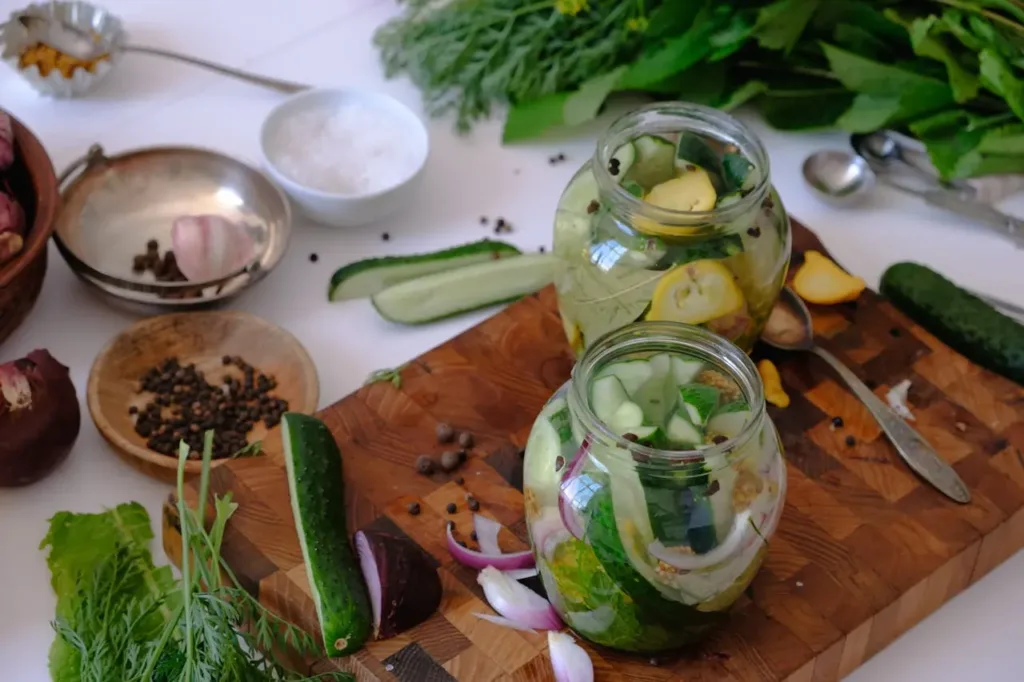
4. Quick Fermented Pickles (Cucumbers): Fast Results
While true sour pickles can be tricky (they tend to get mushy), a quick 3-5 day ferment of small pickling cucumbers is a great beginner project. The key is using very fresh, firm cucumbers and adding tannins—like a grape leaf or black tea bag—to help keep them crisp. The fast turnaround provides near-instant gratification.
5. Water Kefir: Advanced Beginner
Once you’re comfortable with vegetables, water kefir is a fantastic next step into fermented beverages. You’ll need to source water kefir “grains” (a symbiotic culture of bacteria and yeast), but from there, it’s as simple as feeding them sugar water every 24-48 hours. It’s a fun, fast-paced ferment that produces a delicious, naturally carbonated soda alternative.
Step-by-Step Safety Protocol for Your First Ferment
Let’s walk through the process using sauerkraut as our example. This safety-first protocol applies to almost any vegetable fermentation.
Step 1: Pre-Fermentation Checklist (Sanitation and Preparation)
Clean Everything
Wash your jars, weights, and any bowls or cutting boards with hot, soapy water. There’s no need for intense sterilization like in canning; basic cleanliness is sufficient to give the good bacteria the upper hand. The BC Centre for Disease Control emphasizes that clean hands, equipment, and produce are fundamental to safety.
Select Fresh Produce
Use fresh, high-quality vegetables. Avoid anything that is already slimy, moldy, or showing signs of rot.
Measure Your Salt
For sauerkraut, a 2% salt concentration is ideal. Use a kitchen scale. For every 1000g (1kg) of shredded cabbage, you will need 20g of non-iodized salt. This precision is your first line of defense.
🥒 Brine Calculator (Grams & Ounces)
Choose a vegetable or enter a custom weight, select your salt %, and calculate the exact salt needed for safe fermentation.
Create the Brine
Massage the salt into the cabbage until it releases enough liquid to form its own brine. For other vegetables like carrots, you’ll dissolve 20-30g of salt into 1 liter of non-chlorinated water to create the brine.
Step 2: During Fermentation Monitoring (The Watchful Wait)
Submerge Completely
Pack the cabbage tightly into your jar. Press down firmly so the brine rises above the solids. Place your fermentation weight on top to ensure everything stays submerged. This anaerobic condition is non-negotiable.
Secure the Lid
If using a regular mason jar lid, screw it on loosely—just tight enough to keep contaminants out but loose enough for CO2 to escape. Or, burp the jar once a day by quickly opening and closing the lid. If using an airlock, it will do this work for you.
Find the Right Spot
Place your ferment in a cool, dark place, ideally between 65-72°F (18-22°C). A kitchen cupboard away from the stove is often perfect.
Observe Daily
Check on your ferment every day. You should see bubbles forming within 1-3 days—this is a sign that your Lactic Acid Bacteria are happily at work! The liquid may get cloudy, which is also a normal and positive sign.
Step 3: Signs of Success vs. Warning Signs
Knowing what to look for is key to your peace of mind when fermenting at home.
Signs of a Healthy, Successful Ferment:
- Bubbles (Activity): Carbon dioxide production is the first sign of life.
- Pleasantly Sour Smell: It should smell tangy, acidic, and like pickles or fresh sauerkraut.
- Cloudy Brine: This is often due to the proliferation of beneficial bacteria.
- pH Drop: After 5-7 days, the pH should be well below 4.6, ideally around 4.0. This is your ultimate safety check.
Warning Signs (When to Discard):
- Fuzzy Mold: Any fuzzy growth (black, pink, green, orange) on the surface is mold. This is usually caused by improper submersion. Do not just scrape it off. Mold can produce mycotoxins that penetrate deep into the brine. When in doubt, throw it out.
- Truly Foul Odor: A healthy ferment smells sour, not rotten, putrid, or “off.” Trust your nose. If it smells repulsive, discard it.
- Slimy or Mushy Texture: If vegetables become unpleasantly slimy or mushy, it could indicate an unwanted microbial takeover.
Troubleshooting Common Problems
Even seasoned fermenters run into issues. Here’s how to handle the most common ones when fermenting at home.
Problem: There’s a white film on top.
Solution: This is most likely Kahm yeast, not mold. It’s a harmless, non-fuzzy, wrinkled-looking film. While it’s not dangerous, it can impart an off-flavor. Skim it off as best you can with a clean spoon and ensure the rest of your ferment is still fully submerged. Check the smell—if it’s still pleasantly sour, you’re fine.
Problem: My vegetables are mushy.
Solution: This can be caused by using old produce, too little salt, or fermenting at too high a temperature. For future batches, use the freshest veggies possible, ensure your salt concentration is accurate (2-3%), and try to ferment in a cooler spot. For cucumbers, adding a source of tannins (like a grape leaf) can help.
Problem: It tastes too salty or bland.
Solution: This is why using a scale is so important! If it’s too salty, you can try diluting the finished product by mixing it with fresh, unfermented vegetables. If it’s bland, it may not have fermented long enough, or you may have used too little salt. Taste your ferments periodically; when the flavor is perfect for you, move it to the fridge.
Problem: My ferment is too fast/slow.
Solution: This is almost always related to temperature. Fermentation will happen much faster in a warm kitchen (80°F/27°C) and much slower in a cool one (60°F/15°C). Adjust the location accordingly to find that sweet spot of 65-72°F (18-22°C) for the most complex flavor development.
Health Benefits and Nutritional Science
Beyond the delicious, complex flavors, one of the primary motivations for fermenting at home is the incredible health benefits. Homemade ferments are a world apart from their commercial, pasteurized counterparts.
Probiotic Powerhouse
The fermentation process cultivates a diverse ecosystem of beneficial bacteria. These probiotics are crucial for supporting a healthy gut microbiome, which is linked to improved digestion, a stronger immune system, and even mental health.
Enhanced Nutrient Absorption
The acids produced during fermentation can help break down anti-nutrients like phytic acid found in many plant foods. This makes vitamins and minerals like iron, zinc, and calcium more bioavailable, meaning your body can absorb and use them more effectively.
Increased Vitamin Content
Fermentation can actually synthesize new vitamins, particularly B vitamins and Vitamin K2.
Superior to Store-Bought
Many commercial “fermented” products found on supermarket shelves are pasteurized (heated) to ensure shelf stability. This process kills all the beneficial live bacteria, robbing you of the primary probiotic benefit. True, raw, unpasteurized fermented foods are living foods teeming with microbial life.
Your Fermentation Journey Begins Now
You’ve learned the science, gathered your tools, and understand the critical safety protocols. That initial jar of bubbling vegetables is no longer a source of anxiety, but a symbol of empowerment. You are participating in an ancient tradition, creating food that is not only safer and more delicious but also profoundly nourishing. As researcher Dr. Kenji Morimoto says, “Even knowing the science behind fermentation, there’s still something very mystical about watching it come to life.”
Your first successful ferment is a gateway. From sauerkraut, you might move on to kimchi, then to water kefir, and perhaps even to sourdough or kombucha. The principles you’ve learned here—sanitation, salt, submersion, and observation—are the foundation for it all.
Don’t be afraid to experiment. Trust the process, trust your senses, and enjoy the journey.
Ready to Start Your Fermentation Journey?
Join thousands of home fermenters who’ve discovered the joy of creating their own probiotic-rich foods. Get our free 7-Day Fermentation Starter Kit with daily tips and exclusive recipes!Get Your Free Starter Kit
Frequently Asked Questions (FAQ)
Is fermenting at home safe?
Yes, when basic protocols are followed, lacto-fermentation is an exceptionally safe food preservation method. By creating a salty, acidic, oxygen-free environment, you make it impossible for harmful pathogens to survive.
What equipment do I need to start fermenting?
At a minimum, you need glass jars, non-iodized salt, and a way to keep your vegetables submerged (fermentation weights). A kitchen scale and pH strips are highly recommended for beginners to ensure safety and consistency.
How long does fermentation take?
It depends on the food, temperature, and your taste preference. Vegetable ferments like sauerkraut can take anywhere from 1 to 4 weeks. Quick ferments like pickles might only take 3-5 days. Water kefir ferments in 24-48 hours. The key is to taste it along the way and refrigerate it when it’s perfect for you.
What vegetables are best for beginners?
Cabbage (for sauerkraut) is the classic choice. Other great options include carrots, radishes, green beans, and cauliflower. These are all sturdy vegetables that hold up well to the fermentation process.
Can fermentation make you sick?
It is extremely rare for properly conducted lacto-fermentation to cause illness. The acidic environment (pH below 4.6) is the key safety mechanism. The primary risk comes from mold growth due to improper submersion. If you see fuzzy mold, discard the entire batch.
How do I know if my ferment has gone bad?
Trust your senses. The two main red flags are fuzzy mold (any color) on the surface or a truly putrid, rotten smell. A healthy ferment smells pleasantly sour and acidic. When in doubt, throw it out.
What’s the difference between pickling and fermenting?
Standard pickling involves preserving vegetables in an acid, usually vinegar. Fermentation creates its own acid. Beneficial bacteria consume the sugars in the vegetables and produce lactic acid, which preserves the food and creates probiotics.
Do I need special starter cultures?
For vegetable fermentation (like sauerkraut or kimchi), you do not. The necessary Lactic Acid Bacteria are already present on the surface of the vegetables. For other ferments like water kefir, kombucha, or yogurt, you do need a specific starter culture (kefir grains, a SCOBY, or yogurt culture).
How do I prevent mold in fermentation?
The single most important step is to keep everything submerged under the brine. Mold needs oxygen to grow. Using a proper weight to hold vegetables down is the best prevention method. Using an airlock lid also helps by creating a more stable anaerobic environment.
What’s the best salt for fermentation?
Use any non-iodized salt. The iodine in table salt can inhibit bacterial activity. Mineral-rich sea salt, kosher salt, or pickling salt are all excellent choices. Avoid salt with anti-caking agents if possible.
References
- USDA National Institute of Food and Agriculture. “Making Fermented Vegetables.”
- Utah State University Extension. “Fermentation.”
- BC Centre for Disease Control. “Guideline for the Sale of Home-Canned and other Home-Preserved Foods at Temporary Food Markets.”
- Tamang, J. P., et al. “Traditional Fermented Foods and Beverages.” PMC Journal.
- University of Massachusetts Medical School. “Fermented Foods Safety.”
- FAO. “Food Safety Aspects of Cell-Based Food.” FAO Report 2023.
- Zabat, M. A., et al. “Microbial Community Analysis of Sauerkraut Fermentation.” Frontiers in Microbiology.
- Bell, V., et al. “Nutritional and Health Benefits of Fermented Food.” Clinical Studies Review.
- Quote from Sandor Katz, The Art of Fermentation.
- Quote from Dr. Kenji Morimoto, featured in the documentary Fermented.