Quick Answer: Your Essential Tips for Home Fermentation
Mastering home fermentation involves selecting fresh, organic ingredients, using non-iodized salt (2-3% by weight), and filtered water. Crucially, always keep all vegetables submerged under brine to prevent mold. Maintain a consistent temperature (65-75°F / 18-24°C), and use clean, sterilized equipment. Regularly taste your ferment to determine its readiness for peak flavor and texture.
Table of Contents
Why Home Fermentation is Rewarding
Welcome to the dynamic world of home fermentation! It might appear to be a complex culinary art, but it’s far more accessible than you might imagine. At Fermention.com, we believe that everyone can experience the satisfaction and profound benefits of crafting their own delicious, probiotic-rich foods. This guide is packed with practical, actionable tips for home fermentation designed to build your confidence and ensure you achieve delicious, safe results consistently.
As a beginner in fermentation, it’s completely normal to have a few anxieties. Questions like, “Is it safe?” or worries about “What if I mess up?” are common. Rest assured, we’re here to demystify the process. With a foundational understanding and adherence to a few simple guidelines, fermentation is inherently safe. The process of lacto-fermentation—where beneficial Lactobacillus bacteria convert sugars into lactic acid—creates an environment that naturally inhibits harmful pathogens by dropping the pH below 4.6. As for mistakes? Every batch offers a learning opportunity! We’ll equip you with the knowledge to identify normal fermentation signs from true red flags, giving you peace of mind as you embark on this rewarding journey.
Essential Tips for Home Fermentation Success
Success in home fermentation starts with understanding the basics. These safe fermentation practices are your bedrock for consistently excellent results.
Quality Ingredients Matter
The robust flavors and beneficial microbes in your ferment begin with the ingredients you choose. Always opt for fresh, firm vegetables. Picture crisp carrots, firm cabbage, or robust radishes—these are packed with the natural bacteria necessary to kickstart a healthy fermentation. Organic vegetables are often preferred, as they typically have lower pesticide residues and a richer population of beneficial surface microbes, giving your ferment a head start. Using high-quality produce also contributes to superior texture retention, preventing mushy results and ensuring a satisfying, crisp crunch with every bite.
Salt is Key: Precision for Safety and Flavor
Salt is not just a flavor enhancer in fermentation; it’s a critical component for safety and success. For optimal safe fermentation practices, always use non-iodized salt—specifically sea salt or kosher salt. Never use regular table salt, as iodine and anti-caking agents can inhibit the beneficial bacteria we want to cultivate, leading to stalled ferments or off-flavors.
The correct salt concentration is paramount. Aim for a 2-3% salt by weight relative to the total weight of your vegetables and water. Using a kitchen scale for precise measurement is one of the most important lacto-fermentation tips. This specific brine concentration draws moisture from the vegetables through osmosis, creates an environment hostile to harmful spoilage bacteria, and helps maintain the desirable crispness of your ferment. Getting this ratio right is fundamental to building those complex, tangy notes you crave.
Water Wisdom: Filtered is Best
Just like salt, your water choice significantly impacts your fermentation’s outcome. Chlorinated tap water is a common culprit when troubleshooting ferments, as chlorine can kill the very beneficial bacteria you’re trying to cultivate. This can lead to your ferment not bubbling, or simply failing to get started. Therefore, always use filtered or dechlorinated water. If you don’t have a filter, simply let tap water sit uncovered for 24 hours; the chlorine will dissipate naturally. This simple step ensures your beneficial microbes have the clean, supportive environment they need to thrive.
Cleanliness is Crucial
While fermentation involves cultivating microbes, it’s essential to ensure they are the right kind of microbes. Cleanliness is paramount to prevent unwanted contamination from molds or spoilage bacteria. Before you begin, thoroughly wash and ideally sterilize all your equipment—especially your jars, lids, and any utensils that will contact your ingredients. Hot soapy water followed by a rinse in boiling water or a dishwasher’s sanitizing cycle is usually sufficient. This diligence is a key strategy for how to avoid mold in fermentation and ensures your beneficial bacteria can dominate the scene.
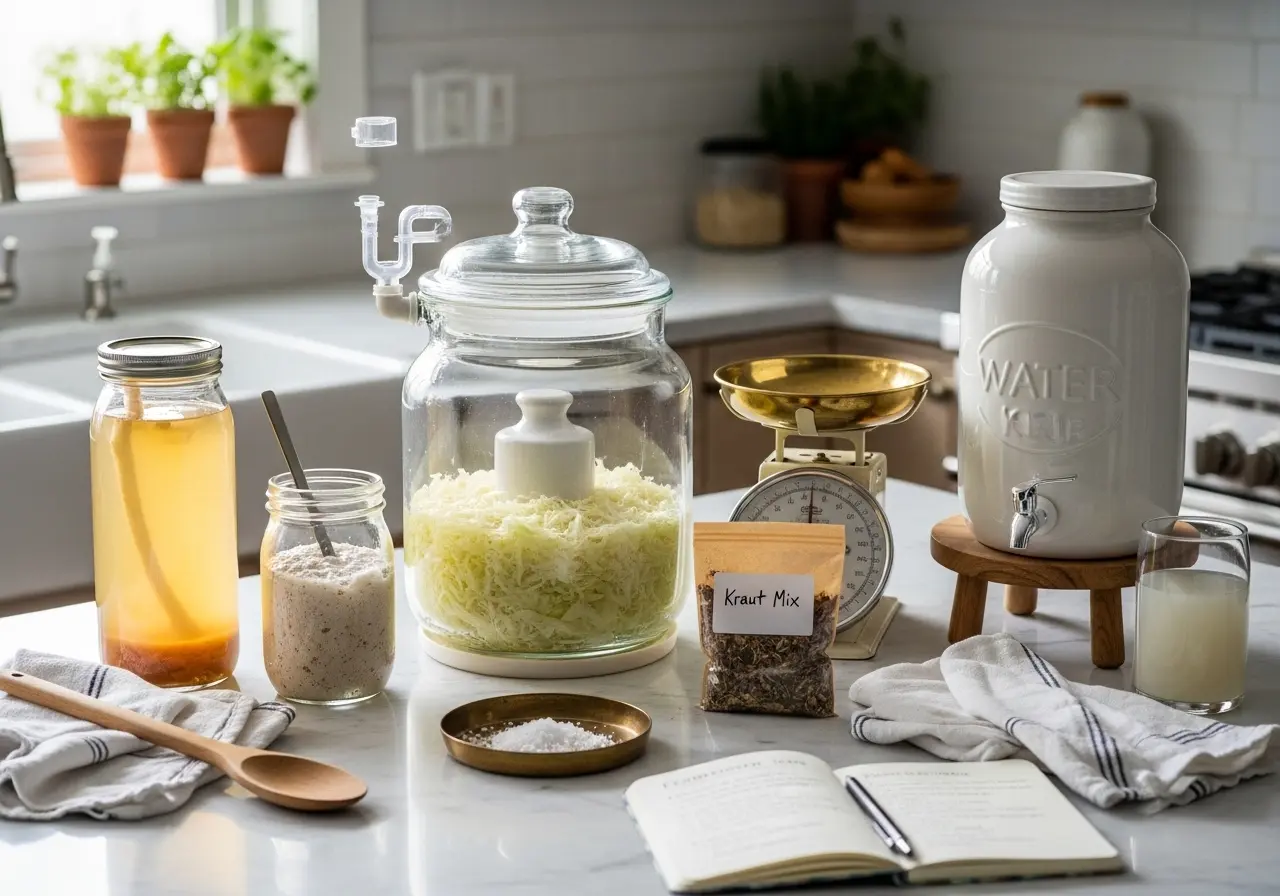
Right Equipment: Your Fermentation Toolkit
Having the proper tools makes all the difference in home fermentation.
- Wide-mouth glass jars are ideal. They are non-reactive, easy to clean, and allow you to visually monitor your ferment’s progress, observing the exciting bubbling activity.
- Fermentation weights are essential. These specialized glass or ceramic weights keep your vegetables submerged under the brine, which is a critical safety requirement. Keeping everything below the liquid surface creates the anaerobic (oxygen-free) environment that lacto-fermentation thrives in, effectively preventing mold.
- Non-metal lids are also crucial. Metal lids can react with the acidic brine, leading to corrosion and metallic off-flavors. Opt for plastic, glass, or ceramic lids. An airlock system, while not strictly essential for beginners, is a helpful addition that allows CO2 to escape without letting oxygen in, further bolstering your safe fermentation practices. With these essential pieces of equipment, you’re well-equipped to begin your delicious and healthy fermentation journey.
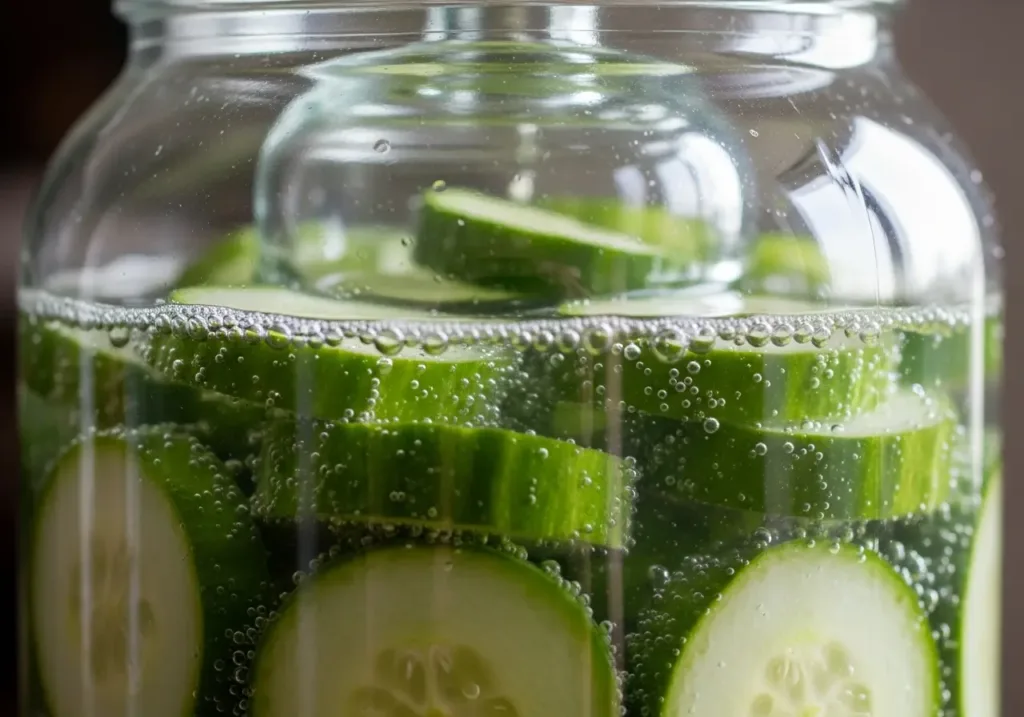
The Golden Rule: Ensure Submersion for Safe Fermentation
For anyone embarking on fermentation for beginners, there’s one principle that stands above all others for safe fermentation practices: complete submersion. This isn’t just a suggestion; it’s the golden rule, one of the most vital tips for home fermentation.
Why is submersion non-negotiable? It’s simple science. Oxygen is the enemy of successful lacto-fermentation. When vegetables are exposed to air, harmful mold and spoilage organisms—which thrive in oxygen—can quickly take hold. This is precisely how to avoid mold in fermentation and keep your delicious ferments from going bad. We need to create an anaerobic, or oxygen-free, environment where our beneficial bacteria can flourish.
So, how do we ensure it? The key is to use a dedicated fermentation weight. These weights are designed to keep every piece of vegetable fully beneath the brine line, acting as a protective barrier. This seals your food away from the air and invites only the good microbes to the party.
Sometimes, as gases build during fermentation, a few adventurous pieces might try to float. Don’t fret! This is a common beginner fermentation mistake to avoid. If you notice vegetables peeking above the surface:
- Gently push them back down with your weight.
- If the brine level has dropped, simply top it up with a little extra filtered or dechlorinated water and a pinch of non-iodized sea salt to maintain that critical 1-inch coverage above your vegetables.
Regularly inspect your ferment, especially in the first few days. You’re looking for vibrant, submerged vegetables, perhaps some cloudy brine, and active bubbling. If you’re troubleshooting ferments and have any doubts, always check that everything is still happily submerged. A healthy, fully submerged ferment will deliver that satisfying, crisp, and tangy crunch you’re aiming for.
Troubleshooting Common Fermentation Issues: Tips for Home Fermentation
Embarking on your fermentation journey is an exciting step towards a healthier, more flavorful kitchen. While the process is incredibly forgiving, it’s natural to encounter questions or concerns along the way. Knowing what to look for, and how to respond, is key to successful and safe fermentation practices. Here are some common scenarios and our expert tips for home fermentation to guide you.
Healthy Signs: Cloudy Brine & Bubbles
One of the most reassuring and exciting sights for fermentation for beginners is a cloudy brine accompanied by steady bubbling. These aren’t signs of trouble, but rather vibrant indicators of success! This visual activity means your beneficial bacteria are hard at work, converting sugars into lactic acid and producing carbon dioxide (CO2). It’s a hallmark of active lacto-fermentation tips to watch for, confirming your process is yielding a thriving microbial ecosystem. You’ll notice the liquid becoming opaque or hazy, and small bubbles will steadily rise to the surface, sometimes accompanied by a gentle fizzing sound. Embrace these signs – they mean you’re doing it right!
Harmless White Film (Kahm Yeast)
Occasionally, you might spot a thin, white, wrinkly film forming on the surface of your ferment. This is almost certainly Kahm yeast, a harmless, aerobic yeast that sometimes grows when exposed to air. It’s a common source of anxiety when troubleshooting ferments, often mistaken for mold. Unlike fuzzy mold, Kahm yeast is typically flat, smooth, or slightly wrinkled, and it won’t have the fuzzy texture or distinct colors (like black, green, or pink) associated with dangerous molds. To address it, simply skim it off the surface with a clean spoon. While it doesn’t pose a safety risk, leaving it can sometimes impart a slightly off-flavor. Maintaining proper submersion of your vegetables with a fermentation weight is one of the best tips for home fermentation to minimize its appearance, helping you know how to avoid mold in fermentation by keeping oxygen away from the surface of your brine.
Fuzzy Mold: A Critical Red Flag!
Here’s a critical safety point for safe fermentation practices: if you see any fuzzy growth, regardless of its color—be it black, green, pink, or even a fuzzy white—this is a clear and immediate red flag for mold. Unlike Kahm yeast, mold is a sign of spoilage and potentially harmful pathogens. This is one of the most important beginner fermentation mistakes to avoid. If you detect fuzzy mold, you must DISCARD THE ENTIRE BATCH immediately. There’s no safe way to salvage a moldy ferment, as the mold’s roots (mycelia) can extend deep into your food, and toxins might be present even if you only see a small spot. Always prioritize safety over saving a batch.
Mushy Vegetables: Texture vs. Safety
If your otherwise healthy-looking fermented vegetables turn mushy, first assess for other signs of spoilage.
- Safe but Soft: If there is no mold, no putrid smell, and no pink discoloration, your ferment is likely safe to eat, even if the texture isn’t ideal. The crispness may have been lost due to:
- Over-fermentation: Leaving vegetables to ferment for too long, especially in warmer conditions, can break down their cell walls.
- Too Warm Temperatures: Fermenting above 80°F (27°C) can accelerate the process, leading to mushy results.
- Insufficient Salt: A proper 2-3% salt concentration helps maintain vegetable crispness.
- Older Vegetables: Using produce that isn’t firm and fresh to begin with can result in a softer final product.
- What to Do: While the texture might not be ideal for a crunchy snack, these softer ferments are still packed with beneficial microbes. Don’t let them go to waste! Blend them into a tangy salad dressing, add them to cooked dishes like soups or stews at the end of cooking, or mash them into dips.
- Unsafe and Soft: If the mushy texture is accompanied by fuzzy mold, putrid odors, or any pink discoloration (especially with garlic), then the batch is compromised and must be discarded immediately. Safety is always paramount in your home fermentation journey. To avoid this beginner fermentation mistake to avoid, ensure you use fresh vegetables, maintain proper salt ratios, and monitor your fermentation timing carefully, tasting daily after day five to catch them at their peak crispness and tang.
Putrid Odors
Trust your nose! A healthy ferment should smell pleasantly sour, tangy, or even a little “funky” in a good way. If you detect rotten egg or sewage-like smells, it’s a definite red flag—discard the entire batch.
Advanced Tips for Elevating Your Ferments
As you gain confidence in fermentation for beginners, you’ll discover numerous tips for home fermentation that can elevate your results from good to truly exceptional. These advanced optimization strategies build on safe fermentation practices to help you achieve consistent, vibrant flavors every time.
Master Your Temperature Control
One of the most crucial lacto-fermentation tips for consistent success is precise temperature control. Maintaining an optimal fermentation temperature between 65-75°F (18-24°C) is paramount for encouraging the beneficial bacteria to thrive and for developing complex, balanced flavors. When your ferment is too warm (above 80°F/27°C), you risk speeding up the process excessively, which can lead to mushy vegetables and off-flavors – a common beginner fermentation mistake to avoid. Conversely, if your environment is too cool (below 60°F/15°C), you might wonder why is my ferment not bubbling; the activity simply slows dramatically, potentially leading to an under-fermented product. Consistent temperature ensures your microbes work steadily, producing that desired crisp texture and tangy profile.
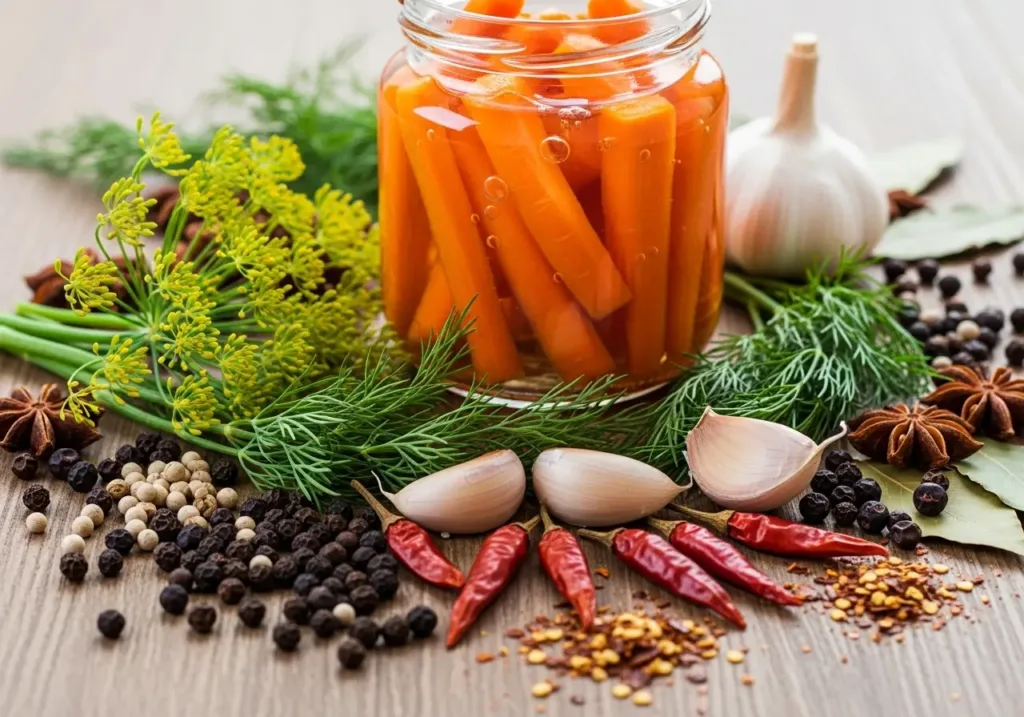
Unleash Flavor with Boosters
Once you’ve mastered the basics, it’s time to explore the exciting world of flavor. While salt and vegetables form the foundation, experimenting with various spices, herbs, and chilies can transform your ferments into unique culinary masterpieces. Consider adding smashed garlic cloves for a pungent depth, fresh dill for a classic tangy crunch, or black peppercorns for a subtle warmth. For bolder profiles, try a sprig of fresh rosemary, a hint of thyme, or a few red pepper flakes for a spicy kick. These additions not only enhance taste but also offer their own aromatic complexity, creating a truly satisfying experience.
Choosing Your Fermentation Vessel: Airlocks vs. Loose Lids
Understanding your equipment is another key tip for home fermentation. Both airlocks and loose lids are effective for lacto-fermentation, but they offer different advantages. An airlock system provides a completely anaerobic environment, allowing the carbon dioxide (CO2) produced by fermentation to escape without letting oxygen in. This significantly reduces the risk of spoilage and is an excellent strategy for how to avoid mold in fermentation, as mold thrives in oxygen. With an airlock, daily intervention is minimal. Loose lids, on the other hand, require you to “burp” your jar daily by briefly opening it to release built-up CO2. While effective, it introduces a momentary exposure to oxygen. For fermentation for beginners, either method works, but airlocks offer a bit more peace of mind regarding unwanted aerial invaders.
Trust Your Palate: The Ultimate Taste Test
Perhaps the most enjoyable and crucial lacto-fermentation tip is to trust your senses. Your palate is the ultimate indicator for when your ferment has reached its peak deliciousness. Begin taste testing your ferments regularly after day 5. Don’t be afraid to spoon out a small piece of vegetable and a sip of the brine. You’re looking for that bright, pleasant tanginess, a satisfying crispness, and a well-rounded flavor that excites your taste buds. If it’s too salty, extending the fermentation can help mellow it, but always ensure you started with the best salt for home fermentation (non-iodized sea salt or kosher salt) to begin with. If it tastes bland or not sour enough, it likely needs more time. Regular tasting is also a great way to catch potential issues early, helping you with troubleshooting ferments before they become major problems. This hands-on approach helps you avoid common beginner fermentation mistakes to avoid like over-fermenting or under-fermenting.
By paying attention to these advanced tips for home fermentation, you’re not just making fermented foods; you’re becoming a confident, intuitive fermenter. Embrace the process, learn from every batch, and enjoy the incredible flavors and health benefits you create.
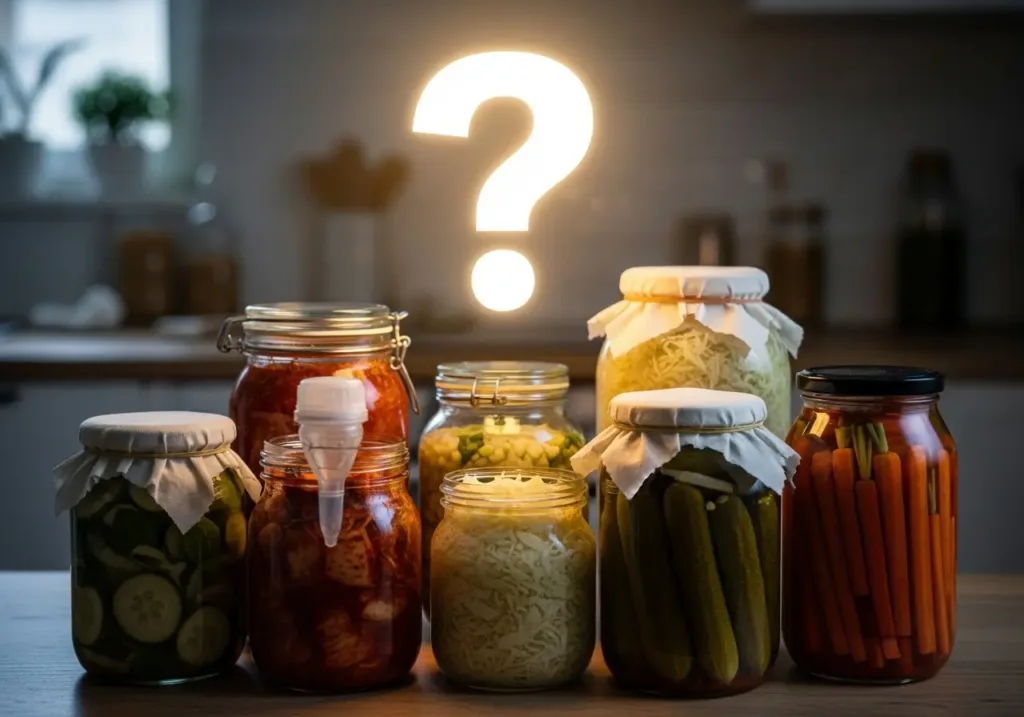
FAQ: Troubleshooting Edition
Embarking on your fermentation journey is an exciting adventure, and like any new skill, it comes with a few questions along the way. Don’t worry, we’re here to help you navigate common concerns and ensure your home fermentation efforts are both safe and successful. These tips for home fermentation are designed to build your confidence, making fermentation for beginners a breeze!
How do I know if my ferment is safe to eat?
This is perhaps the most crucial question for anyone exploring safe fermentation practices, and thankfully, your senses are your best guides. Trust your sight, smell, and taste.
- Sight: Look for clear signs of spoilage. Any fuzzy mold (black, green, pink, or even white with a fuzzy texture) means you must discard the entire batch immediately. A harmless white film, known as kahm yeast, is often mistaken for mold. Kahm yeast is typically flat, wrinkly, and bright white, and it can be skimmed off the surface without compromising the ferment. Cloudy brine and active bubbling are normal and healthy signs of fermentation in progress.
- Smell: Your ferment should have a pleasant, tangy, or subtly sour aroma, perhaps even a “funkily” aromatic scent reminiscent of aged cheese. It should never smell putrid, rotten, sewage-like, or otherwise offensive. If it does, discard the batch.
- Taste: Once it looks and smells good, taste a small piece. It should be pleasantly sour, tangy, and complex. If it tastes off, metallic, or simply unpleasant, err on the side of caution and discard.
Remember, when in doubt, throw it out. Your safety is our top priority.
My ferment isn’t bubbling, is it ruined?
Not necessarily! This is a common concern, especially for fermentation for beginners, and it doesn’t automatically mean your ferment is ruined. Bubbling is a sign of active carbon dioxide production by beneficial microbes, but it can be subtle or delayed. Here are some troubleshooting ferments tips:
- Temperature Matters: Fermentation thrives in a specific temperature range, typically 65-75°F (18-24°C). If your environment is too cool (below 60°F/15°C), the microbial activity will slow down significantly, resulting in little to no visible bubbling. Try relocating your jar to a warmer spot.
- Water Quality: Using chlorinated tap water is a common beginner fermentation mistake to avoid. Chlorine can inhibit or kill the beneficial bacteria needed for fermentation. Always use filtered or dechlorinated water.
- Salt Concentration: Ensuring the correct salt ratio (2-3% of the total weight of vegetables and water) is vital. Too much salt can slow down or stall fermentation, while too little might not provide a safe environment. We recommend a non-iodized salt like sea salt or kosher salt, measured precisely with a kitchen scale.
- Vegetable Freshness: Older vegetables may have fewer naturally occurring beneficial bacteria on their surfaces, leading to slower starts. Using fresh, organic produce can kickstart activity more readily.
Be patient! Sometimes, it just takes a few more days for the activity to become noticeable. Continue to ensure your vegetables are submerged under the brine, and maintain a stable temperature.
Can I reuse the brine from a finished ferment?
Yes, absolutely! Reusing brine, often called “back-slopping,” is an excellent lacto-fermentation tip and a fantastic way to kickstart your next batch. The spent brine from a healthy ferment is teeming with the very beneficial bacteria you want, effectively acting as a starter culture.
- How to Use It: Simply add 1-2 tablespoons of the old brine to your new jar of prepared vegetables and fresh brine. This “starter” will help rapidly lower the pH of your new batch, encouraging the right microbes to flourish and providing an extra layer of safe fermentation practices.
- When to Use It: Only reuse brine from a ferment that was unequivocally successful and healthy. The brine should be clear (or slightly cloudy), smell pleasantly tangy, and show no signs of mold or off-odors.
- When to Avoid It: If your previous ferment had any issues—mold, a strange smell, or an unpleasant taste—do not reuse the brine. It’s not worth risking your new batch.
What if my vegetables turn soft?
This is another frequent question when troubleshooting ferments. If your vegetables have turned soft or mushy, first assess for other signs of spoilage.
- Safe but Soft: If there is no mold, no putrid smell, and no pink discoloration (especially with garlic), your ferment is likely safe to eat, even if the texture isn’t ideal. The crispness may have been lost due to:
- Over-fermentation: Leaving vegetables to ferment for too long, especially in warmer conditions, can break down their cell walls.
- Too Warm Temperatures: Fermenting above 80°F (27°C) can accelerate the process, leading to mushy results.
- Insufficient Salt: A proper 2-3% salt concentration helps maintain vegetable crispness.
- Older Vegetables: Using produce that isn’t firm and fresh to begin with can result in a softer final product.
- What to Do: While the texture might not be ideal for a crunchy snack, these softer ferments are still packed with beneficial microbes. Don’t let them go to waste! Blend them into a tangy salad dressing, add them to cooked dishes like soups or stews at the end of cooking, or mash them into dips.
- Unsafe and Soft: If the mushy texture is accompanied by fuzzy mold, putrid odors, or any pink discoloration (especially with garlic), then the batch is compromised and must be discarded immediately. Safety is always paramount in your home fermentation journey. To avoid this beginner fermentation mistake to avoid, ensure you use fresh vegetables, maintain proper salt ratios, and monitor your fermentation timing carefully, tasting daily after day five to catch them at their peak crispness and tang.
Embrace the Fermentation Journey
Fermentation is more than just a technique; it’s a living, breathing process, a fascinating journey of learning and discovery that connects us to ancient traditions and modern science. As you embark on your own “fermentation for beginners” adventure, remember that every batch offers valuable insights. Embrace the imperfections, for they are simply part of the natural world at work. No two ferments will ever be exactly alike, and that’s where the magic, and the learning, truly happens.
Think of every jar you prepare as a unique experiment. Whether it’s your first attempt at lacto-fermented carrots or a more adventurous blend, each creation provides valuable tips for home fermentation. You’ll learn to recognize the active bubbling, the subtle shift in aroma from fresh to pleasantly tangy, and the satisfying cloudiness of a thriving brine. Don’t be discouraged by what might seem like “failures”—instead, view them as crucial learning opportunities. Perhaps you’re wondering “why is my ferment not bubbling?” or how to address a batch that’s a bit too soft. These are common queries that lead to deeper understanding of “safe fermentation practices” and crucial “lacto-fermentation tips”. Our extensive guides on “troubleshooting ferments” can turn any hiccup into a step forward, helping you avoid common “beginner fermentation mistakes to avoid” and ensuring you know “how to avoid mold in fermentation” by maintaining proper submersion and using the “best salt for home fermentation”.
This journey also invites you to play. Don’t be afraid to experiment with different vegetables and exciting flavor combinations. Imagine the crisp, tangy crunch of ginger-infused carrots or the complex, umami-rich notes of a spiced cabbage ferment. The joy of fermentation lies in customizing to your palate, discovering new textures and tastes.
Ultimately, the goal is to celebrate the incredible act of creation. With each satisfying pop of the lid, you’re not just opening a jar of food; you’re revealing a dynamic, living ecosystem teeming with beneficial bacteria. You’re creating healthy, delicious, and probiotic-rich foods that nourish your body and delight your senses. Feel the satisfaction of providing your gut microbiome with diverse, living beneficial bacteria, contributing to your overall health and wellness.
Ready to deepen your fermentation expertise? Continue your learning with more in-depth guides, innovative recipes, and expert insights right here on Fermention.com. We’re here to support you every step of the way, transforming curious beginners into confident, accomplished fermenters.

Important Health & Safety Information
Medical Disclaimer: This content is for educational purposes only and is not intended as medical advice. Fermented foods may interact with medications or health conditions. Consult your healthcare provider before making significant dietary changes, especially if you have autoimmune conditions, are pregnant, nursing, or taking medications.
Food Safety Notice: Fermentation carries inherent risks if not performed correctly. Always follow proper sanitation procedures, monitor pH levels when specified, and trust your senses. When in doubt, discard your ferment. The publishers are not responsible for adverse effects from following these instructions.