Discover the magic of second fermentation and transform your homemade kombucha into a fizzy, flavorful delight with this beginner-friendly guide.
So, you’ve mastered the art of brewing kombucha, and now you’re ready to take it to the next level? Second fermentation, also known as F2, is where the real fun begins. It’s where you infuse your kombucha with exciting flavors and create that satisfying fizz. This guide will walk you through the process step-by-step, offering practical advice and tips for crafting delicious, personalized kombucha.
Table of Contents
What is Second Fermentation?
- Second fermentation is the process of adding flavor and carbonation to your kombucha after the initial fermentation (F1).
- Similar to bottle conditioning in beer or champagne making, F2 involves adding a small amount of sugar (usually from fruit) to bottled kombucha.
- The yeast consumes this sugar, producing carbon dioxide which gets trapped in the sealed bottle, creating those delightful bubbles.
- This process also allows you to infuse unique and exciting flavors into your brew.
Preparing for Second Fermentation
- Remove the SCOBY: Gently remove your SCOBY and place it in a clean container (a SCOBY hotel is ideal) with 1-2 cups of finished kombucha (starter tea) for your next batch.
- Stir your Kombucha: Give your brewed kombucha a good stir to distribute the yeast evenly before bottling.
- Prepare Your Flavorings: Puree or chop your chosen fruits, herbs, or spices. Popular choices include berries, ginger, citrus fruits, and herbs like mint or lavender.
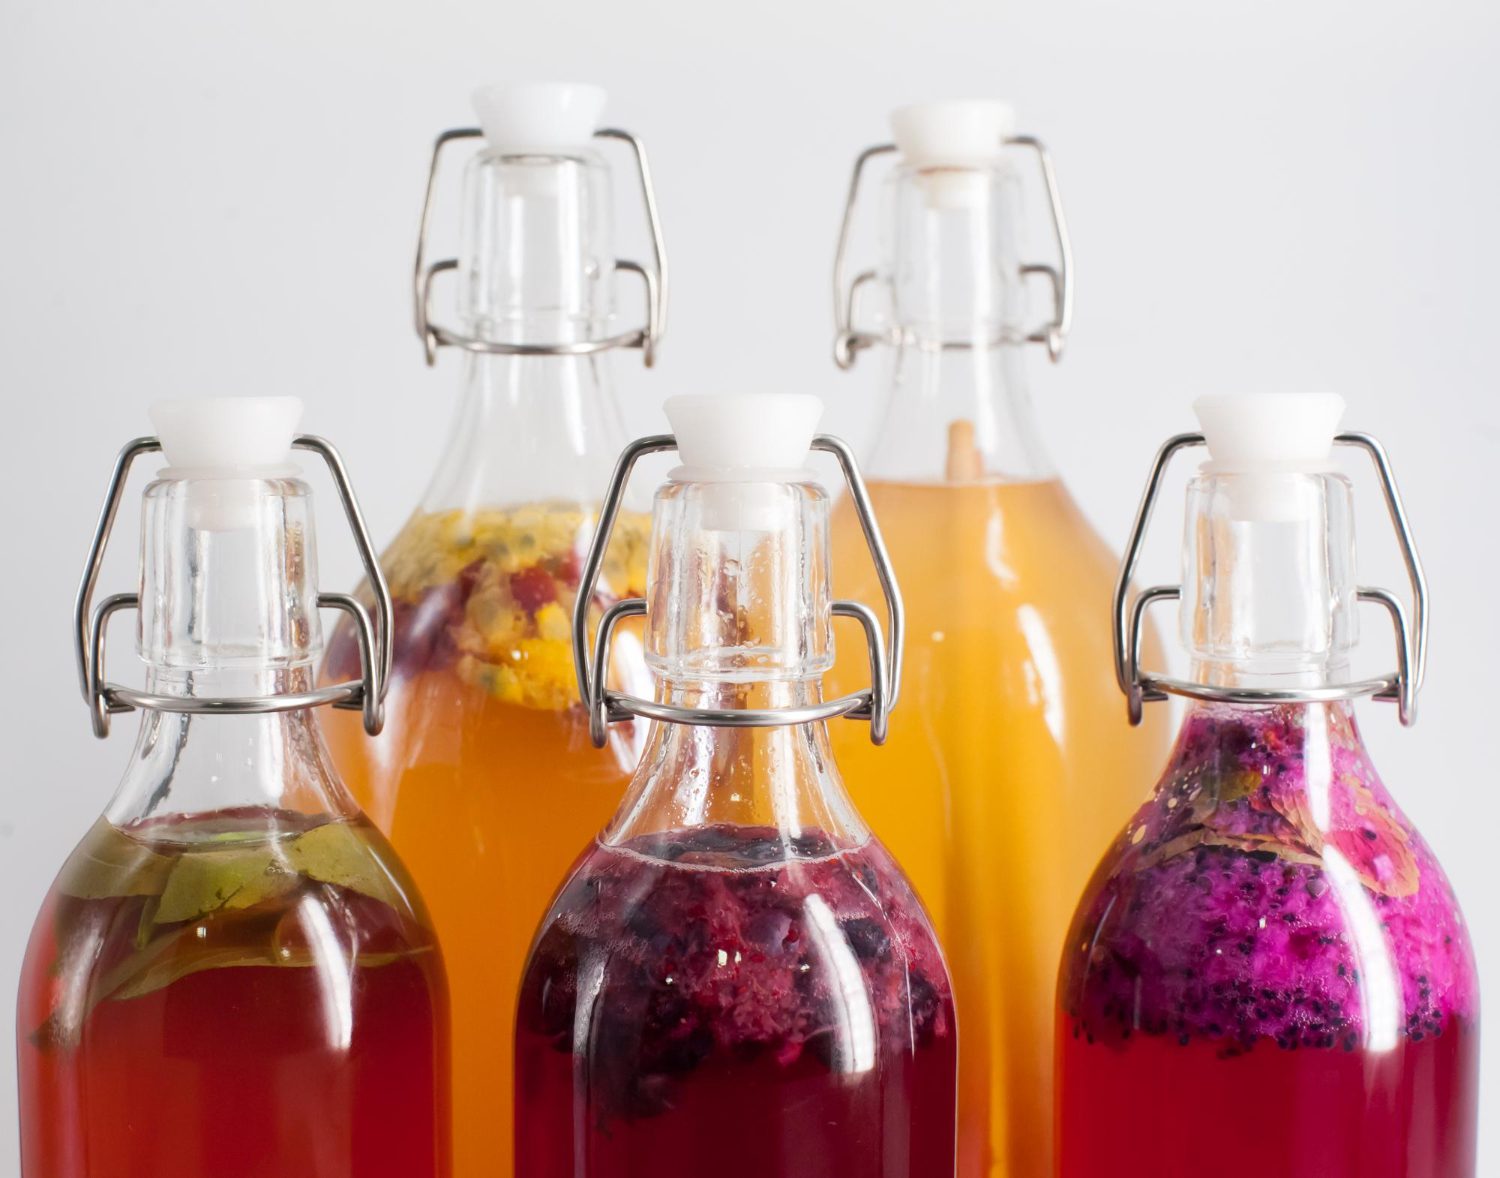
- Choose the Right Bottles: Use airtight bottles designed for carbonated beverages. Flip-top bottles are a great option for beginners. Ensure they are clean and sanitized.
Bottling and Flavoring Your Kombucha
- Add Flavorings: Add about ¼ to ⅓ cup of your chosen flavoring to each bottle. Adjust the amount based on your preference and the size of your bottles.
- Fill the Bottles: Carefully pour your kombucha into the bottles, leaving a small amount of headspace (about an inch). This allows for expansion during carbonation.
- Seal Tightly: Secure the lids on your bottles. Use a bottle gripper for screw-top lids to ensure a tight seal and prevent leaks during carbonation.
- Label Your Bottles: It’s helpful to label each bottle with the flavor and bottling date to track your experiments and preferences.
The Carbonation Process: Patience is Key
- Room Temperature Fermentation: Store your filled and sealed bottles at room temperature (ideally 70-75°F) for 2-7 days. This allows the yeast to consume the sugar and produce carbonation.
- Monitor Carbonation: After 2-3 days, you can gently squeeze a bottle to check the carbonation level. If it feels firm, it’s likely ready. If not, give it another day or two.
- Refrigerate to Slow Fermentation: Once desired carbonation is reached, transfer the bottles to the refrigerator. The cold temperature will slow down the fermentation process and preserve the fizz.
- Taste Test: After chilling, open a bottle to test the flavor and carbonation. If you prefer more fizz, leave the remaining bottles at room temperature for another day or so before refrigerating again.
Flavor Combinations and Tips for Success
- Fruit Flavors: Berries (strawberries, blueberries, raspberries), pineapple, mango, passionfruit, citrus fruits (orange, lemon, grapefruit).
- Herbal and Spice Flavors: Ginger, mint, lavender, cinnamon, cloves.
- Juice Blends: Apple juice, cranberry juice, pomegranate juice.
- Sweetness Level: The sweetness of your chosen flavoring will influence the carbonation level. Sweeter fruits will produce more fizz.
- Experiment and Have Fun: Don’t be afraid to get creative with your flavor combinations! Try blending different fruits, herbs, and spices to find your perfect kombucha flavor profile.
- Safety First: Always use clean and sanitized equipment to prevent contamination. If you notice any mold or unusual smells, discard the batch.
- Burping (Optional): Some brewers prefer to “burp” their bottles daily during F2 to release excess pressure. This is generally not necessary with flip-top bottles but might be needed for other bottle types.
- Sediment is Normal: Don’t be alarmed if you see some sediment at the bottom of your bottles. This is a natural byproduct of fermentation and is perfectly safe to consume.
By following these steps and experimenting with different flavors, you can transform your basic kombucha brew into a personalized, fizzy, and flavorful beverage. Enjoy the process and the delightful results of your kombucha crafting journey!
Step-by-Step Guide to Creating Kombucha Flavors
- This guide helps beginners explore the world of kombucha flavors.
- It provides easy steps for choosing and adding flavors.
- Step 1: Understand the Base Flavor: Start by tasting your plain, finished kombucha. This will help you decide which flavors will complement its natural tartness and sweetness (or lack thereof). Is it very vinegary? Very sweet? This will influence your flavor choices.
- Step 2: Choose Your Flavor Profile: Think about what flavors you enjoy. Do you prefer fruity, spicy, herbal, or floral notes? Consider these categories:
- Fruits: Berries (strawberries, raspberries, blueberries), stone fruits (peaches, plums), tropical fruits (mango, pineapple), citrus (lemon, lime, grapefruit)
- Spices: Ginger, cinnamon, cloves, cardamom, allspice
- Herbs: Mint, basil, lavender, rosemary
- Other: Vanilla bean, maple syrup, cacao nibs
- Step 3: Start Simple: Begin with single flavors before experimenting with combinations. This will help you understand how each ingredient affects the final taste. A good starting point is 2-4% fruit puree or juice by volume of kombucha. Whole spices are usually used more sparingly.
- Step 4: The Second Ferment: After your initial kombucha fermentation, add your chosen flavorings to your bottles. Seal the bottles tightly and leave them at room temperature for 1-3 days for a second fermentation. This is where the flavors meld and carbonation develops. Taste test daily to monitor the flavor and fizziness.
- Step 5: Refrigerate: Once your kombucha reaches your desired flavor and fizziness, refrigerate it to slow down fermentation and carbonation. This also helps preserve the flavors.
- Step 6: Experiment and Refine: Don’t be afraid to experiment! Try different flavor combinations, adjust the amount of flavoring, and vary the second fermentation time to find your perfect kombucha blend. Keep notes of your experiments to recreate your favorites.
Common Questions About Kombucha Flavors
Q: What are some common Kombucha flavors?
Popular flavors include ginger, berry, and citrus. Many kombucha brewers use a combination of fruits, herbs, and spices to create unique flavor profiles.
Q: Can I flavor Kombucha naturally?
Yes! Adding fresh or frozen fruits, herbs, and spices is a great way to naturally flavor your kombucha after the initial fermentation process.
Q: How long should I flavor my Kombucha?
The flavoring time depends on the intensity you’re aiming for, typically 2-7 days in a sealed bottle. Taste-testing regularly helps you achieve your desired level of flavor naturally.
Q: What are some unique Kombucha flavor combinations?
Try combinations like pineapple-ginger, lavender-lemon, or raspberry-rosemary for a more complex and exciting taste experience. These flavors combine naturally during the secondary fermentation.
Q: Can I use juice to flavor Kombucha?
While you can use juice, be mindful of added sugars. Using whole, naturally flavorful ingredients like fruits is generally recommended for a healthier and tastier outcome.