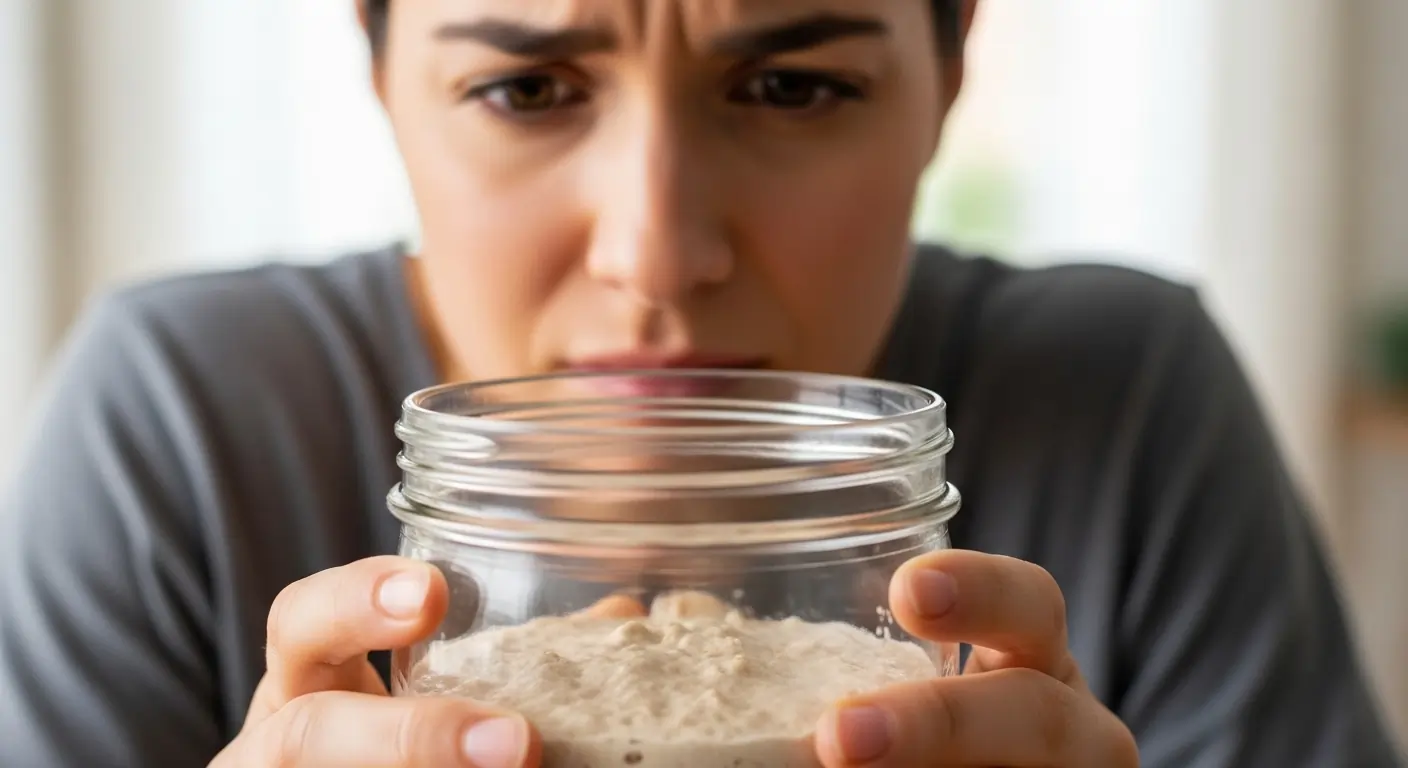
There’s a unique kind of disappointment that comes from staring at a motionless jar. You followed every step, measured precisely, and waited with anticipation, only to be met with… nothing. No gentle bubbling, no tangy aroma, no signs of life. It’s a common and deeply frustrating moment when your home fermentation starter culture seems to have failed before it even began.
But please, don’t throw it out just yet! Whether you’re struggling with a new probiotic starter culture from a fermentation starter kit, trying to revive a sleepy sourdough starter, or coaxing life back into your precious kefir grains, the solution is often simpler than you think. Every experienced fermenter has faced a stubborn live culture starter at some point.
These living communities of beneficial microbes—whether you call them a mother culture or are just getting started with DIY fermenting cultures—are resilient, but they are sensitive to their environment. This guide is your troubleshooting partner. We’ll walk you through the most common issues, help you diagnose the problem, and provide clear, actionable steps to bring your ferment back to vibrant, bubbling life.
Feeling Overwhelmed by Home Fermentation Starter Cultures? You’re Not Alone.
You’re standing at the threshold of an exciting culinary adventure. The promise of vibrant, gut-friendly foods made in your own kitchen is calling. But as you take your first steps, you’re met with a whole new world of terms: SCOBYs, grains, mothers, and back-slopping. Finding the right home fermentation starter culture can feel like the most intimidating part of the journey, turning excitement into hesitation. We understand completely.
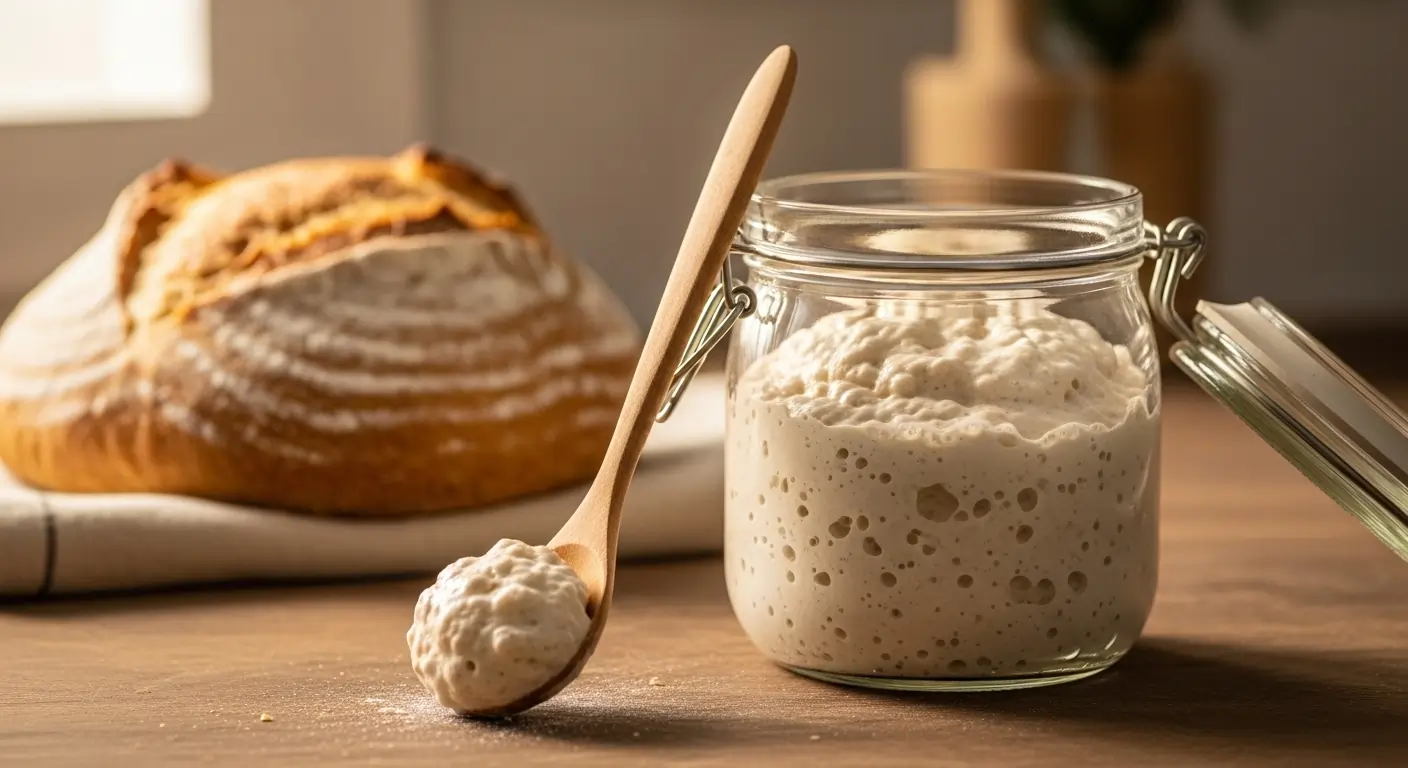
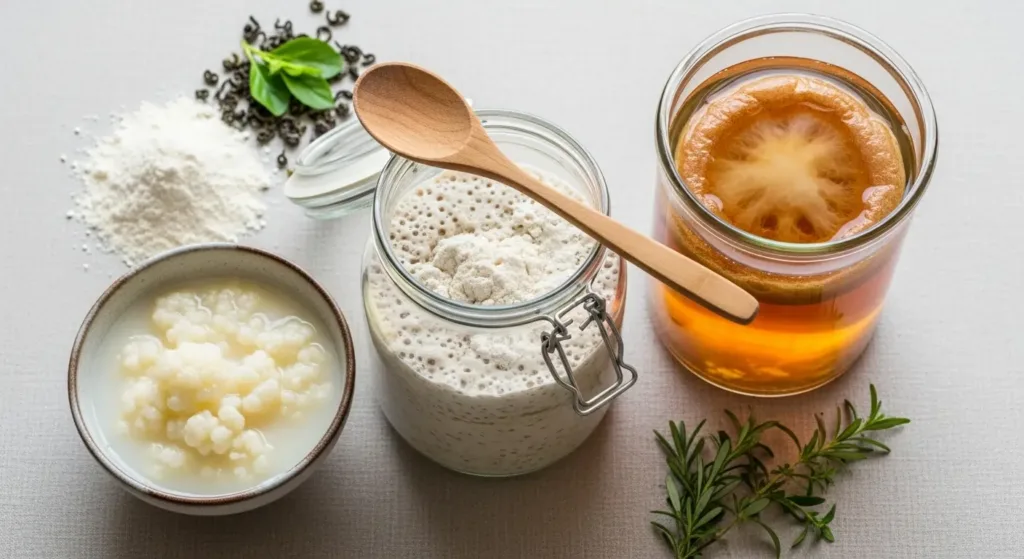
Whether you’re dreaming of a tangy, effervescent water kefir made from active kefir grains, a deeply flavorful loaf from a bubbly sourdough starter, or the bright crunch of homemade pickles, the core concept is wonderfully simple. Every probiotic starter culture, often called a live culture starter or mother culture, is simply a thriving community of beneficial bacteria and yeasts, ready and waiting to transform basic ingredients into something extraordinary.
But that knowledge doesn’t always quiet the common worries: “Will I harm it?” “Do I really need a full fermentation starter kit?” “How can I be sure it’s safe?” We’ve heard every one of these questions, and the fantastic news is that working with DIY fermenting cultures is far more intuitive and resilient than you might imagine. This guide is designed to be your trusted mentor, clearing away the confusion and empowering you to confidently choose, use, and maintain the perfect starter for your fermentation goals. Let’s begin.
Your Guide to Home Fermentation Starter Cultures: What’s Inside
Navigating the world of fermentation begins with understanding your most important ally: the starter culture. This guide is designed to build your confidence, walking you through everything from choosing the right culture to keeping it thriving for years to come. Here’s what we’ll cover.
Table of Contents
5 Essential Tips for a Thriving Home Fermentation Starter Culture
Embarking on your journey with a home fermentation starter culture is an exciting step toward unlocking a world of flavor and gut-friendly foods. Think of it as adopting a living pet that will reward you generously with tangy sourdough, bubbly kefir, or vibrant kombucha. To help you succeed, we’ve identified the most common hurdles beginners face. View these not as mistakes, but as the foundational lessons every great fermenter learns.
1. Mistake: Using Chlorinated Tap Water
This is the number one reason a new live culture starter fails to thrive. The chlorine and chloramine added to municipal water are designed to kill microbes, and they can’t tell the difference between harmful pathogens and the beneficial bacteria and yeasts you’re trying to cultivate.
- The Pro Tip: Always use filtered or dechlorinated water. The easiest way to dechlorinate tap water is to simply let it sit out in an open container for 24 hours, allowing the chlorine to evaporate. This simple step provides a safe environment for your probiotic starter culture to flourish.
2. Mistake: Incorrect Feeding Schedule (Starving or Overfeeding)
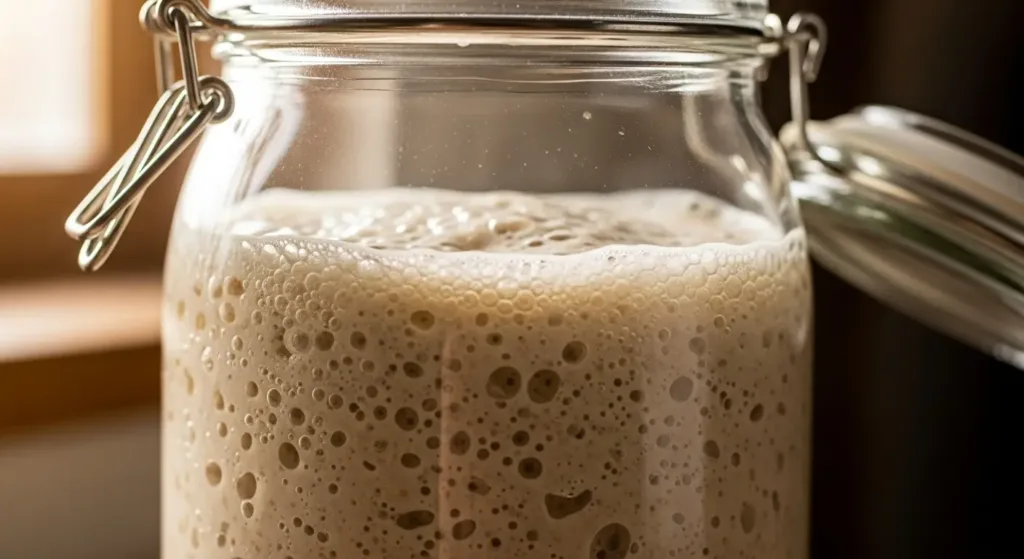
A living culture, whether it’s kefir grains or a sourdough starter, has a rhythm. Feeding it too little can starve the microbes, leading to a weak, sluggish culture with a thin, acidic aroma. Feeding too much or too often can dilute the microbial colony, making it vulnerable.
- The Pro Tip: Follow the instructions that came with your culture or are outlined in your recipe. A healthy sourdough starter will often have a pleasantly sour, yeasty aroma and a texture full of bubbles. Healthy kefir grains will look plump and slightly gelatinous. Learn your culture’s signs of hunger—like deflating after peaking—and you’ll develop an intuitive rhythm. Many people find a once-daily feeding at the same time works best.
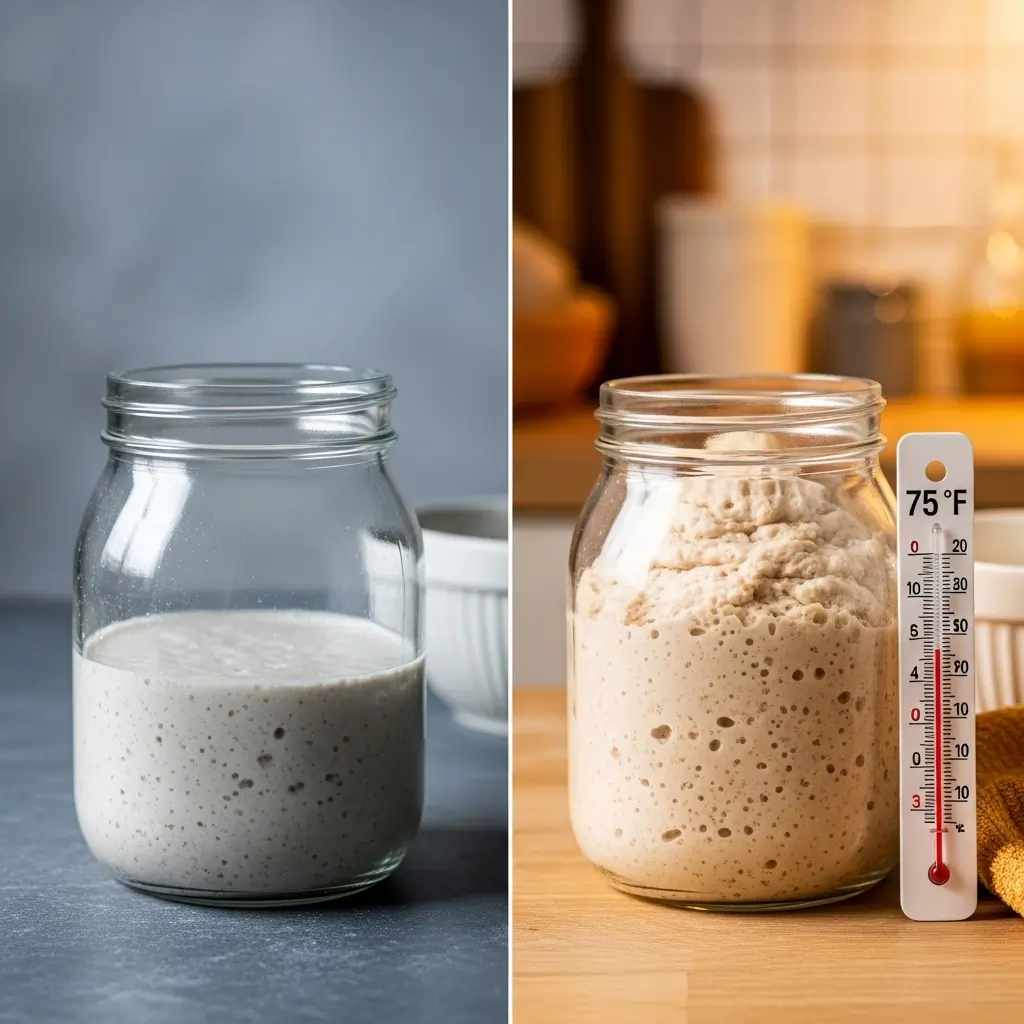
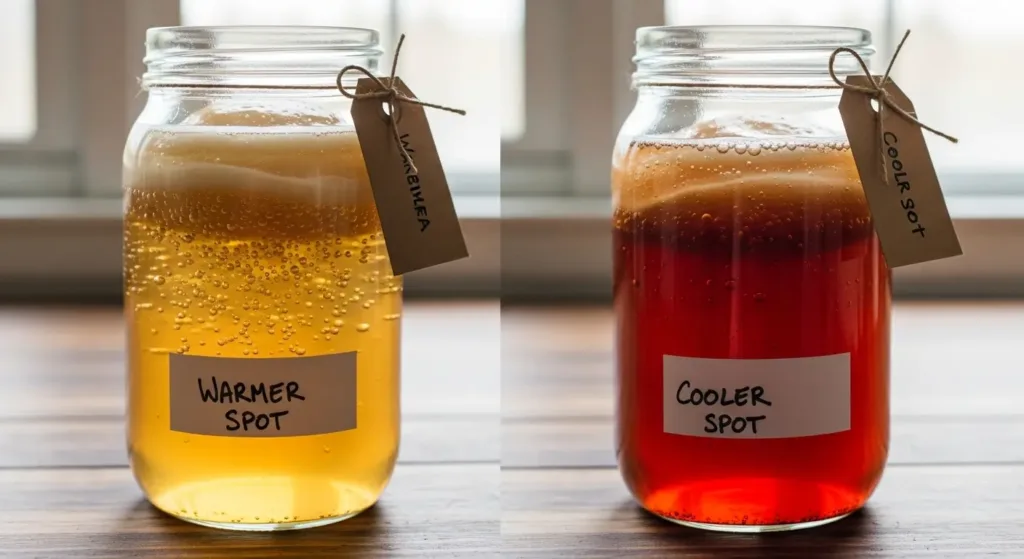
3. Mistake: Ignoring Temperature
Your fermenting cultures are sensitive to their environment. Temperature is the accelerator or the brake pedal for microbial activity. A spot that’s too cold will dramatically slow fermentation, while a location that’s too warm can stress the culture, encourage the wrong kinds of microbes, and produce off-flavors.
- The Pro Tip: Aim for a stable temperature between 68-78°F (20-26°C) for most common cultures. A kitchen counter away from direct sunlight and drafts is often perfect. If your home is cool, find a slightly warmer spot, like on top of the refrigerator or in an oven with just the light on. Consistency is key for predictable, delicious results from your DIY fermenting cultures.
4. Mistake: Panicking at Normal Sights and Smells
New fermenters often worry about strange new developments. Is that white film bad? Why does my kombucha mother culture (SCOBY) have brown, stringy bits? This fear can lead to discarding a perfectly healthy culture.
- The Pro Tip: Learn to distinguish between normal and problematic signs.
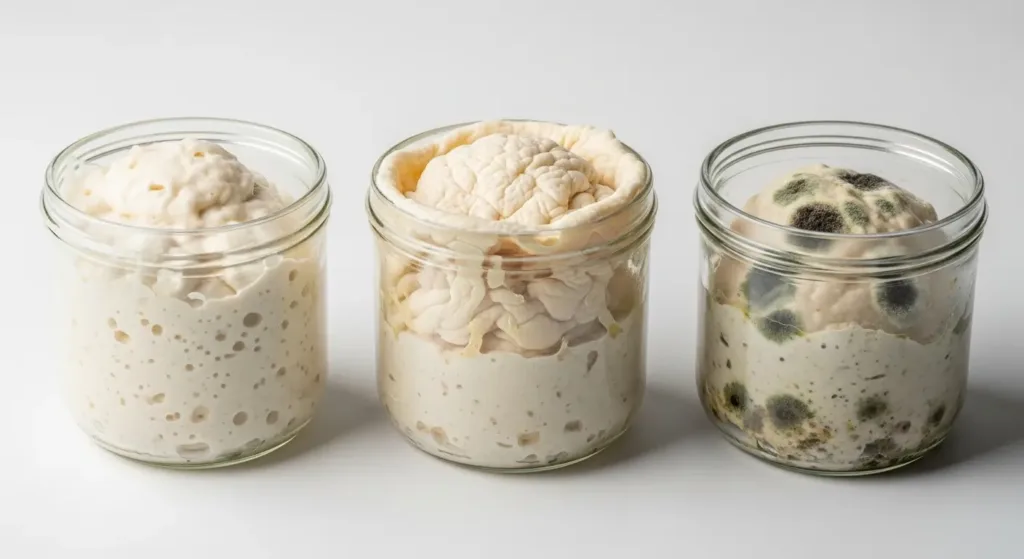
- ✅ Normal: A flat, white film is likely harmless Kahm yeast (just skim it off). Brown, stringy bits on a SCOBY are yeast strands. A “funky” but pleasantly sour or cheese-like aroma is often a sign of complex flavor development.
- 🚨 Red Flag: Fuzzy, discolored mold (black, green, pink, or orange) is a deal-breaker. If you see fuzzy mold, discard the entire batch and start over. Your safety is non-negotiable. Trust your senses—a truly spoiled culture will smell putrid or rotten, not just sour.
5. Mistake: Expecting Perfection on Day One
Sometimes a fermentation starter kit or a culture shipped by mail needs time to wake up and adapt to your unique environment—your water, your flour, your home’s native yeasts. The first few batches might be a little sluggish or taste underwhelming.
- The Pro Tip: Be patient! Give your culture a few cycles to acclimate. This initial period is building its strength and resilience. Celebrate the small signs of life—the first few bubbles, a tangy scent, the thickening of your milk kefir. Fermentation is a partnership, and your culture will reward your patience with increasingly complex and delicious results.
The Golden Rule of a Thriving Home Fermentation Starter Culture
If you take away only one piece of wisdom from this guide, let it be this: Your starter is a living community of beneficial microbes, and it thrives on consistency. Whether you’re nurturing delicate kefir grains, a robust sourdough starter, or any other home fermentation starter culture, thinking of it as a living pet rather than a static ingredient is the absolute key to success. This single mindset shift will help you troubleshoot nearly any issue you encounter.
A healthy live culture starter doesn’t ask for much, but it does ask for routine. This community of bacteria and yeasts needs two fundamental things to flourish: consistent food and a stable environment.
1. Feed Your Culture Consistently and with Quality Ingredients
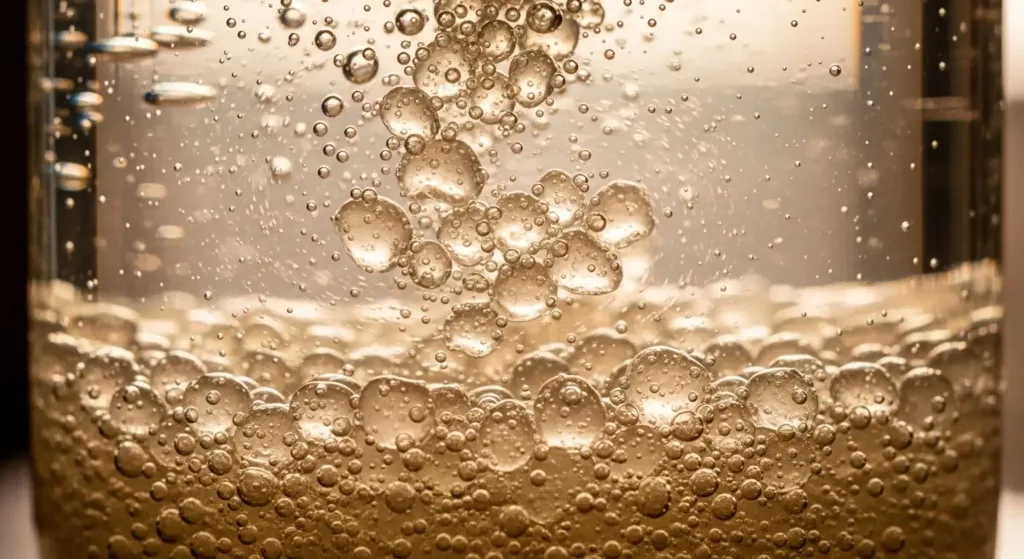
Just like any living organism, your starter gets hungry. A predictable feeding schedule is the most important factor in its long-term health. When a probiotic starter culture is fed, it consumes the sugars in its food (like the flour for sourdough or the lactose in milk for kefir) and produces the acids, CO2, and complex flavors we love.
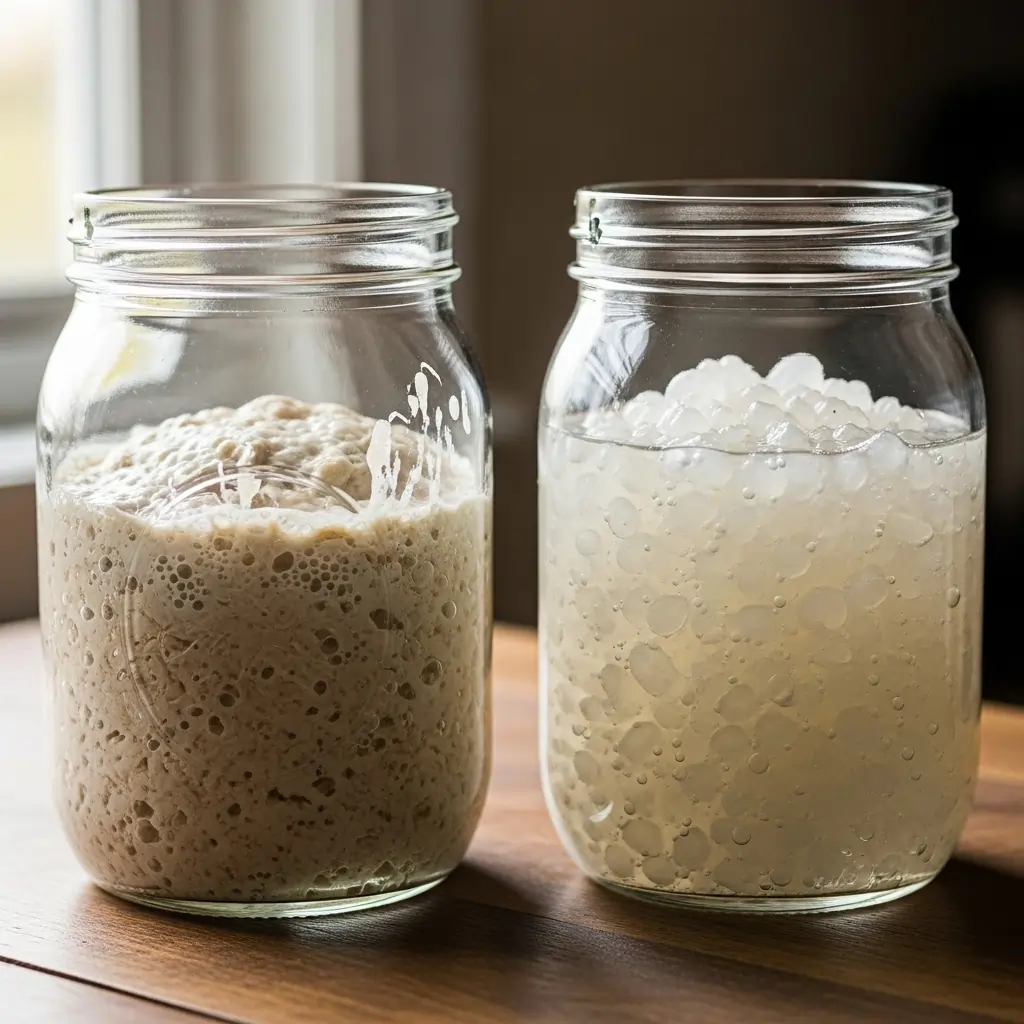
- What to Observe: A happy, well-fed starter will show signs of life. Look for active bubbling, a pleasant, tangy aroma, and an increase in volume. A hungry starter may look flat, develop a layer of dark liquid (“hooch”), and smell sharp or like alcohol. This is your culture’s way of asking for its next meal.
- Best Practice: Always use the right food. For example, never use chlorinated water, as it can harm the delicate microbes in your DIY fermenting cultures.
2. Provide a Clean, Stable, and Safe Environment
Your culture’s home matters. It needs a clean space, free from competing microbes (like mold), and a stable temperature to do its work effectively. Drastic temperature swings can stress the culture, leading to sluggish activity or off-flavors.
- What to Observe: Your mother culture or grains should look vibrant and healthy—creamy white for kefir, smooth and beige for a kombucha SCOBY. The environment should smell clean and characteristically tangy, never putrid or moldy. Any fuzzy spots of black, green, or pink are a red flag to discard the batch and start over.
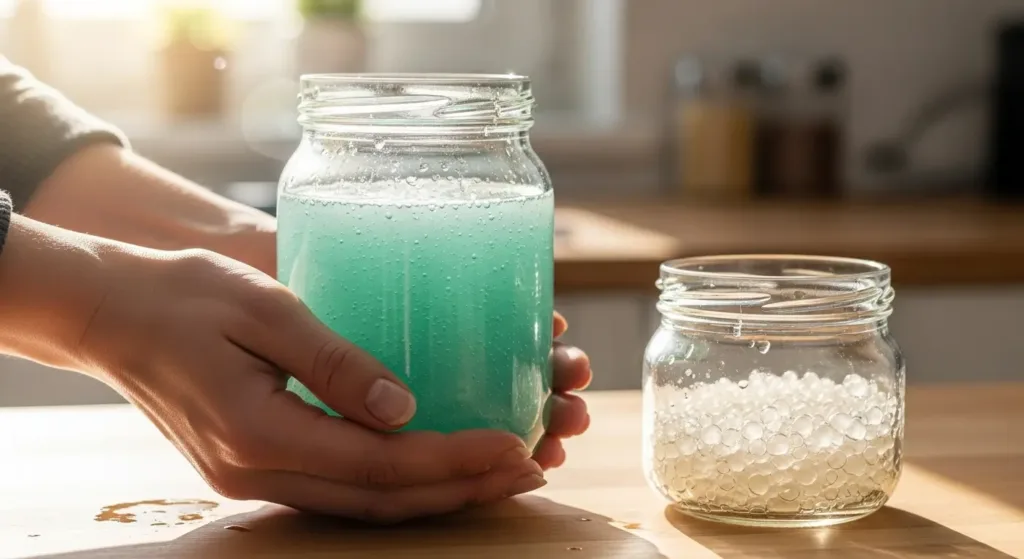
- Best Practice: Use glass jars for your cultures. Glass is non-reactive and easy to clean thoroughly. Whether you’re just starting with a fermentation starter kit or are a seasoned pro, impeccable cleanliness is non-negotiable for safety and success.
Quick Reference Troubleshooting for Your Home Fermentation Starter Culture
Don’t worry! Every fermenter encounters a hiccup now and then. Your home fermentation starter culture is a living, breathing ecosystem, and sometimes it just needs a little adjustment to thrive. Think of this guide as your friendly mentor, here to help you read the signs and get your ferment back on track.
Here’s a quick-reference chart to diagnose and solve the most common issues you might face with your probiotic starter culture, from kefir grains to a new sourdough starter.
| The Issue & What You See | What It Likely Means & How to Fix It |
|---|---|
| My Starter is Sluggish or Inactive No bubbles, no rise, no tangy aroma after 24-48 hours. | It’s likely cold or sleepy. A new live culture starter often needs time to wake up after shipping or refrigeration. Solution: 1. Warm it up: Move your jar to a consistently warmer spot, ideally between 70-78°F (21-26°C). 2. Check its food: Ensure you’re using dechlorinated water and the correct food (e.g., unbleached flour for sourdough, real sugar for water kefir). 3. Be patient: Give it another 12-24 hours. Consistent feeding is key to building a strong culture. |
| A Flat, White Film on the Surface A thin, sometimes wrinkly or web-like white layer. It is not fuzzy. | This is Kahm yeast. It’s a harmless wild yeast that forms when exposed to oxygen. While not dangerous, it can produce an off-flavor if left unchecked. Solution: 1. Skim it off: Use a clean spoon to carefully remove the film from the surface. 2. Assess your setup: Ensure your mother culture (like a kombucha SCOBY) is fully submerged or that your container has a proper airlock to limit oxygen. |
| Fuzzy Spots of Any Color (Green, Black, Pink, White) Hairy, fuzzy, or dusty-looking patches on the surface or sides of the jar. | This is mold and is a critical safety issue. Unfortunately, the visible spots are just the tip of the iceberg; the roots (mycelia) have likely contaminated the entire batch. Solution: 1. DO NOT CONSUME. Do not try to scoop it out or save any part of the culture. 2. Discard the entire batch immediately. 3. Start over: Thoroughly wash and sanitize your jar and all equipment before beginning your next DIY fermenting cultures project. |
| It Smells Like Nail Polish Remover or Rubbing Alcohol A sharp, pungent, acetone-like aroma. | Your culture is hungry! The beneficial microbes have consumed all their available food and are now producing alcohol and acids. This is common in a powerful sourdough starter or other cultures that need regular feeding. Solution: 1. Feed it now: It’s time for its next feeding. Discard the usual amount and give it fresh flour and water. 2. Increase feeding frequency: If this happens often, you may need to feed your starter more frequently or increase the ratio of fresh food you provide. |
| My Kefir Grains Aren’t Growing The milk or sugar water is fermenting, but the grains aren’t multiplying over several batches. | The grains may be stressed or adjusting. As long as they are successfully fermenting your liquid into tangy kefir, they are healthy and alive. Growth is a secondary sign of health. Solution: 1. Check your liquid: Avoid ultra-pasteurized (UHT) milk, which can lack necessary components. For water kefir, use mineral-rich water (not distilled or reverse osmosis) to give them the nutrients they need. 2. Give them space: Don’t overcrowd the grains. A ratio of 1 tablespoon of grains to 1-2 cups of liquid is a good starting point. |
Advanced Optimization: Supercharge Your Home Fermentation Starter Culture
Congratulations, you’ve moved beyond the basics and are keeping your cultures alive and active! Now, it’s time to transition from simply maintaining your starter to truly mastering it. These advanced tips will help you coax out more complex flavors, achieve rock-solid consistency, and elevate your home fermentation starter culture from a simple science project to a culinary powerhouse.
1. Strategic Feeding for Flavor and Vigor
Think of your starter as a living ecosystem. What you feed it directly influences its microbial composition and, therefore, the final taste and texture of your ferments.
- For a Sourdough Starter: Go beyond all-purpose white flour. Introduce a small percentage (10-20%) of whole rye or spelt flour into its feeding routine. Rye flour is rich in minerals and enzymes, which will give your sourdough starter a significant activity boost and introduce a wonderfully deep, earthy, and more complex sour flavor to your bread.
- For Water Kefir Grains: While white sugar works, your kefir grains thrive on minerals. Once a week, swap out a tablespoon of white sugar for molasses, rapadura, or coconut sugar. This mineral-rich “treat” will make them more robust and productive, often resulting in a more vigorous, effervescent fizz and a richer, caramel-like undertone.
2. Master Temperature for Targeted Results
Temperature is your secret control dial for fermentation. Instead of just finding a “good enough” spot, you can use temperature variations to steer the development of your culture.
- Favoring Yeast (for Bubbly Results): A slightly warmer environment, around 75-80°F (24-27°C), encourages yeast to flourish. This is ideal when you want a highly carbonated kombucha or a light, airy sourdough. The aroma will be less tangy and more bright or fruity.
- Favoring Bacteria (for Tangy Flavors): A cooler temperature, around 68-72°F (20-22°C), gives the Lactobacillus bacteria an advantage. This will slow down the fermentation slightly but develop a much deeper, tangier, and more pleasantly sour flavor profile. This is the secret to a truly lip-smacking sourness in everything from yogurt to vegetable ferments.
3. The Power of Precision “Backslopping”
“Backslopping”—using a portion of a finished ferment to start a new batch—is a cornerstone of many DIY fermenting cultures. The advanced technique is to do it with precision. Instead of just adding a “splash” of old brine, start measuring. Using exactly 10% of the previous batch’s liquid as your probiotic starter culture for the new batch creates remarkable consistency. This practice ensures a stable, predictable microbial community, meaning your fermented carrots will taste just as delicious and tangy this month as they did last month.
4. Optimize Mineral Content and Hydration
The quality of your water is critical, but we can go a step further than simply using dechlorinated water.
- Add Trace Minerals: If you use reverse osmosis or distilled water, your water is essentially a blank slate, lacking the trace minerals that microbes need. Add a tiny pinch of non-iodized sea salt or a few drops of trace mineral solution to your water. This provides the essential cofactors for your live culture starter or mother culture to perform at its peak.
- Adjust Hydration: For cultures like sourdough, the hydration level is a powerful lever. A stiffer starter (less water) will develop more acetic acid, giving a sharper, more vinegar-like tang. A wetter starter (more water) promotes lactic acid, resulting in a milder, more yogurt-like sourness. Experimenting with your flour-to-water ratio can completely transform your final product.
5. Plan Strategic Rests and Revivals
A thriving starter can feel like a demanding pet. Learning how to safely put it on pause is a game-changer. Most cultures, from kefir grains to sourdough starters, can be “hibernated” in the refrigerator. To do this effectively, first give your starter a robust feeding. Let it sit at room temperature for 2-3 hours to become active, then place it in the fridge. This slows its metabolism to a crawl. When you’re ready to revive it, bring it back to room temperature and resume its normal feeding schedule. It may take 2-3 feedings for it to return to its full, bubbly vigor, but this technique frees you to ferment on your own schedule.
Home Fermentation Starter Culture FAQ: Common Questions Answered
Navigating the world of living cultures can feel like learning a new language. Don’t worry—these tiny microbes are resilient, and most issues are easy to solve. Here are answers to the most common questions we hear from new fermenters.
- Problem-Focused Headline
- Feeling Overwhelmed by Home Fermentation Starter Cultures? You’re Not Alone.
- Your Guide to Home Fermentation Starter Cultures: What’s Inside
- 5 Essential Tips for a Thriving Home Fermentation Starter Culture
- The Golden Rule of a Thriving Home Fermentation Starter Culture
- Quick Reference Troubleshooting for Your Home Fermentation Starter Culture
- Advanced Optimization: Supercharge Your Home Fermentation Starter Culture
- Home Fermentation Starter Culture FAQ: Common Questions Answered
- Beyond Troubleshooting: The Living Art of Your Home Fermentation Starter Culture
- Continue Your Journey: From Starter Culture to Success
- Important Health & Safety Information
My live culture starter isn’t bubbling. Is it dead?
This is the most common fear for beginners, and the answer is almost always no! A lack of visible activity, like bubbling or fizzing, usually means your culture is just sluggish, not gone for good.
Think of it as being dormant. The most likely culprits are:
- Temperature: Most cultures thrive in a sweet spot of 65-75°F (18-24°C). If your kitchen is too cool, fermentation will slow down dramatically. Try moving your jar to a warmer spot, like near an oven with the light on.
- Feeding Schedule: A young or recently revived sourdough starter or set of kefir grains needs consistent, regular feedings to build strength.
- Incorrect Food: Are you using the right “fuel”? A sourdough starter needs the right flour, while water kefir grains need non-chlorinated water and proper sugar. Using chlorinated tap water is a common mistake that can inhibit your beneficial microbes.
The Solution: Be patient. Move your culture to a warmer spot, ensure you’re feeding it correctly, and give it a few more days. You’ll likely see that satisfying bubbling return.
What should my mother culture smell like?
Your nose is one of your best tools in fermentation. A healthy mother culture, whether it’s a kombucha SCOBY or a sourdough starter, should have a pleasant, tangy, and yeasty aroma.
- Healthy Smells: Expect notes that are pleasantly sour, bright, slightly vinegary, or like fresh bread dough. The aroma should smell clean and alive.
- Warning Smells: Trust your instincts. If your culture smells genuinely putrid—like rotten eggs, sewage, or anything that makes you recoil—something is wrong. This is very rare but indicates contamination with harmful bacteria.
The Golden Rule: When in doubt, throw it out. It’s always better to be safe and start over with a fresh home fermentation starter culture.
There’s a white film on my ferment. Is it mold?
Deep breath—that white film is probably not the fuzzy monster you’re imagining. It’s most likely Kahm yeast, a harmless wild yeast that can form on the surface of many ferments.
Here’s how to tell the difference:
- ✅ Kahm Yeast: Looks like a flat, thin, and often wrinkly white film across the surface. It is completely harmless, though it can impart a slightly off-flavor if left for too long. Simply skim it off the surface with a clean spoon and ensure your fermenting vegetables are fully submerged.
- 🚨 Mold: Is fuzzy, hairy, and often grows in distinct circular spots. It can be green, black, pink, or fuzzy white. If you see fuzzy mold, you must discard the entire batch. Its roots, or hyphae, can penetrate deep into the ferment, making it unsafe to consume.
My sourdough starter has a dark liquid on top. What is it?
That dark, sometimes grayish liquid is called “hooch,” and it’s a perfectly normal sign that your starter is hungry! Hooch is a mixture of alcohol and acids produced as the yeasts and bacteria consume the available flour.
You have two options:
- Stir it in: This will give your final bread a tangier, more sour flavor profile.
- Pour it off: For a milder flavor, simply pour the liquid off before you feed your starter.
Either way, the appearance of hooch is your cue that it’s time for its next feeding.
I bought a fermentation starter kit. How long until it’s active?
Patience is key, especially when rehydrating a culture. Many excellent products, from a fermentation starter kit to a packet of probiotic starter culture, arrive in a dehydrated, dormant state for shelf stability.
- Dehydrated Cultures: These can take several days and multiple “feedings” to fully wake up and become active. Follow the manufacturer’s instructions closely and don’t be discouraged if you don’t see vigorous bubbling for 3-5 days.
- Live Cultures: If you received fresh, live kefir grains or a portion of an active starter, you should see signs of fermentation within 24-48 hours, provided they are in the right environment.
Can I create my own DIY fermenting cultures from scratch?
Absolutely! This is how many ancient fermentation traditions began. Creating DIY fermenting cultures, like a sourdough starter from just flour and water, involves capturing the wild yeasts and bacteria naturally present in the air and on the flour itself.
While it requires more time and attention than using an established culture, it’s an incredibly rewarding process that connects you directly to the microbial world around you. It’s a fantastic next step once you feel confident with your first few ferments.
Beyond Troubleshooting: The Living Art of Your Home Fermentation Starter Culture
Stepping into the world of fermentation is an invitation to partner with a living ecosystem right in your own kitchen. If you’ve encountered a few bumps along the way—a sluggish start, an unfamiliar aroma, or a texture that wasn’t quite right—please don’t be discouraged. Every experienced fermenter has been there. Troubleshooting isn’t a sign of failure; it’s a sign that you are actively learning the unique language of your home fermentation starter culture.
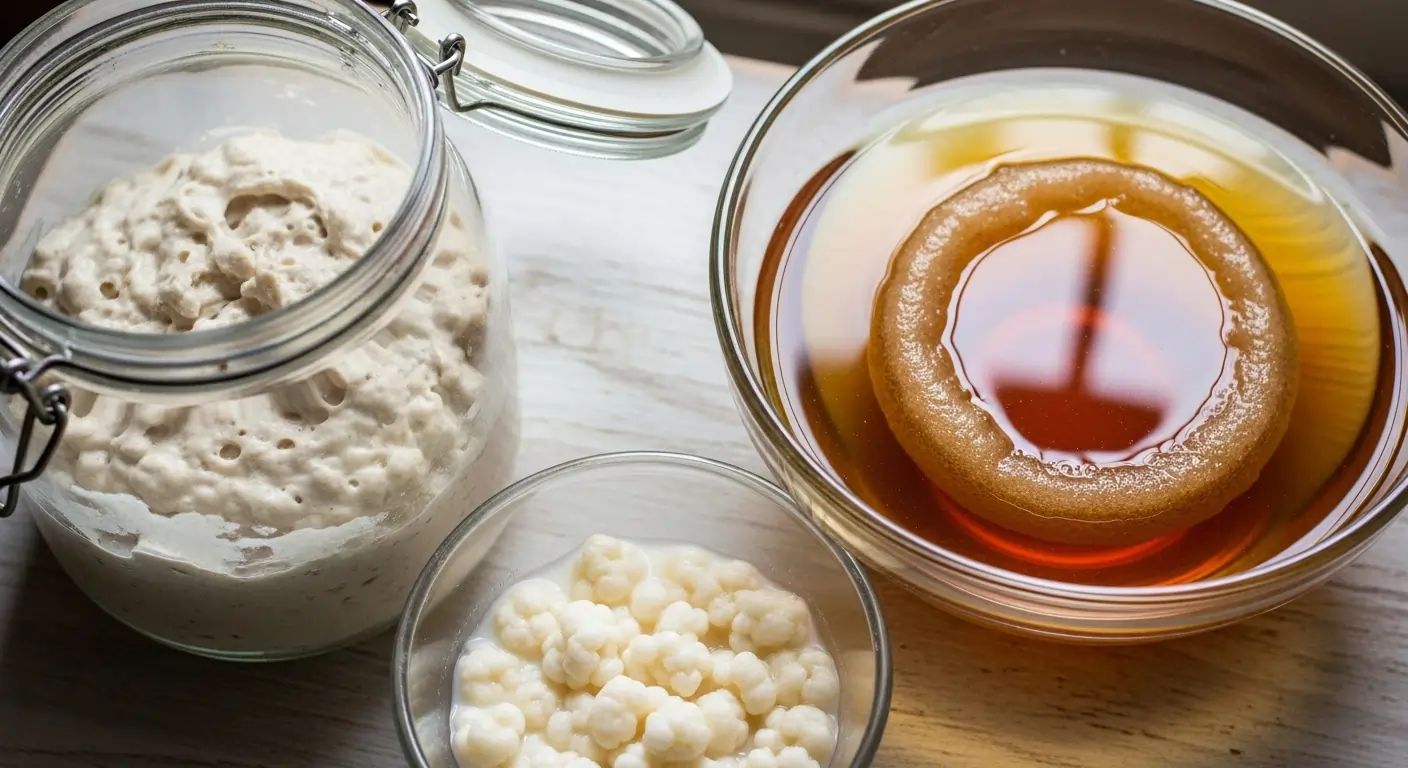
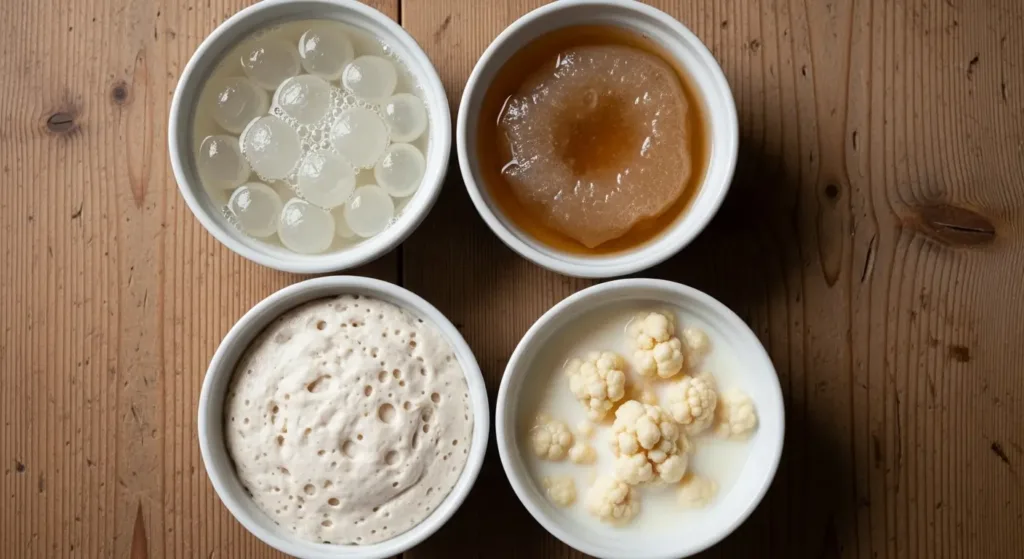
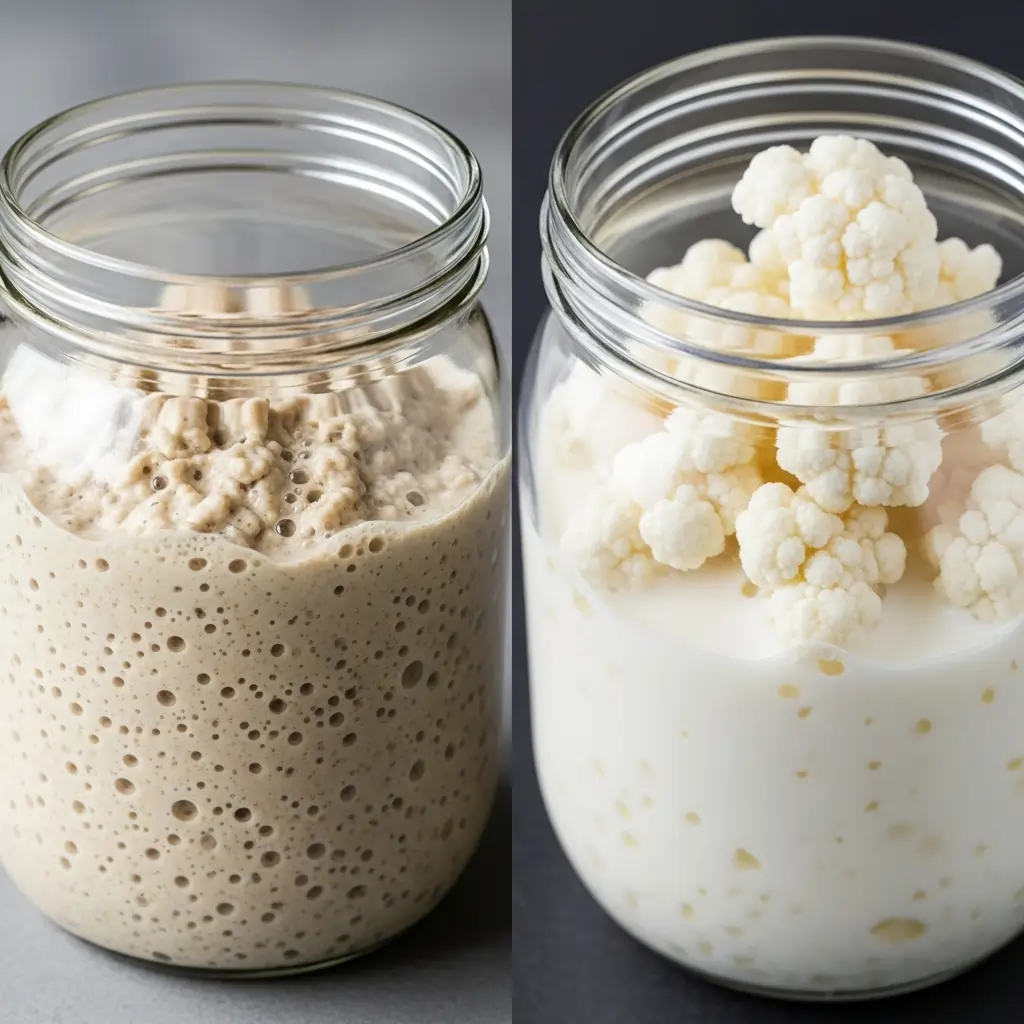
Think of your live culture starter—whether it’s the rubbery, mysterious disc of a kombucha SCOBY, the bubbly heart of a sourdough starter, or the cauliflower-like clusters of kefir grains—not as a static ingredient, but as a dynamic colony of beneficial microbes. This living, breathing mother culture responds to temperature, nourishment, and time. Your role is to become its caretaker, learning its rhythms and needs. The joy comes from this very interaction: noticing the first tiny bubbles, smelling the shift from sweet to tangy, and tasting the complex flavors you helped create.
What may begin with a simple fermentation starter kit can blossom into a lifelong practice of creating self-sustaining DIY fermenting cultures. You are not just following a recipe; you are participating in an ancient tradition of preservation and nourishment. Each successful batch builds your confidence, and every challenge deepens your understanding. Celebrate every satisfying pop of a well-fermented jar and every crisp, tangy crunch of a vegetable you transformed.
Embrace curiosity as your most essential tool. This journey is about progress, not perfection. By working with your probiotic starter culture, you are doing more than just making food; you are cultivating a connection to the microbial world that may contribute to a diverse and vibrant life. So take a deep breath, trust the process, and get ready for your next delicious experiment. You can do this.
Continue Your Journey: From Starter Culture to Success
Congratulations! You’re now equipped with the knowledge to troubleshoot common issues and confidently care for your living ferments. The true magic of fermentation, however, happens when you put this wisdom into practice. The best way to build your skills is to dive in and create something delicious and teeming with life.
Whether you’re nurturing a treasured mother culture or just starting out, we have the resources to guide your next steps. Let this be the start of a fascinating and rewarding journey.
- For the Absolute Beginner: Feeling inspired but not sure where to start? Our Beginner’s Guide to Your First Ferment walks you through the simplest, can’t-fail recipes that build a rock-solid foundation of confidence. We also review the best tools in our Ultimate Fermentation Starter Kit Guide.
- Ready for a Specific Culture? If you have a particular probiotic starter culture in mind, explore our in-depth guides. Learn the secrets to caring for your kefir grains to produce creamy, tangy kefir, or master the art of maintaining a vigorous sourdough starter for bakery-quality bread with that signature crisp crust and complex flavor.
- Feeling Adventurous? For those ready to explore the wilder side of fermentation, our article on Creating DIY Fermenting Cultures From Scratch shows you how to capture and cultivate the beneficial microbes right from your own environment.
Every live culture starter is a unique ecosystem, and you are its dedicated caretaker. Embrace the process, trust your senses, and don’t be afraid to experiment.
You’ve got this. Happy fermenting!
Important Health & Safety Information
Medical Disclaimer: This content is for educational purposes only and is not intended as medical advice. Fermented foods may interact with medications or health conditions. Consult your healthcare provider before making significant dietary changes, especially if you have autoimmune conditions, are pregnant, nursing, or taking medications.
Food Safety Notice: Fermentation carries inherent risks if not performed correctly. Always follow proper sanitation procedures, monitor pH levels when specified, and trust your senses. When in doubt, discard your ferment. The publishers are not responsible for adverse effects from following these instructions.