Quick Answer Summary: Sauerkraut is made by lacto-fermenting shredded cabbage with non-iodized salt. Massaging draws out brine, submerging the cabbage in an anaerobic (oxygen-free) environment. Lactobacillus bacteria (beneficial microbes naturally present on vegetables) convert sugars to lactic acid, preserving the cabbage and creating its tangy flavor. This process yields a probiotic-rich food (meaning it contains live, beneficial microorganisms), offering significant gut health benefits.
Table of Contents
- The Magic of Homemade Sauerkraut
- The Science Simplified: How Sauerkraut Works Its Magic
- Health Benefits of Homemade Sauerkraut
- Safety First: Essential Sauerkraut Fermentation Guidelines
- Complete Sauerkraut Recipe: Step-by-Step Guide
- Ingredient Spotlight: Choosing the Best Cabbage and Salt
- Customization Options: Flavorful Sauerkraut Variations
- Serving & Storage: Enjoying Your Homemade Sauerkraut
- Troubleshooting Common Sauerkraut Problems
- Video Guide: Making Sauerkraut from Scratch
- Frequently Asked Questions About Sauerkraut
- Important Health & Safety Information
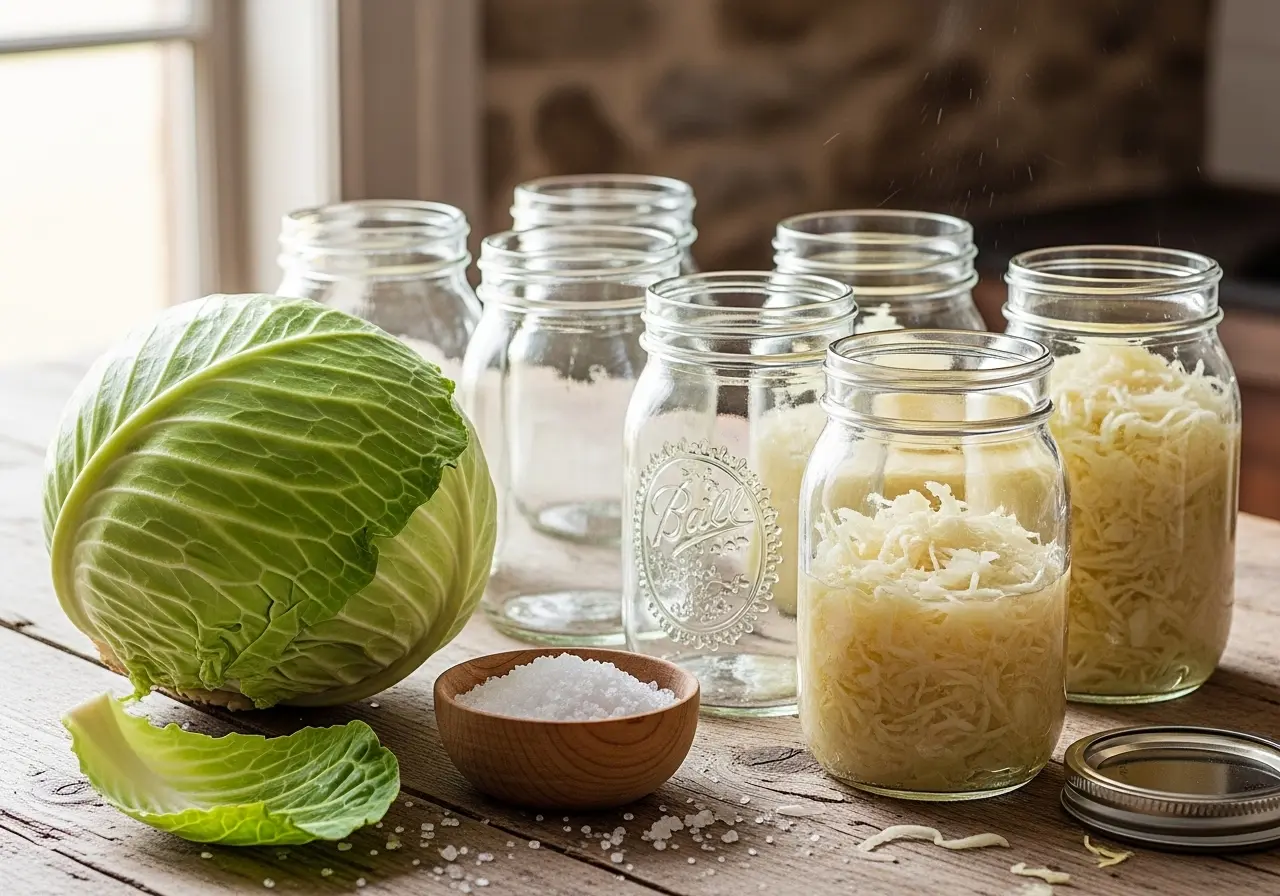
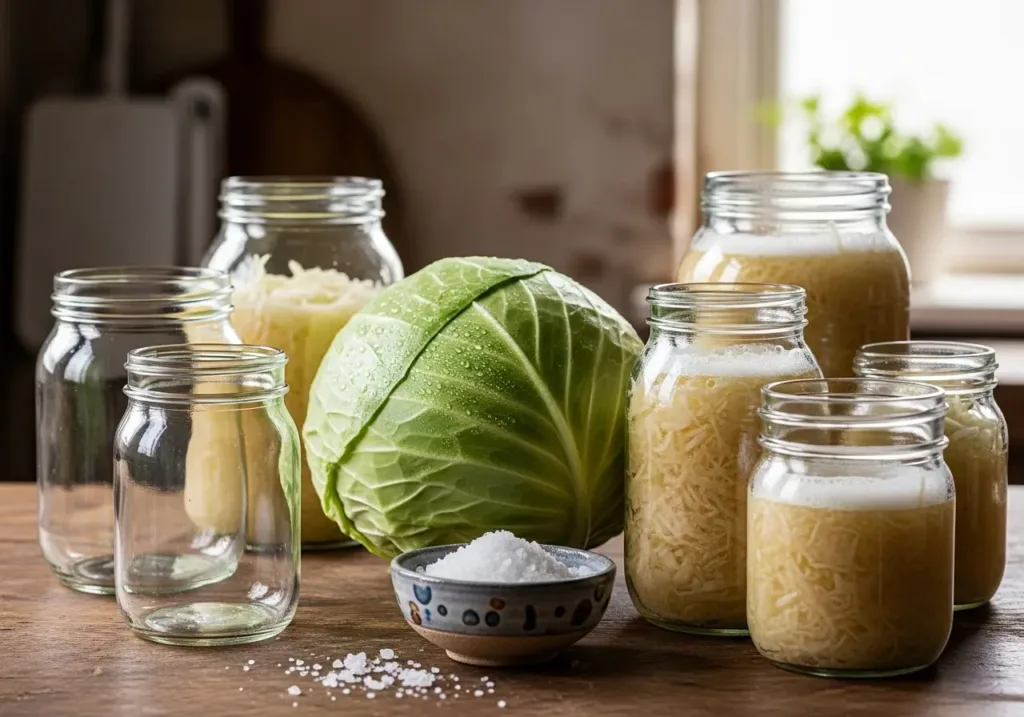
The Magic of Homemade Sauerkraut
Welcome, curious fermenters, to the ancient and simple world of homemade sauerkraut! Crafting an easy sauerkraut recipe for beginners requires little more than fresh cabbage and a bit of salt. It’s a transformative process where two humble ingredients become a probiotic-rich food right in your kitchen.
For centuries, fermented cabbage has been a beloved staple, prized for its distinct, tangy flavor and its ability to preserve food and enhance well-being. This traditional preservation method, known as cabbage fermentation or lacto-fermentation, unlocks remarkable sauerkraut benefits by cultivating beneficial microbes that support gut health.
Imagine the satisfying crunch and the bright, complex flavor of freshly made fermented cabbage—a far cry from store-bought varieties. This journey into how to make sauerkraut at home is not just about creating a delicious condiment; it’s about connecting with a timeless culinary art. Whether you use a traditional crock or discover how simple it is to make sauerkraut without a crock, we’ll guide you, ensuring success and tackling common concerns like troubleshooting sauerkraut mold and selecting the best salt for sauerkraut. Get ready to experience the pure joy of fermentation!
The Science Simplified: How Sauerkraut Works Its Magic
Making your own homemade sauerkraut is a rewarding experience, transforming humble cabbage into a probiotic-rich food. While it might seem like magic, it’s actually a precise dance of microbiology. Understanding the science behind your fermented cabbage will demystify the process and boost your confidence in creating a safe and delicious sauerkraut recipe.
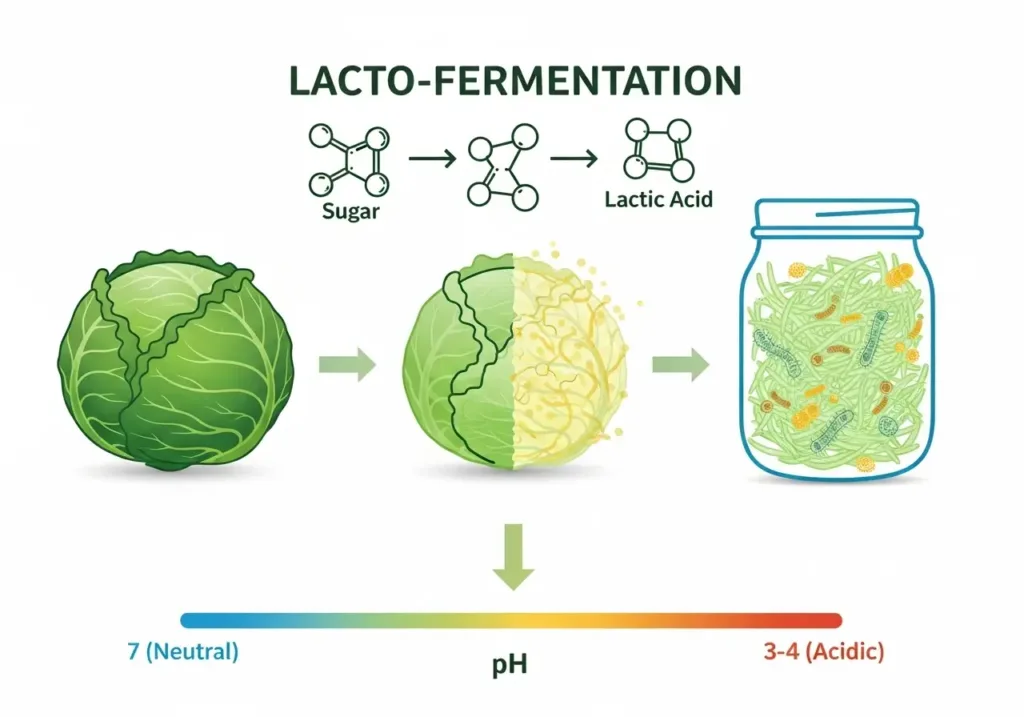
At the heart of cabbage fermentation lies lacto-fermentation (a natural preservation method where beneficial bacteria transform vegetables). This process is driven by naturally occurring Lactobacillus bacteria (a type of beneficial bacteria naturally present on vegetables), which live on the surface of fresh vegetables. When you prepare your cabbage for an easy sauerkraut recipe for beginners, these microbes feed on the natural sugars in the cabbage, changing them into lactic acid. This lactic acid is what gives sauerkraut its signature tangy, bright, and complex taste.
Crucial to this transformation is creating an anaerobic environment—meaning “without oxygen.” Our beneficial Lactobacillus friends thrive in an oxygen-free zone, while unwanted molds and spoilage bacteria cannot. This is why keeping your cabbage submerged completely under the brine is non-negotiable. Think of the brine as a protective shield, keeping oxygen away from the cabbage and allowing only the good bacteria to flourish. Whether you’re making sauerkraut without a crock using a simple jar and a fermentation weight, or a traditional crock, ensuring the cabbage stays below the liquid line is paramount for safety and success. The brine, usually made with non-iodized salt (the best salt for sauerkraut for consistent results), helps pull moisture from the cabbage. This salty liquid also creates an environment where harmful bacteria struggle to survive, while your good bacteria thrive.
As Lactobacillus bacteria produce lactic acid, the acidity of your fermenting cabbage increases, leading to a significant pH drop (a measure of how acidic or alkaline something is, where lower numbers mean more acidic), typically falling below 4.6. This lower pH is critical because it creates a hostile environment for most harmful bacteria, including Clostridium botulinum, which cannot survive in such acidic conditions. This natural preservation method is a cornerstone of sauerkraut benefits, ensuring your fermented cabbage remains safe to eat for weeks, even months, in the refrigerator once fermentation is complete.
Beyond preservation and safety, cabbage fermentation also brings enzymatic activity (natural processes where microbes release special proteins called enzymes that start to break down the cabbage). During the process, these enzymes begin to pre-digest the cabbage, breaking down cellulose (plant fiber) and making nutrients more accessible. This “pre-digestion” makes the vitamins and minerals in the cabbage more bioavailable (meaning your body can absorb and utilize them more efficiently). This enhanced bioavailability is another fantastic aspect of the many sauerkraut benefits, contributing to improved gut health and overall wellness.
So, when you learn how to make sauerkraut at home, you’re not just following a sauerkraut recipe; you’re orchestrating a symphony of microbial activity, harnessing ancient wisdom with modern scientific understanding to create something truly nourishing and delicious.
Health Benefits of Homemade Sauerkraut
Diving into the world of homemade sauerkraut isn’t just a culinary adventure; it’s a profound step towards enhancing your well-being. This humble, fermented cabbage dish, created through the ancient art of lacto-fermentation, is brimming with powerful health advantages. Once you discover the myriad sauerkraut benefits, you’ll understand why crafting your own is so rewarding, and why finding an easy sauerkraut recipe for beginners is a fantastic first step.
First and foremost, homemade sauerkraut is incredibly rich in probiotics (live, beneficial microorganisms that support gut health). During the cabbage fermentation process, naturally occurring Lactobacillus bacteria convert sugars into lactic acid, creating a thriving ecosystem of living, beneficial microbes. These are crucial for supporting a diverse and healthy gut microbiome, which is the cornerstone of efficient digestion and contributes significantly to overall well-being. Every tangy bite delivers a powerful dose of these microscopic helpers.
Beyond populating your gut with good bacteria, fermented cabbage also leads to enhanced nutrient absorption. Fermentation acts as a natural pre-digester, breaking down complex compounds in the cabbage. This makes the vitamins and minerals more bioavailable, meaning your body can absorb and utilize them more efficiently.
A healthy gut, fueled by foods like homemade sauerkraut, is directly linked to immune system support. A significant portion of your immune system resides in your gut. By nurturing a balanced and diverse gut microbiome with beneficial bacteria from fermented cabbage, you help fortify your body’s natural defenses, making it more resilient. This is one of the most compelling sauerkraut benefits that encourages many to learn how to make sauerkraut at home.
Furthermore, sauerkraut is a fantastic source of vitamins C and K. Cabbage itself is nutritious, but fermentation can actually increase the levels of certain vitamins, including vitamin C, a powerful antioxidant, and vitamin K, essential for blood clotting and bone health.
Finally, the beneficial compounds created during cabbage fermentation may contribute to anti-inflammatory properties. A balanced gut microbiome, supported by the probiotics in sauerkraut, plays a role in modulating immune responses, which can help reduce inflammation throughout the body.
Embracing a sauerkraut recipe for your kitchen isn’t just about making food; it’s about cultivating health. While you’ll want to ensure you’re using the best salt for sauerkraut and understand the basics of troubleshooting sauerkraut mold to ensure a safe and successful batch, the effort is truly worth the remarkable health benefits you’ll unlock.

Safety First: Essential Sauerkraut Fermentation Guidelines
Embarking on your journey to create delicious homemade sauerkraut is incredibly rewarding, offering a wealth of sauerkraut benefits. At Fermention.com, your safety is our top priority. By following these essential guidelines, you’ll confidently create a vibrant, healthy, and utterly delicious fermented cabbage every time. This isn’t just about making an easy sauerkraut recipe for beginners; it’s about building a solid foundation for all your lacto-fermentation adventures.
1. Sterilization: Your First Line of Defense
For any sauerkraut recipe, pristine cleanliness is non-negotiable. Always use thoroughly clean and sterilized jars and equipment. This prevents unwanted microbial growth, ensuring only beneficial bacteria thrive. A quick wash with hot, soapy water followed by a rinse is often sufficient, but for extra peace of mind, you can sterilize jars in boiling water or a low oven.
2. Proper Salt Ratio: The Heart of Fermentation
Using the correct salt concentration is essential for successful and safe fermented cabbage. We recommend a 2-3% salt ratio by weight of your shredded cabbage. This specific amount creates the perfect environment: it slows down harmful bacteria while allowing the beneficial Lactobacillus species to flourish. For the best salt for sauerkraut, always use non-iodized sea salt or kosher salt; iodine and anti-caking agents can interfere with fermentation. Using a kitchen scale for precision will significantly boost your success rate.
3. Submersion is Key: No Oxygen, No Mold
This is perhaps the most critical rule for safe cabbage fermentation: submersion is non-negotiable. Oxygen is the enemy of lacto-fermentation, allowing mold and other spoilage microorganisms to flourish. You must ensure all shredded cabbage remains fully submerged under the brine at all times. Use a fermentation weight, a smaller glass jar, or even a clean, heavy rock (sterilized!) to keep every piece of cabbage securely under the liquid. This is vital whether you’re making sauerkraut without a crock or with one.
4. Temperature Control: The Goldilocks Zone
Temperature plays a significant role in your homemade sauerkraut‘s success and safety. The optimal range for cabbage fermentation is 65-75°F (18-24°C). Fermenting too hot (above 80°F or 27°C) can encourage undesirable bacteria, leading to off-flavors or mushy results. Too cool (below 60°F or 15°C), and your fermentation will dramatically slow down, potentially stalling. Find a stable spot in your home, away from direct sunlight, that maintains this “just right” temperature.
5. Identifying Spoilage: Trust Your Senses
One common concern, especially for those learning how to make sauerkraut at home, is distinguishing between normal fermentation activity and spoilage. Don’t worry, we’re here to help with troubleshooting sauerkraut mold.
- Cloudy brine and bubbling: These are excellent signs of active, healthy fermentation.
- Kahm Yeast: A thin, white, often wrinkly or powdery film on the surface. This is kahm yeast, a harmless aerobic yeast (a type of yeast that needs oxygen to grow). Simply skim it off carefully, ensure your vegetables are fully submerged again, and continue fermenting. It’s an aesthetic issue, not a safety one.
- Fuzzy Mold: This is the red flag. Any growth that appears fuzzy, especially if it’s black, green, pink, or even white and fuzzy, is mold. Unlike kahm yeast, mold indicates harmful spoilage. In this case, for your safety, discard the entire batch. Trust your nose too: a putrid, rotten smell is a clear sign of spoilage, distinct from the pleasantly tangy, sour, or funky aromas of healthy fermentation.
Complete Sauerkraut Recipe: Step-by-Step Guide
Embarking on your first batch of homemade sauerkraut is a truly rewarding experience, opening the door to the incredible world of lacto-fermentation. This easy sauerkraut recipe for beginners guides you through creating your own vibrant, probiotic-rich fermented cabbage with confidence.
| Prep time | Fermentation time | Yield |
|---|---|---|
| 25 mins | 7-21 days | 1 Quart |
Ingredients:
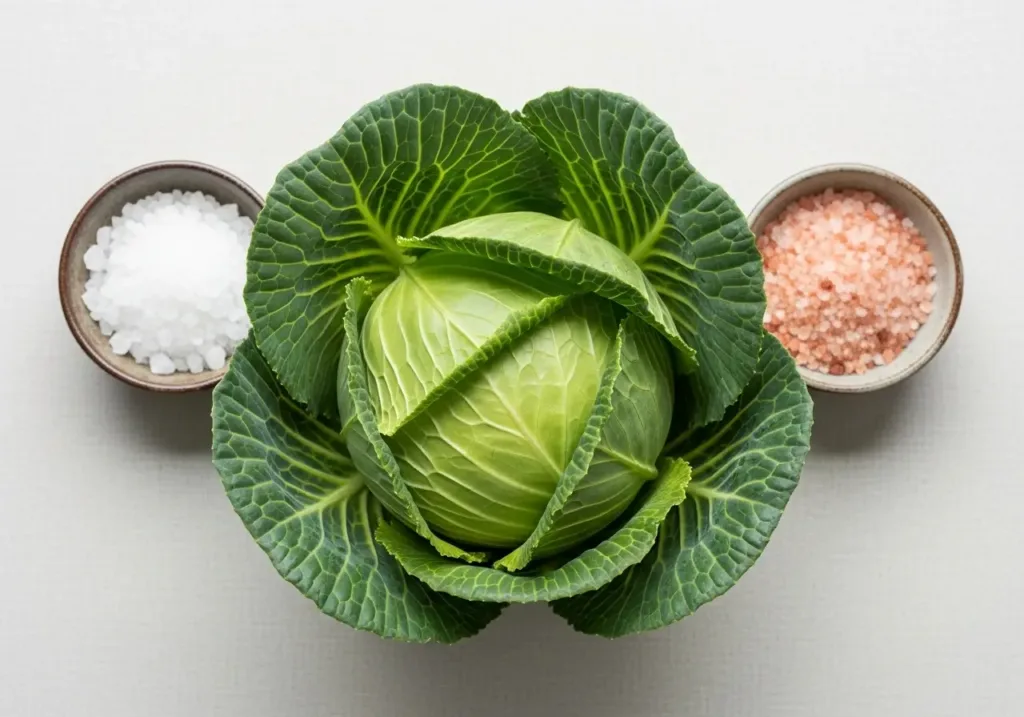
- 1 medium head green cabbage (about 2-2.5 lbs or 1-1.2 kg), outer leaves removed
- 1.5-2 tablespoons (25-30g) non-iodized sea salt or kosher salt. Precision is key here; use a kitchen scale for the most consistent results, aiming for a 2-3% salt concentration by weight to inhibit harmful bacteria and encourage beneficial microbes.
- Optional: 1 tsp caraway seeds or juniper berries for classic, aromatic flavor complexity.
Equipment:
- Large mixing bowl
- Sharp knife or mandoline
- 1-quart wide-mouth glass jar (sterilized). Glass is non-reactive and allows you to observe the magic of fermentation.
- Fermentation weight (glass or ceramic). Crucial for keeping your cabbage submerged.
- Airlock lid or standard lid (loosely fitted). An airlock allows CO2 to escape without letting oxygen in, while a loose lid serves the same purpose if checked daily.
- Kitchen scale (recommended for precise salt measurement). This is your secret weapon for consistent, safe batches, ensuring you have the best salt for sauerkraut ratios.
Instructions:
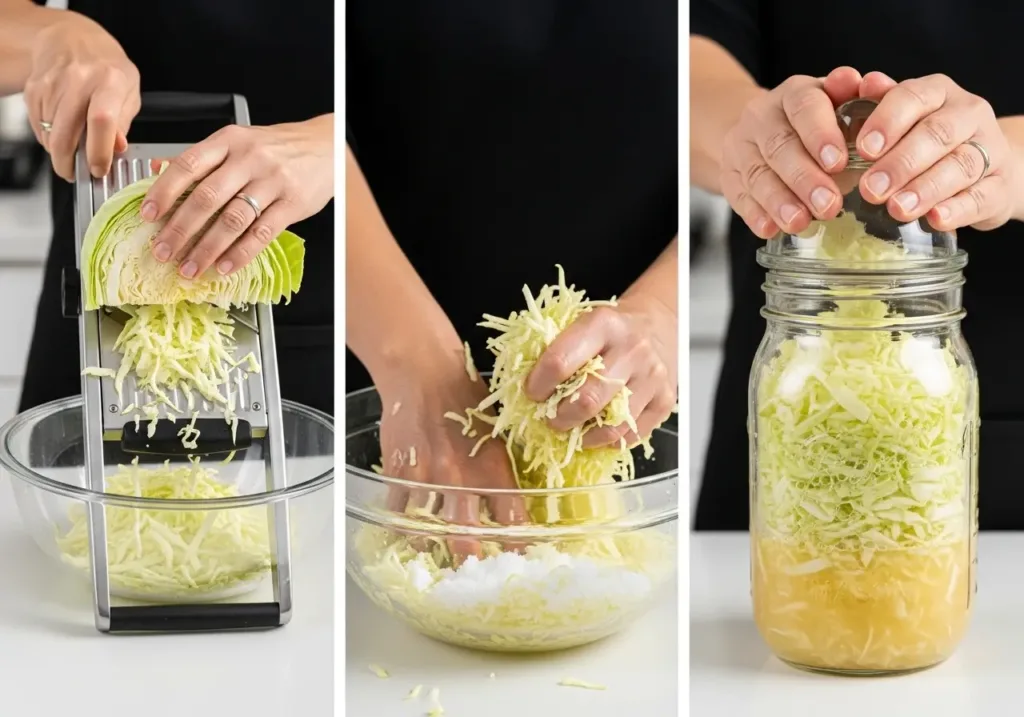
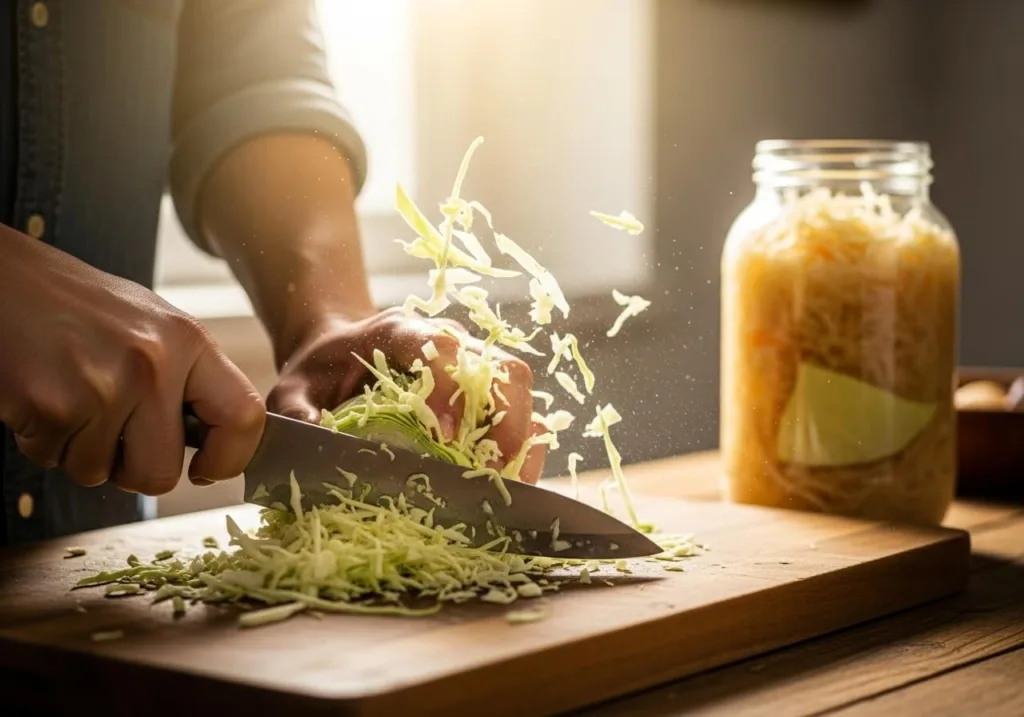
- Prepare Cabbage: Begin by removing any bruised or damaged outer leaves from the cabbage. Set one large, clean outer leaf aside—you’ll need it later. Cut the cabbage into quarters and carefully remove the tough core. Using a sharp knife or mandoline, finely shred the cabbage to about 1/8-inch thick. Uniform cuts ensure even cabbage fermentation.
- Salt the Cabbage: Place the shredded cabbage in your large mixing bowl. Sprinkle the measured non-iodized sea salt evenly over the cabbage. If you’re adding optional caraway seeds or juniper berries, mix them in now. The salt will begin to draw out moisture, forming the natural brine.
- Massage the Cabbage: Now for the fun part! With thoroughly clean hands, vigorously massage and squeeze the cabbage for 5-10 minutes. You’ll notice the cabbage softening and a significant amount of liquid accumulating at the bottom of the bowl. This physical action helps break down cell walls and encourages the formation of the vital brine needed for a successful lacto-fermentation.
- Pack the Jar: Transfer the massaged cabbage and all its glorious brine into your sterilized 1-quart jar. Pack it down very tightly with your fist or a blunt tool, pressing out any trapped air pockets. The goal is to get the cabbage fully submerged under its own liquid. This creates the essential anaerobic (oxygen-free) environment that beneficial bacteria thrive in and prevents spoilage.
- Submerge with Leaf & Weight: Take the reserved outer cabbage leaf and place it on top of the shredded cabbage, creating a protective barrier. Now, position your fermentation weight firmly on top of the leaf, ensuring that all shredded cabbage remains pressed well below the brine level. This critical step prevents exposure to oxygen, which could lead to mold. There should be at least 1 inch of headspace from the brine to the rim of the jar to accommodate bubbling.
- Seal & Ferment: Secure an airlock lid on your jar, or simply place a standard lid loosely on top (do not tighten it completely, as gases need to escape). Place the jar on a plate or in a shallow dish to catch any potential overflow. Position it in a cool, dark spot, ideally between 65-75°F (18-24°C). This temperature range is optimal for the beneficial bacteria to get to work. This is how to make sauerkraut at home with minimal fuss, even sauerkraut without a crock. Pro-Tip: Temperature Matters!Fermentation time varies significantly with temperature. In warmer environments (70-75°F), your sauerkraut will ferment faster and develop tang sooner. In cooler conditions (60-65°F), the process will be slower, resulting in a more complex, nuanced flavor profile. Adjust your fermentation time based on your ambient temperature and taste preferences.
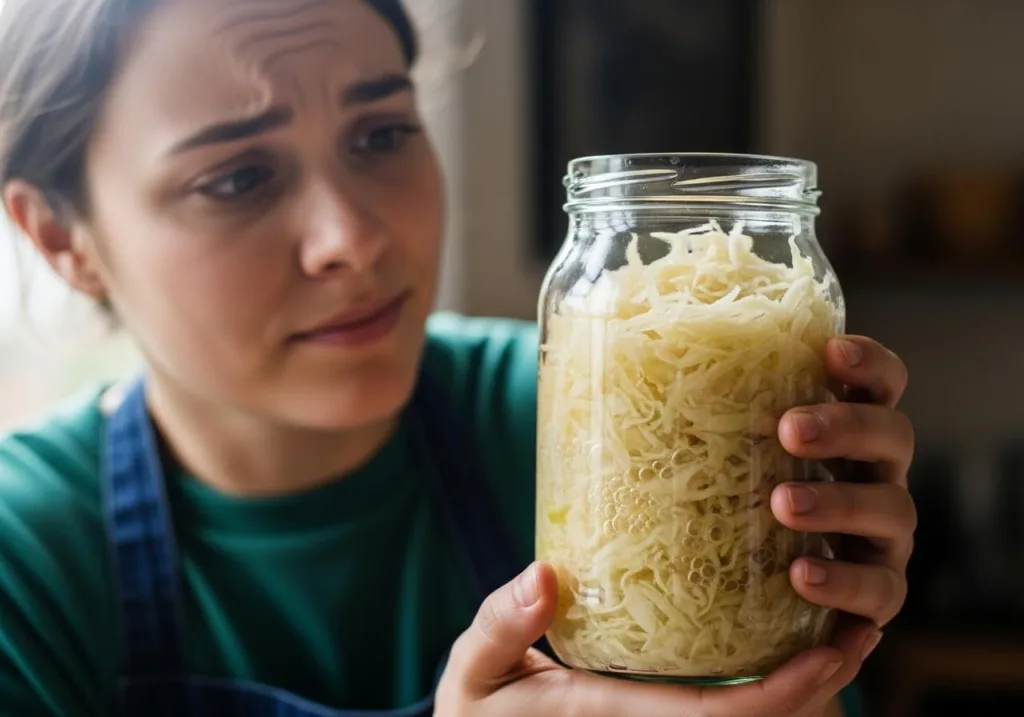
- Monitor & Taste: Check your ferment daily to ensure the cabbage remains submerged beneath the brine. You should start to see bubbling activity within 2-5 days, a sign that your beneficial bacteria are actively producing CO2 and lactic acid! After 7 days, begin tasting your homemade sauerkraut. It should be pleasantly tangy and crisp. When it reaches your desired level of tanginess and crunch (typically 7-21 days), it’s ready. The longer it ferments, the more complex and sour the flavor, and the more pronounced the sauerkraut benefits from the live cultures.
- Refrigerate: Once your sauerkraut recipe has achieved its perfect balance of flavor and texture, remove the weight and the outer leaf. Seal the jar tightly with a standard lid and transfer it to the refrigerator. The cool temperature dramatically slows down the fermentation process, allowing you to enjoy your delicious fermented cabbage for weeks, even months!
Ingredient Spotlight: Choosing the Best Cabbage and Salt
For a truly exceptional homemade sauerkraut, your journey begins with the star ingredient: cabbage. We recommend opting for fresh, firm heads of green or white cabbage. The crisper and more vibrant the cabbage, the more satisfying your final fermented cabbage will be. Organic cabbage is often preferred, not just for reduced pesticide exposure, but because it tends to harbor a richer community of beneficial bacteria on its leaves – the very microbes crucial for successful lacto-fermentation. Choosing the right cabbage is the first simple step in mastering how to make sauerkraut at home, setting the stage for a delicious and nutrient-rich batch.
Next to cabbage, salt is the most vital ingredient in any sauerkraut recipe. It’s not just for flavor; salt plays a critical role in cabbage fermentation by drawing out moisture from the cabbage through osmosis (a natural process where water moves from an area of lower salt concentration to an area of higher salt concentration), creating the protective brine that stops spoilage organisms and allows beneficial bacteria to thrive. When selecting salt, always choose non-iodized sea salt, kosher salt, or Himalayan pink salt. Table salt, with its added iodine and anti-caking agents, can interfere with the delicate microbial balance and actually kill the beneficial bacteria essential for lacto-fermentation. This is why using the best salt for sauerkraut is non-negotiable for a safe and successful batch, ensuring you reap all the wonderful sauerkraut benefits.
While a classic sauerkraut recipe typically relies solely on the cabbage’s own moisture to create its brine, water quality is still a critical consideration. If you ever need to rinse your cabbage or top off your jar with extra brine (which is rare for a well-packed fermented cabbage), be acutely aware that chlorinated tap water can kill the very beneficial bacteria you’re cultivating. Always use filtered or dechlorinated water to protect your fermentation. Ensuring pure water helps maintain a healthy microbial environment, significantly reducing concerns like troubleshooting sauerkraut mold.
Once you’ve mastered the basic easy sauerkraut recipe for beginners, you can explore a world of flavor by incorporating optional additions. Classic choices like caraway seeds and juniper berries are traditional for a reason, lending a distinctive, earthy aroma to your homemade sauerkraut. A few smashed garlic cloves or a sprig of fresh dill can also transform your cabbage fermentation with bright, aromatic notes, adding another layer of complexity to your finished product. These thoughtful additions not only enhance flavor but can also contribute their own unique characteristics to the overall sauerkraut benefits.
Customization Options: Flavorful Sauerkraut Variations
Once you’ve mastered the foundational homemade sauerkraut technique, a world of flavor exploration awaits! The beauty of cabbage fermentation is its incredible versatility. While a classic plain sauerkraut recipe is wonderfully satisfying, adding a few simple ingredients can elevate your fermented cabbage to new culinary heights. Remember, the core principles of lacto-fermentation—proper salt concentration, submersion, and temperature—remain paramount for safety and success, no matter your chosen additions.
Classic Additions: A Taste of Tradition
For those seeking an authentic, traditional German flavor profile, these additions are your best friends:
- Caraway Seeds: These small, aromatic seeds are the quintessential partner to fermented cabbage. They offer a warm, slightly peppery, and anise-like flavor that perfectly complements the tangy crunch of sauerkraut. Add 1-2 tablespoons per quart jar during the packing stage. They also aid digestion, enhancing the already numerous sauerkraut benefits.
- Juniper Berries: Less common but equally traditional, juniper berries provide a distinctive piney, slightly citrusy aroma and a subtle bitter note. They pair beautifully with caraway seeds and are often found in recipes for hearty meat dishes served alongside sauerkraut. A teaspoon per quart is usually sufficient to impart their unique essence.
Herbal Twists: Aromatic Complexity
Herbs and alliums can infuse your homemade sauerkraut with fresh, vibrant notes, transforming its character.
- Fresh Dill: A bright, grassy, and slightly anise-flavored herb, dill is a natural fit for fermented cabbage. It lends a fresh, spring-like quality that is both familiar and invigorating. Chop a few sprigs and layer them in with your shredded cabbage, or add whole sprigs for visual appeal.
- Garlic Cloves: For a pungent, savory kick, whole or smashed garlic cloves are an excellent choice. Garlic not only adds incredible depth of flavor but also contains beneficial compounds. We recommend smashing the cloves gently to release their oils without mincing, which can sometimes lead to an overly strong garlic flavor. Add 2-3 cloves per quart jar.
- Bay Leaves: These aromatic leaves impart a subtle, almost floral, and slightly bitter note that rounds out the tanginess of the fermented cabbage. A single bay leaf per quart jar is usually enough to contribute its distinctive aroma without overpowering the other flavors.
Spicy Kick: Heat and Zest
If you appreciate a little warmth and zing in your ferments, these additions are sure to please.
- Red Pepper Flakes: For a straightforward spicy kick, red pepper flakes are an easy and effective addition. Start with ½ to 1 teaspoon per quart jar, depending on your heat preference, and adjust in future batches. The capsaicin (the natural compound that gives peppers their heat) in the peppers adds a pleasant warmth that stands up well to the sour notes of the sauerkraut.
- Thinly Sliced Fresh Ginger: Ginger offers a different kind of heat—pungent, zesty, and slightly sweet. It also brings its own array of digestive benefits, making this a doubly healthy choice. Peel and thinly slice a 1-inch piece of ginger and layer it throughout your cabbage. This variation is particularly refreshing and bright.
Fruity Notes: Sweetness and Dimension
A surprising, yet delightful, way to add complexity to your homemade sauerkraut is by incorporating a small amount of fruit. The natural sugars in the fruit will also contribute to the lacto-fermentation process.
- Grated Apple or Pear: A small amount (about ¼ cup per quart) of grated apple (like Granny Smith for extra tang) or pear can add a subtle sweetness and a nuanced, fruity dimension to your fermented cabbage. This creates a beautiful balance with the inherent sourness and can be a fantastic gateway for those new to the stronger flavors of traditional sauerkraut. Ensure the fruit is grated finely and mixed evenly with the cabbage.
Root Vegetable Fusion: Color and Nutrients
Extending your sauerkraut recipe beyond just cabbage allows for an infusion of color, texture, and additional nutrients. These additions integrate seamlessly into the cabbage fermentation process.
- Grated Carrots: Carrots add a lovely orange hue, a touch of sweetness, and additional crunch to your fermented cabbage. They also bring a wealth of vitamins and minerals, boosting the overall sauerkraut benefits. Grate about ½ cup per quart jar and mix thoroughly with the shredded cabbage before packing.
- Grated Beets: For a truly vibrant and earthy homemade sauerkraut, grated beets are an excellent choice. They will turn your entire batch a beautiful fuchsia color and impart a distinct, sweet earthiness. Be mindful that beets can be quite potent, so start with about ¼ cup grated beets per quart.
Experimentation is key to finding your perfect sauerkraut recipe. Don’t be afraid to combine a few of these options! Just remember to always use non-iodized salt and ensure all your vegetables remain submerged under the brine to prevent issues like troubleshooting sauerkraut mold. Whether you’re making an easy sauerkraut recipe for beginners or exploring advanced flavor combinations, the journey of how to make sauerkraut at home is one of continuous discovery and delicious rewards.

Serving & Storage: Enjoying Your Homemade Sauerkraut
Congratulations! You’ve successfully transformed humble cabbage into vibrant, probiotic-rich homemade sauerkraut. Once your fermented cabbage is perfectly tangy and crisp, it’s ready to elevate countless dishes.
Serving Suggestions: A Burst of Flavor and Sauerkraut Benefits
Embrace the versatility of your finished homemade sauerkraut! Its bright, tangy profile makes it an excellent addition to a wide array of meals.
- Cold & Crisp: Enjoy it straight from the jar, cold, as a refreshing side dish. Its zesty crunch is incredibly satisfying.
- Classic Pairings: Pile it high on your favorite sandwiches, hot dogs, or brats for that iconic tangy counterpoint.
- Salad & Bowl Booster: Incorporate it into fresh green salads or mix it into hearty grain bowls. The acidity and complexity it brings can transform a simple dish into something truly special.
- Savory Accompaniment: Serve alongside roasted meats, scrambled eggs, or even as a topping for baked potatoes.
Preserving the Power: Why to Avoid Heat
A crucial tip to remember for maximizing the sauerkraut benefits is to avoid heat. The live, beneficial bacteria that thrive during the lacto-fermentation process are sensitive to high temperatures. To ensure you’re getting all those wonderful probiotics, always add your fermented cabbage to dishes after cooking, just before serving. Think of it as a flavorful, living garnish – a testament to your successful cabbage fermentation journey. Whether you followed an easy sauerkraut recipe for beginners or tackled a more intricate one, this step is vital for retaining its gut-friendly properties.
Refrigeration: Your Homemade Sauerkraut‘s New Home
Once your cabbage fermentation has reached its peak flavor, it’s time to move your precious batch to cold storage. Transfer your finished homemade sauerkraut into clean glass jars, ensuring they are tightly sealed. Store these jars in the refrigerator. The cold temperature significantly slows down the fermentation process, but it doesn’t stop it entirely. Your sauerkraut recipe masterpiece will continue to slowly ferment, developing even more complex flavors over time, and can last for several months—often even longer! This careful preservation ensures you can enjoy the fruits of your labor from your how to make sauerkraut at home journey for weeks and months.
Taste Evolution: A Living Food
Don’t be surprised if the flavor profile of your fermented cabbage continues to evolve in the fridge. The beneficial microbes are still subtly active, meaning the sauerkraut will naturally become more sour and its flavors will deepen over time. This taste evolution is a testament to the living nature of your homemade sauerkraut, offering new nuances with each passing week. Remember, maintaining proper submersion during the initial fermentation, as discussed when preventing issues like troubleshooting sauerkraut mold, is what sets you up for long-term success. And of course, starting with the best salt for sauerkraut ensures a robust and safe ferment from day one, whether you made your sauerkraut without a crock or with traditional equipment. Enjoy the journey of flavor!

Troubleshooting Common Sauerkraut Problems
Even the most seasoned fermenters encounter hiccups, especially when crafting a beautiful batch of homemade sauerkraut. Don’t let these common issues deter you from enjoying the crisp, tangy rewards of fermented cabbage. We’re here to guide you through troubleshooting with an authoritative yet encouraging approach, ensuring your sauerkraut recipe journey is a success.
Mushy Sauerkraut
Discovering your fermented cabbage has turned soft rather than retaining its signature crunch can be disappointing.
- Root Causes: Mushy sauerkraut is often caused by too little salt, leading to an imbalance in microbial activity; a fermentation temperature that is too high, which can accelerate the process and favor undesirable bacteria; or simply over-fermentation.
- Safety & Solutions: If there’s no visible mold or putrid odors (we’ll cover those next!), your mushy sauerkraut is generally still safe to eat, though the texture is compromised. Consider repurposing it into cooked dishes like stews or soups. To prevent this in future batches, ensure you’re using the correct salt ratio (typically 2-3% of the cabbage weight), maintain an optimal fermentation temperature between 65-75°F (18-24°C), and begin tasting your homemade sauerkraut daily after about day 7 to catch it at its peak crispness and tang. Using a best salt for sauerkraut like non-iodized sea salt or kosher salt is also crucial.
No Bubbling Activity
You’ve set up your cabbage fermentation and days pass, but you see no signs of life. Don’t panic!
- Root Causes: A lack of bubbling activity doesn’t necessarily mean failure. It could be due to a cool environment, as colder temperatures slow down microbial metabolism (the life-sustaining chemical processes within microorganisms) significantly. Insufficient salt can also inhibit the initial stages of lacto-fermentation, or using chlorinated water can kill off the very beneficial bacteria you’re trying to cultivate.
- Solutions: First, exercise patience. Fermentation can take a few days to visibly kick off. If your kitchen is cool (below 60°F or 15°C), try moving your jar to a warmer spot within the optimal 65-75°F range. Double-check your salt ratio against your chosen easy sauerkraut recipe for beginners, ensuring you used enough non-iodized salt. If you used tap water, remember that chlorine kills beneficial microbes; always use filtered or dechlorinated water for your brine. Within a few more days, you should start seeing those satisfying bubbles.
Kahm Yeast vs. Mold: The Visual Guide
This is perhaps the most critical distinction in cabbage fermentation safety.
- Kahm Yeast: This is a harmless, thin, white, powdery, or sometimes wrinkled film that can form on the surface of your brine. It’s often mistaken for mold but typically lacks fuzziness. While aesthetically unappealing, it does not compromise the safety of your homemade sauerkraut. Simply skim it off carefully with a clean spoon, ensuring your vegetables remain submerged under the brine.
- Mold: Any fuzzy growth, regardless of color (green, black, pink, or even fuzzy white), is a definitive sign of spoilage. Mold indicates the presence of undesirable microorganisms. If you see mold, you must discard the entire batch of fermented cabbage. There’s no safe way to salvage it. Maintaining a proper fermentation weight to keep all vegetables submerged is your best defense against mold, especially when making sauerkraut without a crock. This vigilance is key in troubleshooting sauerkraut mold.
Off-Smells: Trust Your Nose
Your sense of smell is an invaluable tool in lacto-fermentation.
- Normal Aromas: During cabbage fermentation, it’s normal to detect a range of pungent, tangy, and even slightly ‘funky’ or ‘cheesy’ aromas. These are signs of healthy microbial activity and lactic acid production. Think of the complex, earthy scents of a good aged cheese or a vibrant pickle.
- Red Flag Odors: A strong, truly unpleasant, putrid, rotten egg, or sewage-like smell indicates spoilage. This is distinct from a healthy funky aroma. If your homemade sauerkraut emits such an odor, it’s a clear signal to discard the batch. Your nose knows best when it comes to safety!
Not Sour Enough
You’re eager for that classic sauerkraut recipe tang, but your batch tastes bland or merely salty.
- Root Causes: The most common reasons for insufficient sourness are simply not allowing enough fermentation time or a consistently cool environment that slows down the acid-producing bacteria.
- Solutions: The good news is this is usually an easy fix! Simply extend the fermentation period. If your fermentation space is on the cooler side, try moving your jar to a warmer spot within the optimal 65-75°F range. Begin to taste your fermented cabbage daily after day 7 (or even day 5 for an easy sauerkraut recipe for beginners). Your palate is your ultimate guide for when it’s achieved the perfect level of bright, tangy sourness you desire. The longer it ferments, the more complex and sour it will become, boosting those amazing sauerkraut benefits.
Remember, every batch is a learning experience. With these troubleshooting tips, you’re well-equipped to confidently tackle any challenges on your journey to how to make sauerkraut at home.

Video Guide: Making Sauerkraut from Scratch
Frequently Asked Questions About Sauerkraut
Embarking on your journey to create delicious homemade sauerkraut is an incredibly rewarding experience. As experts in lacto-fermentation, we’re here to answer your most common questions, ensuring your cabbage fermentation is safe, successful, and satisfying. This easy sauerkraut recipe for beginners guide will help demystify the process and build your confidence.
Q: What is the best salt to use for sauerkraut? A: When making any fermented vegetable, including your sauerkraut recipe, the type of salt you choose is critically important for safety and success. Always use non-iodized salt such as natural sea salt, kosher salt, or Himalayan pink salt. The science is clear: iodine and anti-caking agents found in regular table salt can inhibit the growth of the beneficial bacteria responsible for lacto-fermentation, potentially leading to spoilage or a failed batch. A high-quality, pure salt ensures your microbes thrive, creating that wonderfully tangy flavor. Using the best salt for sauerkraut is a foundational step for a vibrant ferment.
Q: How long does sauerkraut need to ferment? A: Typically, your fermented cabbage will need to ferment for 7-21 days. However, the ideal fermentation time is highly dependent on a few factors: your personal preference for tanginess, the ambient temperature of your fermenting space, and the size of your cabbage cuts. Warmer temperatures (optimal 65-75°F or 18-24°C) will speed up the process, while cooler temperatures will slow it down. We encourage you to start tasting your sauerkraut daily after day 7. Trust your palate—it’s your best tool! When it reaches a flavor and texture you love, it’s ready.
Q: How can I tell the difference between kahm yeast and mold? A: This is a crucial safety question for any homemade sauerkraut enthusiast. Kahm yeast is a thin, white, powdery, or sometimes wrinkled film that forms on the surface of the brine. It’s an aesthetic issue, not a safety concern, and is harmless. Simply skim it off the surface with a clean spoon. Mold, on the other hand, is fuzzy in texture and can appear in various colors, including green, black, pink, or even white. Any sign of fuzzy mold indicates spoilage – discard the entire batch immediately. Always keep your vegetables submerged under the brine to prevent mold growth. If you’re troubleshooting sauerkraut mold and are ever in doubt, it’s always safest to throw it out and start fresh.
Q: What essential equipment do I need to make sauerkraut? A: You don’t need a fancy crock to make excellent fermented cabbage at home; a simple setup works wonders! For your sauerkraut recipe, you’ll definitely need:
- A large mixing bowl for massaging the cabbage.
- A sharp knife or mandoline for uniform slicing.
- A wide-mouth glass jar (quart or half-gallon size is common) – non-reactive and easy to clean.
- Crucially, a fermentation weight (glass, ceramic, or a clean, food-grade stone) to keep the cabbage firmly submerged under the brine. This is vital for preventing mold and ensuring an anaerobic (oxygen-free) environment.
- A standard lid (loosely fitted) or an airlock system. While an airlock is helpful for releasing CO2 without letting oxygen in, a loosely fitted lid on your jar works perfectly for an easy sauerkraut recipe for beginners or if you’re making sauerkraut without a crock.
Q: What are the key safety signs to look for during fermentation? A: Knowing what to look for will build your confidence in your homemade sauerkraut.
- Normal, healthy signs: You should observe steady bubbling activity (CO2 production) within the first few days, a cloudy brine, and a pleasant, pleasantly tangy or slightly sour aroma (like pickles or cheese). The vegetables may also change color slightly. These are all indicators of active and successful lacto-fermentation.
- Immediate red flags: Be vigilant for any fuzzy mold (as described above), putrid odors (like rotten eggs or sewage), or a slimy texture. These are clear signs of harmful bacterial contamination. Remember the golden rule: When in doubt, throw it out. Your safety is paramount.
Q: Can I add other vegetables or spices to my sauerkraut? A: Absolutely! This is where the fun and experimentation begin with your sauerkraut recipe. While a classic fermented cabbage is wonderful on its own, adding other ingredients can introduce exciting new flavors and additional sauerkraut benefits. Popular additions include thinly sliced carrots (for sweetness and color), beets (for an earthy flavor and vibrant hue), smashed garlic cloves, fresh dill, or caraway seeds (a traditional pairing). The most important rule to remember for any additions is that they, too, must remain submerged under the brine to prevent spoilage. Get curious and experiment with your next batch!
Q: Why isn’t my sauerkraut bubbling? A: It can be a bit concerning when you don’t see the expected activity in your fermented cabbage, but don’t worry, it’s often easily remedied. Lack of bubbling can be due to several factors:
- Cooler room temperature: Fermentation slows down significantly in cooler environments. Try moving your jar to a warmer spot (65-75°F or 18-24°C).
- Insufficient salt: While too much salt can inhibit fermentation, too little can also lead to issues. Ensure you’ve used the correct 2-3% salt concentration by weight.
- Chlorinated water: If you added water (e.g., for a brine) and it was chlorinated tap water, the chlorine can kill the beneficial bacteria. Always use filtered or dechlorinated water.
- Just being slow: Sometimes, your cabbage fermentation simply needs more time to get going, especially with very fresh or cold cabbage. Give it an extra day or two.
Patience is a virtue in fermentation! Ensure all your vegetables are properly submerged, and give your ferment a little more time in an optimal environment.
Conclusion: Your Sauerkraut Journey Awaits
Mastering homemade sauerkraut is a delicious and empowering step into the world of traditional food preservation. From understanding the science of lacto-fermentation and its incredible sauerkraut benefits, to confidently following an easy sauerkraut recipe for beginners, you’re now equipped to create your own batches of this tangy, probiotic-rich fermented cabbage.
Embrace the process, trust your senses, and don’t be afraid to experiment with flavors. Each batch is a learning experience, yielding a unique and rewarding culinary creation. So, gather your cabbage and salt, and start your cabbage fermentation journey today. Your gut—and your taste buds—will thank you!
Important Health & Safety Information
Medical Disclaimer: This content is for educational purposes only and is not intended as medical advice. Fermented foods may interact with medications or health conditions. Consult your healthcare provider before making significant dietary changes, especially if you have autoimmune conditions, are pregnant, nursing, or taking medications.
Food Safety Notice: Fermentation carries inherent risks if not performed correctly. Always follow proper sanitation procedures, monitor pH levels when specified, and trust your senses. When in doubt, discard your ferment. The publishers are not responsible for adverse effects from following these instructions.