Making your own milk kefir is easier than you think! This comprehensive guide walks you through every step, from acquiring your first kefir grains to troubleshooting common issues. Discover the joy of this tangy, probiotic powerhouse and enjoy its numerous health benefits from the comfort of your kitchen.
Table of Contents
Understanding Kefir Grains
- What are they? Kefir grains are not actual grains, but symbiotic cultures of bacteria and yeast (SCOBY). These gelatinous, cauliflower-like colonies ferment milk into a tangy, probiotic-rich beverage.
- Sourcing Kefir Grains: You can buy kefir grains online, from health food stores, or even get them from a friend. They’re available fresh or dehydrated. If buying dehydrated, follow the activation instructions provided.
- Milk Kefir vs. Water Kefir: While both offer probiotic benefits, milk kefir grains require lactose (milk sugar) to thrive, while water kefir grains ferment sugary water.
- Probiotic Powerhouse: Homemade milk kefir boasts billions of probiotics per cup, significantly more than most commercial probiotic supplements. These probiotics contribute to gut health and overall well-being.
Making Your First Batch of Milk Kefir
- The Right Milk: Use any milk with lactose, such as cow, goat, or sheep milk. Avoid ultra-pasteurized (UHT) milk as its high heat treatment can hinder fermentation. Raw, pasteurized, whole, or low-fat milk all work well.
- The Process: Place about 1 tablespoon (20g) of kefir grains in a clean glass jar. Add 4 cups (950ml) of milk, leaving about 2 inches (5cm) of headspace.
- Fermentation Time: Let the jar sit at room temperature for 12-30 hours. The fermentation time depends on the room temperature and your preference for tanginess.
- Controlling Effervescence: For a less fizzy kefir, loosely place the lid on the jar. For more fizz, tighten the lid. This controls the release of carbon dioxide produced during fermentation.
- Signs of Fermentation: The milk will thicken and separate into curds and whey. This is normal and a sign that the kefir is ready.
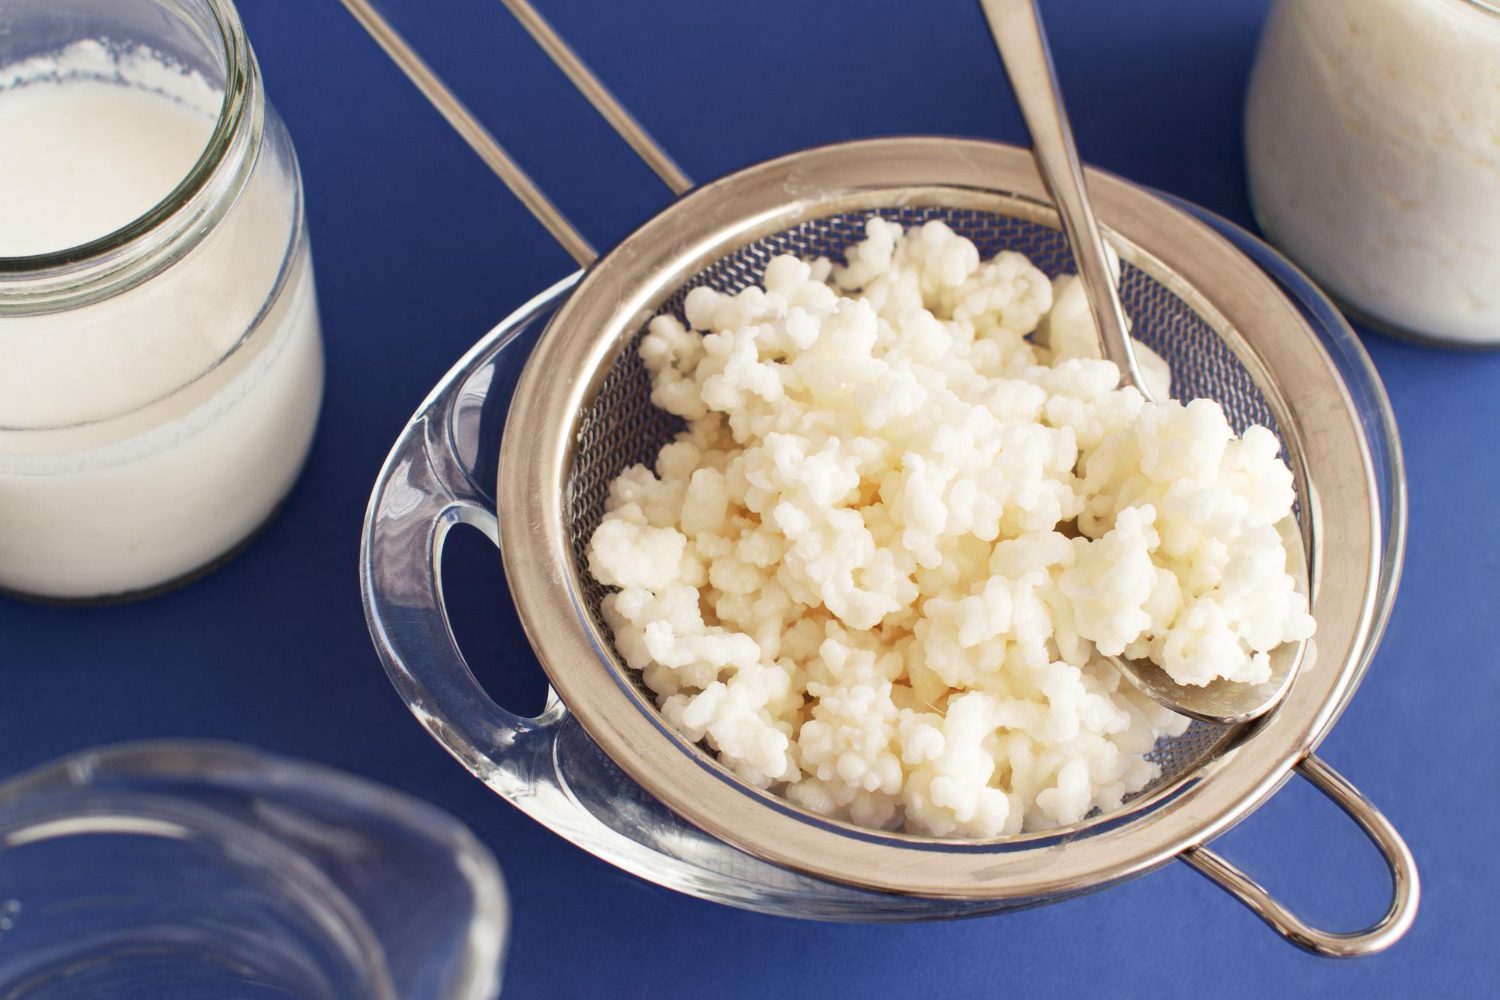
Straining and Storing Your Kefir
- Straining the Grains: Pour the kefir through a fine-mesh plastic or nylon strainer to separate the grains from the finished kefir. Gently push the curds through the strainer with a spoon or clean hands.
- Don’t Rinse the Grains: Rinsing removes the beneficial kefir, a protective polysaccharide matrix produced by the grains. This matrix also has prebiotic benefits.
- Starting the Next Batch: Place the strained grains back into a clean jar, add fresh milk, and repeat the fermentation process.
- Storing Your Kefir: Store the finished kefir in the refrigerator with a tight lid for up to 2-3 weeks. The cold temperature slows down further fermentation but doesn’t stop it completely.
Adjusting Fermentation Time and Troubleshooting
- Speeding Up Fermentation: Use warmer room temperatures, add less milk to your grains, or both.
- Slowing Down Fermentation: Use cooler temperatures, add more milk to your grains, or both.
- Grain Color: Healthy grains are whitish to light yellowish-cream. Discard grains if they turn pink, black, grey, or blue.
- Smell: A slightly yeasty or acidic smell is normal. A rotting or offensive odor indicates spoilage or contamination.
- Sticky Grains: Sticky grains are a sign of healthy kefir production. Don’t rinse them!
- Excess Grains: Share your kefir grains with friends, freeze or dry them for later use, or even eat them!
- Whey Separation: Some whey separation is normal. Excessive separation suggests over-fermentation. Adjust fermentation time to your preference.
Enjoying and Using Your Milk Kefir
- Drinking Kefir: Enjoy kefir plain or add it to smoothies, oatmeal, or use it in baking.
- Lactose Intolerance: The fermentation process reduces lactose, making kefir easier to digest for many lactose-intolerant individuals.
- Cassein Sensitivity: Similar to lactose, kefir fermentation breaks down casein, making it potentially suitable for people with casein sensitivities.
- Experiment with Flavors: After straining, add fruits, honey, or other natural sweeteners to enhance the flavor of your kefir. You can even make kefir cheese!
Making milk kefir is a rewarding and cost-effective way to introduce beneficial probiotics into your diet. With a little practice, you’ll become a kefir-making pro in no time! Enjoy the journey and the delicious, healthy kefir it produces.
How to make milk kefir at home: A Simple Step-by-Step Guide
- What you’ll need:
- Live milk kefir grains (about 1 tablespoon to start)
- 2 cups of fresh milk (cow, goat, or sheep – avoid ultra-pasteurized)
- Clean glass jar
- Plastic strainer
- Non-metallic spoon or spatula
- Storage container for finished kefir
- Step 1: Preparing the Jar: Rinse the glass jar and other utensils thoroughly with hot water (no soap necessary). Soap residue can harm the kefir grains.
- Step 2: Adding the Ingredients: Place the milk kefir grains in the clean jar. Pour the milk over the grains. Leave about an inch of headspace at the top of the jar.
- Step 3: Covering and Fermenting: Cover the jar loosely with a lid, cheesecloth, or a coffee filter secured with a rubber band. This allows for airflow while preventing contaminants from entering. Place the jar in a room-temperature location, out of direct sunlight. The ideal temperature is between 68-75°F (20-24°C).
- Step 4: Checking for Fermentation: Let the kefir ferment for 12-24 hours. The time will depend on the temperature, the amount of grains, and your desired thickness and tartness. Check the kefir every few hours after 12. It’s ready when the milk has thickened slightly and has a tangy aroma. It might also look slightly separated.
- Step 5: Straining the Kefir: Place the plastic strainer over a clean storage container. Carefully pour the fermented kefir through the strainer, separating the kefir grains from the finished kefir. Use a non-metallic spoon or spatula to gently push the kefir through the strainer, avoiding crushing the grains.
- Step 6: Storing the Kefir and Grains: Transfer the strained kefir to your storage container and refrigerate. It will continue to ferment slowly in the refrigerator, becoming slightly more tart over time. Rinse the kefir grains with cool, filtered water and place them back in the jar with fresh milk to start the process again immediately. If you need a break from making kefir, store the grains in fresh milk in the refrigerator. Change the milk every few days.
Common Questions About How to make milk kefir at home
Q: What is milk kefir?
Milk kefir is a fermented milk drink, similar to a thin yogurt, that’s made with kefir grains. These grains contain a symbiotic culture of bacteria and yeasts that naturally ferment the milk, creating a tangy and slightly effervescent beverage.
Q: How do I make milk kefir at home?
Simply add milk kefir grains to milk (cow, goat, or sheep are common choices), cover, and let it sit at room temperature for 12-24 hours to naturally ferment. The kefir grains will thicken and slightly sour the milk, producing the finished kefir.
Q: Where can I get kefir grains?
You can often find kefir grains online, at health food stores, or even get them from someone who already makes kefir. Because the grains multiply naturally during fermentation, many people are happy to share.
Q: What kind of milk should I use for making kefir?
Most types of milk work, including cow, goat, sheep, or even coconut milk, though the taste and texture will vary. Avoid ultra-pasteurized milk as it can sometimes hinder the naturally occurring fermentation process.
Q: How do I store my kefir grains?
Kefir grains can be stored in fresh milk in the refrigerator for a week or two. For longer-term storage, dehydrate the grains or freeze them to preserve the culture naturally.