Discover the secrets of the SCOBY (Symbiotic Culture of Bacteria and Yeast) and learn how it transforms sweet tea into tangy, fizzy kombucha.
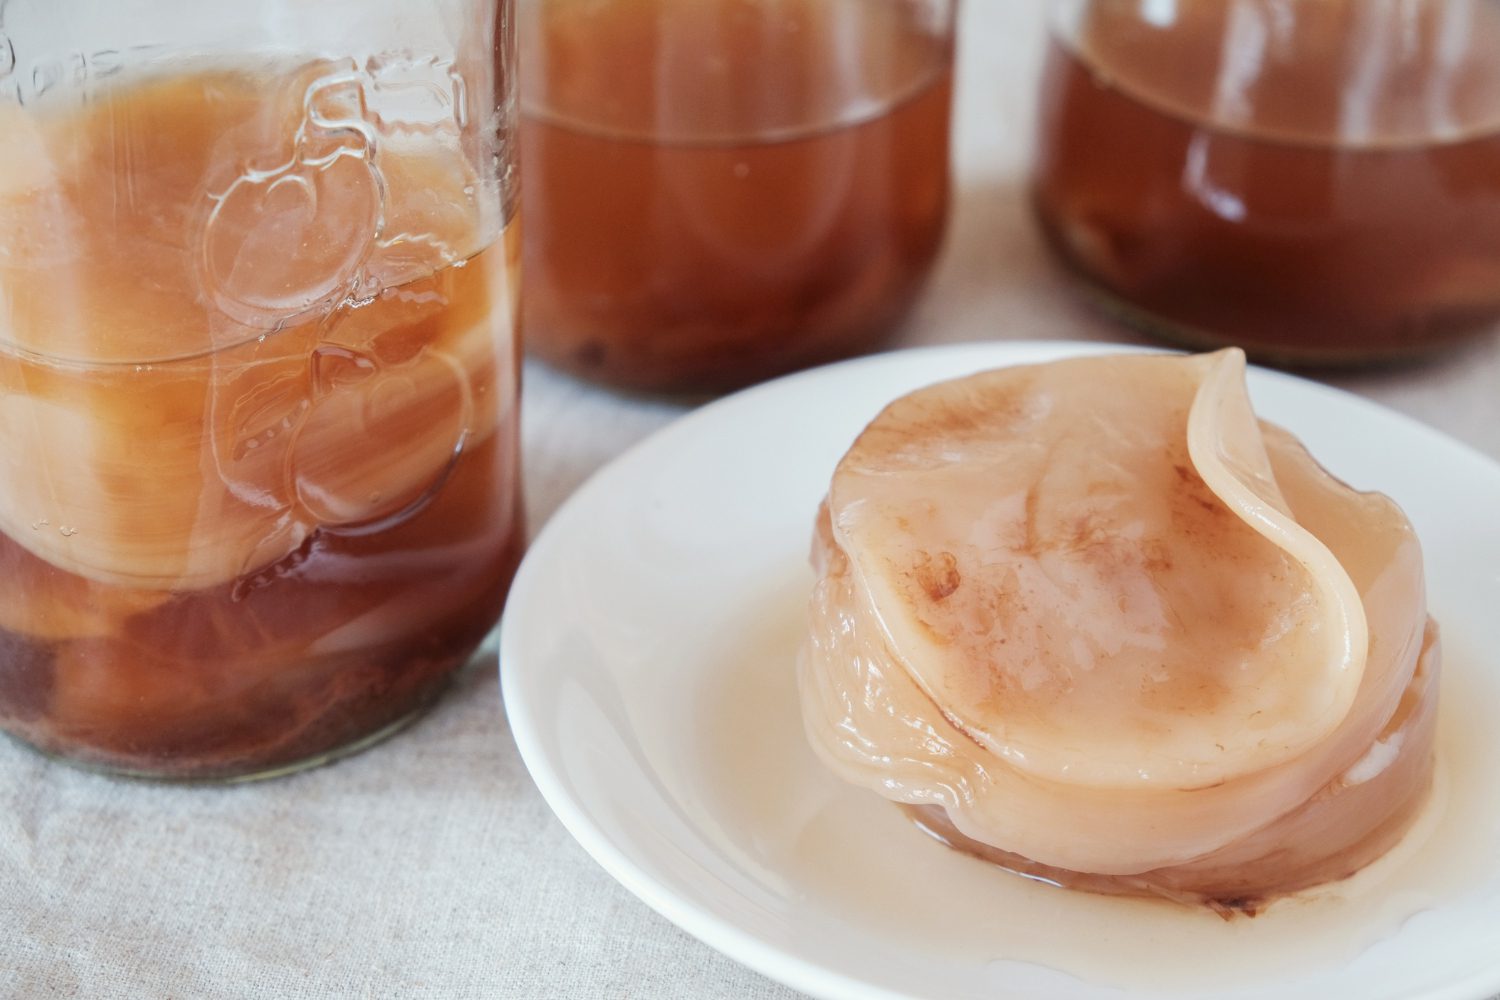
So, you’re ready to dive into the exciting world of homebrewed kombucha? Fantastic! One of the most intriguing aspects of this process is the SCOBY, that mysterious, pancake-like disc floating atop your brew. Don’t worry, it’s not as complicated as it seems! This guide will break down everything you need to know about the SCOBY, from what it is and how it works to tips for caring for it and troubleshooting common issues. Get ready to unlock the magic of kombucha brewing!
What is a SCOBY?
- SCOBY stands for Symbiotic Culture of Bacteria and Yeast.
- It’s a cellulose mat that houses the beneficial bacteria and yeast responsible for fermenting sweet tea into kombucha.
- Also known as the “mother,” “pellicle,” or even “mushroom” (though it’s not a fungus!), the SCOBY is a vital component of kombucha brewing.
- The SCOBY itself isn’t alive in the traditional sense; it’s more like a scaffolding or apartment complex where the active microbial community resides.
The SCOBY plays a crucial role in the fermentation process by providing a protected environment for the bacteria and yeast to thrive. It also acts as a barrier, preventing unwanted microbes from contaminating your brew. Without a healthy SCOBY, your kombucha won’t ferment properly.
How Does a SCOBY Work?
- The bacteria and yeast in the SCOBY consume the sugar in the sweet tea, converting it into acids, carbon dioxide, and other flavorful compounds.
- This process is what gives kombucha its signature tangy flavor and effervescence.
- Starter tea (previously fermented kombucha) is added to the sweet tea along with the SCOBY to kickstart the fermentation process and lower the pH, creating an environment hospitable to the SCOBY.
- As the kombucha ferments, a new layer of SCOBY often forms on the surface. This is a sign of a healthy brew!
Think of the SCOBY and starter tea as a team. The SCOBY provides the home, and the starter tea provides the initial boost of beneficial bacteria and yeast needed for fermentation. Together, they transform sweet tea into the delicious, probiotic-rich beverage we know and love.
Caring for Your SCOBY
- Store your SCOBY in a clean glass jar with some starter tea. This keeps the SCOBY healthy and ready for your next batch of kombucha.
- Keep the SCOBY at room temperature, away from direct sunlight. A dark pantry or cupboard is ideal.
- Avoid using metal utensils or containers with your SCOBY, as these can react negatively with the acids in the kombucha.
- If you notice mold on your SCOBY (fuzzy, colorful patches), discard it and start with a new one. Don’t take any risks with moldy SCOBYs.
Your SCOBY is a living culture, and it needs proper care to stay healthy and productive. By following these simple tips, you can ensure that your SCOBY thrives and continues to produce delicious kombucha for many batches to come. Remember, a happy SCOBY means happy kombucha!
Troubleshooting Common SCOBY Issues
- Brown spots or strings: These are usually yeast strands and perfectly normal. Don’t worry unless they’re fuzzy or colorful, indicating mold.
- Thin SCOBY: A thin SCOBY is usually fine. It will thicken over time with subsequent batches.
- SCOBY sinking: This isn’t necessarily a problem. It can happen for various reasons and usually doesn’t affect the fermentation process.
- No new SCOBY growth: Sometimes a new SCOBY doesn’t form. As long as your kombucha is fermenting properly, this isn’t a cause for concern.
Don’t be alarmed if you encounter some of these common SCOBY quirks. Most are perfectly normal and don’t indicate a problem. However, always err on the side of caution and discard your SCOBY if you see any signs of mold.
Brewing with Your SCOBY: A Quick Overview
- Brew sweet tea using high-quality black or green tea.
- Let the tea cool completely before adding your SCOBY and starter tea.
- Cover the brewing vessel with a breathable cloth secured with a rubber band.
- Allow the kombucha to ferment for 7-30 days, depending on your taste preference and room temperature.
- Taste-test regularly to monitor the fermentation process.
Brewing kombucha is a rewarding experience that allows you to create a delicious and healthy beverage in your own kitchen. With a little patience and practice, you’ll be brewing perfect kombucha in no time. Remember, your SCOBY is your partner in this process. Treat it well, and it will reward you with batch after batch of tangy, fizzy goodness.
Scoby: A Simple Step-by-Step Guide
- What is a Scoby?: A SCOBY (Symbiotic Culture Of Bacteria and Yeast) is a living home for the bacteria and yeast that ferment sweet tea into tangy, fizzy kombucha.
- Why Use a Scoby?: A Scoby is the easiest and most common way to start brewing kombucha. It provides the necessary microbes and creates an acidic environment that protects the brew from harmful bacteria.
- Where to Get a Scoby?: You can get a Scoby from a friend who brews kombucha, buy one online, or grow your own from a bottle of unflavored, unpasteurized kombucha.
- Step 1: Brew Sweet Tea: Start by brewing a strong batch of black or green tea. Use about 8 tea bags or 2 tablespoons of loose leaf tea per gallon of water. Once brewed, remove the tea and add 1 cup of sugar per gallon. Stir well until the sugar dissolves completely and allow to cool to room temperature. Hot tea will kill the Scoby.
- Step 2: Add Starter Tea: Pour the cooled sweet tea into a clean glass jar. Add 1-2 cups of starter tea from a previous batch of kombucha or a bottle of unflavored, unpasteurized kombucha. This starter tea lowers the pH and introduces the right microbes to the brew.
- Step 3: Introduce the Scoby: Gently place the Scoby in the jar, making sure it’s fully submerged or at least mostly covered by the sweet tea.
- Step 4: Cover the Jar: Cover the jar with a tightly woven cloth, like a coffee filter or cheesecloth, and secure it with a rubber band. This allows air to circulate while keeping out fruit flies and other contaminants.
- Step 5: Ferment: Place the jar in a dark, room-temperature location (ideally 70-80°F) and let it ferment for 7-30 days. The warmer the temperature, the faster the fermentation. Taste the kombucha periodically to check its progress. It will gradually become less sweet and more tart.
- Step 6: Remove the Scoby: Once the kombucha reaches your desired tartness, carefully remove the Scoby and about 1-2 cups of kombucha (this will be your starter tea for the next batch) and place them in a clean jar with a little bit of kombucha for storage.
- Step 7: Bottle and Flavor (Optional): Bottle the remaining kombucha and add any desired flavorings, such as fruit, juice, or herbs. Seal the bottles tightly and allow them to carbonate at room temperature for 1-3 days (this is called secondary fermentation).
- Step 8: Refrigerate: Once carbonated to your liking, refrigerate the kombucha to slow down fermentation and enjoy!
Common Questions About Scoby
Q: What is a SCOBY?
SCOBY stands for Symbiotic Culture Of Bacteria and Yeast. It’s a rubbery, pancake-like mass that naturally ferments sweetened tea into kombucha.
Q: How does a SCOBY work?
The SCOBY consumes the sugar in the tea and naturally produces healthy acids, giving kombucha its tangy flavor. It also creates a new layer of SCOBY on top.
Q: Does a SCOBY look weird?
While a SCOBY might look a little strange with its stringy bits, it’s perfectly natural! Variations in color and texture are normal, too.
Q: Where do I get a SCOBY?
You can buy a SCOBY online or at some health food stores. You can also naturally grow one from a bottle of unflavored, unpasteurized kombucha.
Q: Do I need a SCOBY to make kombucha?
While a SCOBY is the most common way, you can naturally brew kombucha using starter tea from a previous batch, which contains the necessary bacteria and yeast.